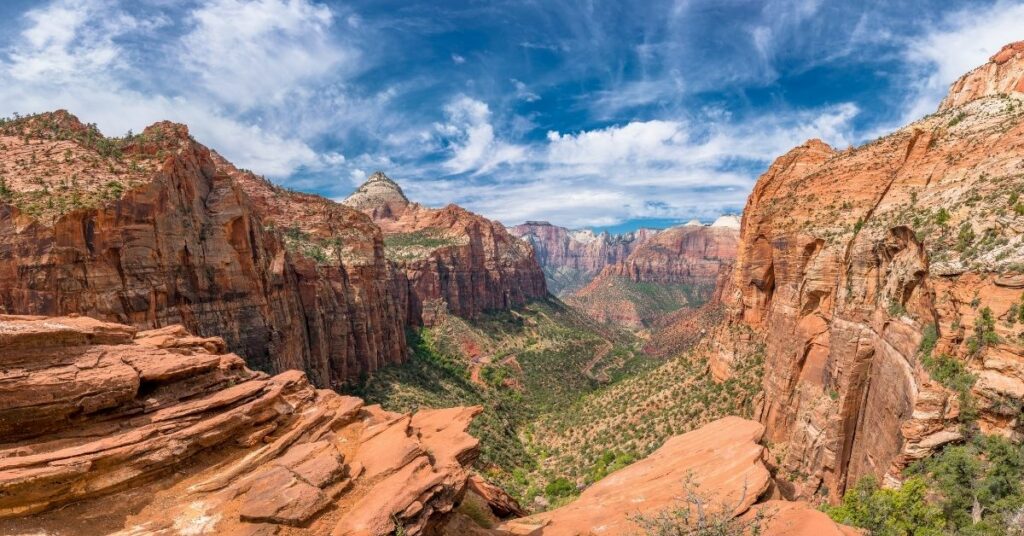
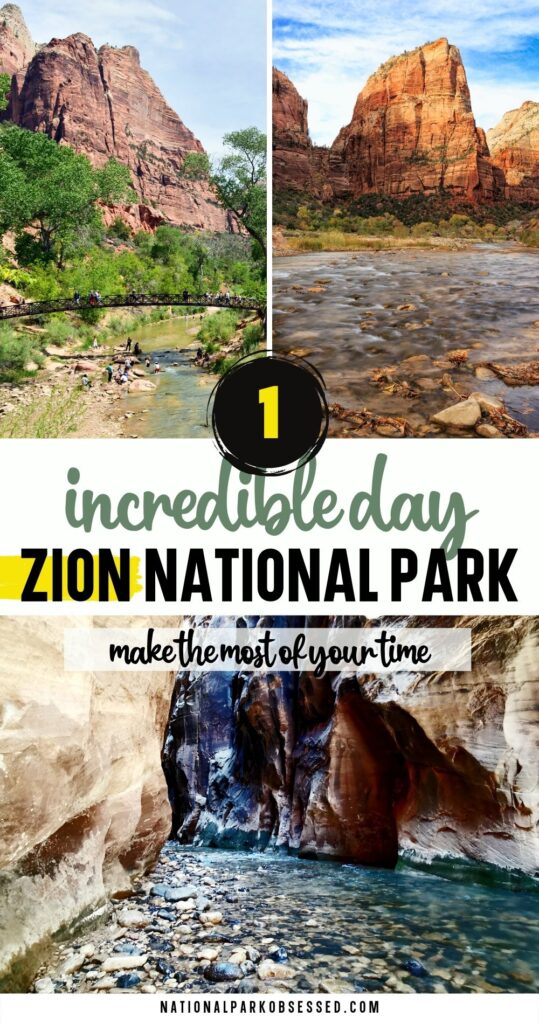
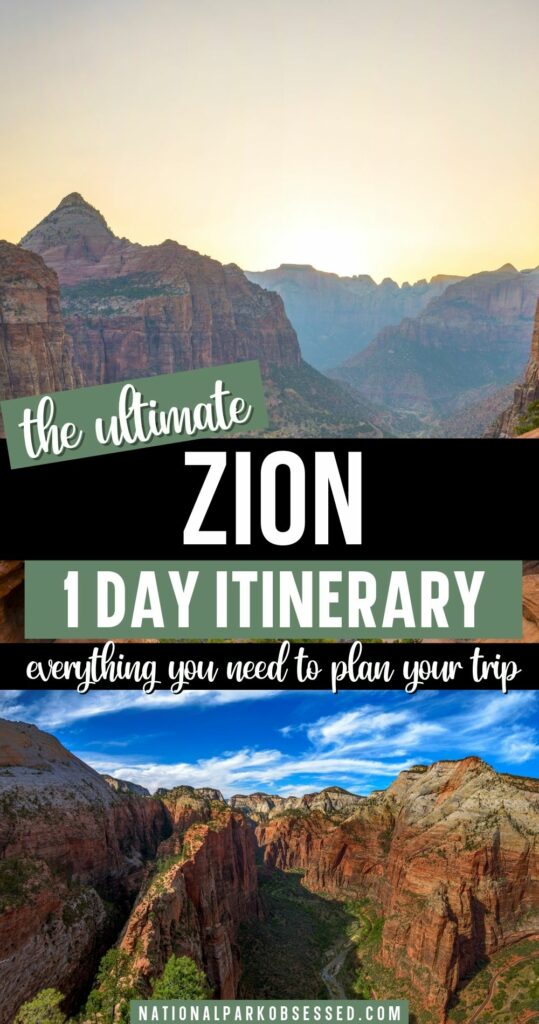
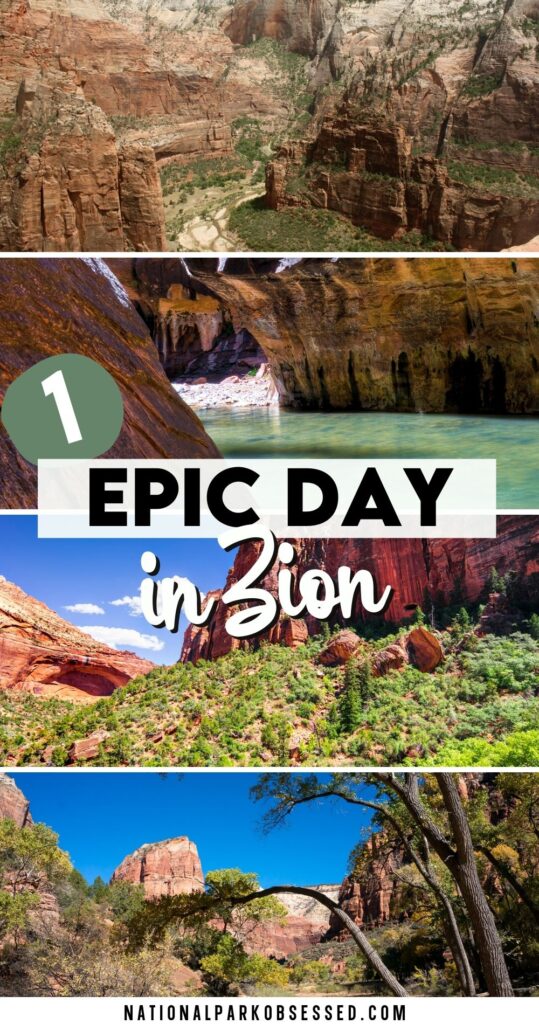
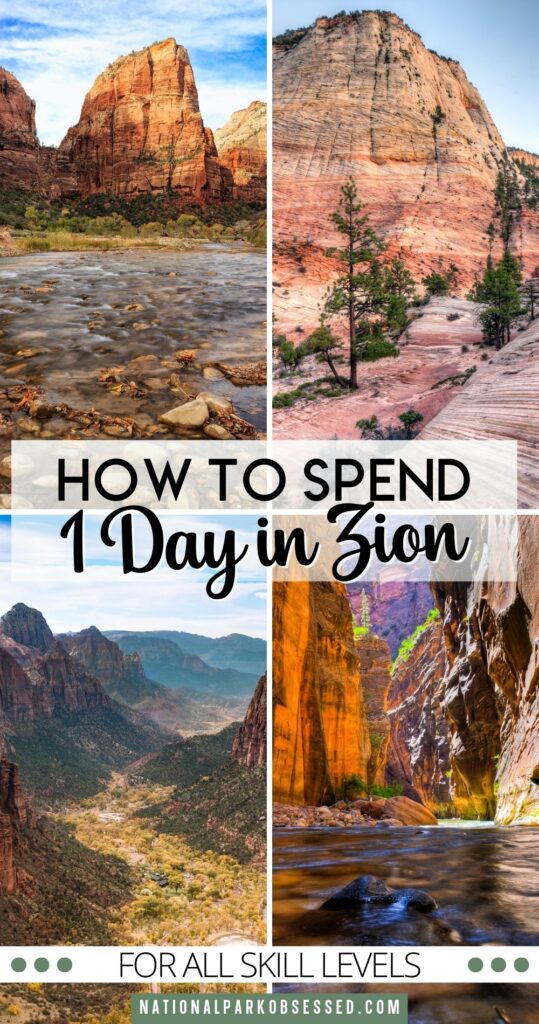
Post Summary: One Day in Zion National Park
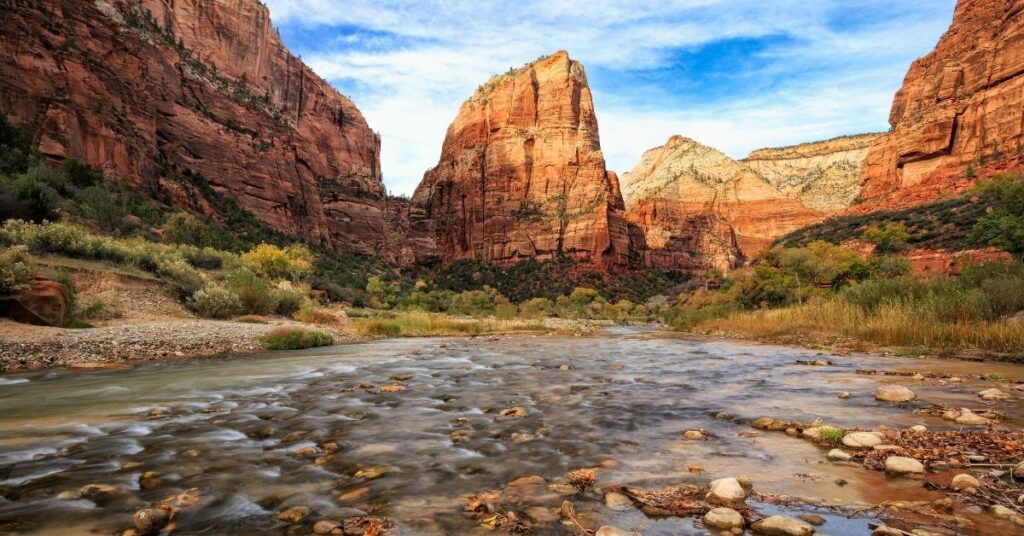
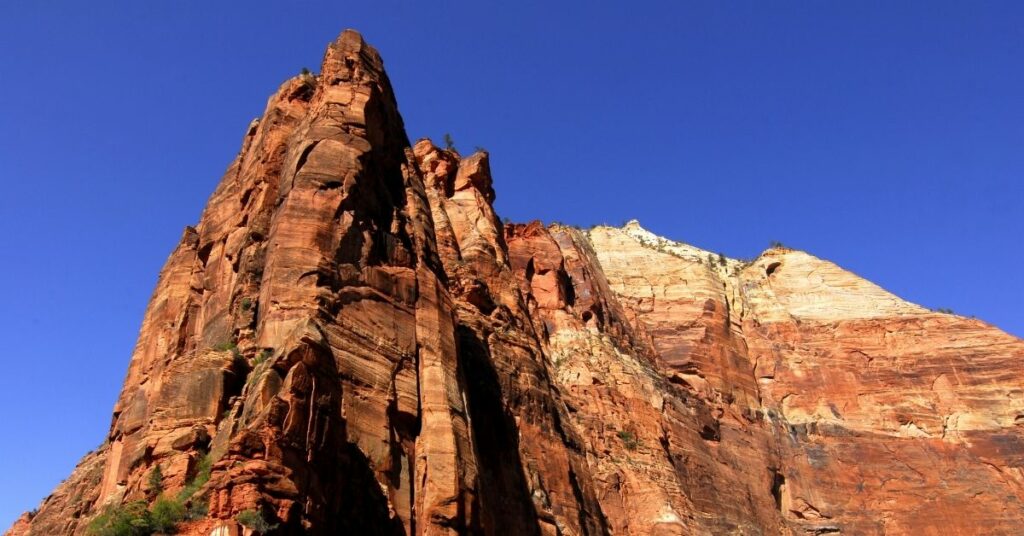
Nestled in southwest Utah is a stunning canyon National Park is known as Zion. With towering red cliffs and some of the most iconic hikes in the National Park, Zion National Park is a wonderland for hikers, climbers, and non-hikers alike. With so many spectacular things to do in Zion, it can be hard to decide what to do with your time in the park. Even more so when you have a limited amount of time.
We have had the chance to visit Zion several times and have learned a few tricks about maximizing adventure and how to make the most of your trip. This one-day itinerary to Zion National Parks is perfect for first-time visitors to Zion.
This post may contain affiliate links, meaning if you book or buy something through one of these links, I may earn a small commission at no extra cost to you! Read the full disclosure policy here
Planning your visit to Zion National Park
Getting to Zion National Park
The closest airport to Zion is the McCarran International Airport (LAS). McCarran Airport is located about 2.75 hours from Zion. The closest major airport is Salt Lake City International which is about 4.5 hours from the park.
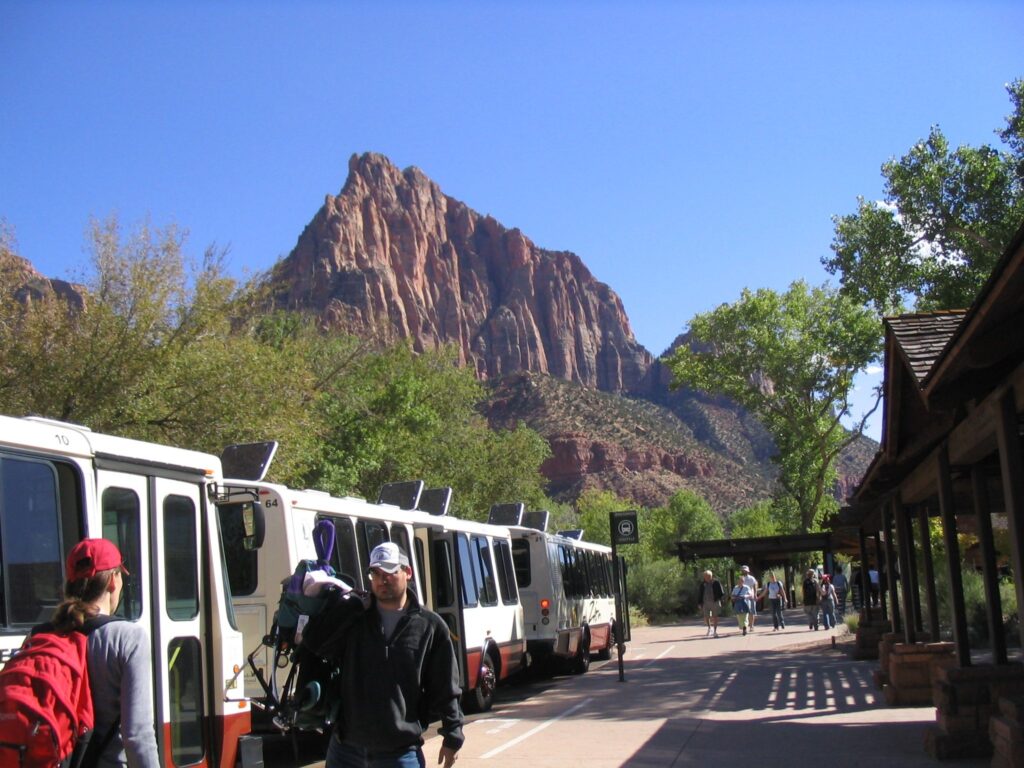
While there is no public transportation to Zion National Park, access to the Zion Canyon is limited to shuttle buses for much of the year..
Estimated Drive time to Zion National Park from major cities:
- Las Vegas, Nevada – 2.75 hours
- Flagstaff, Arizona – 4 hours
- Salt Lake City, Utah – 4.5 hours
- Phoenix, Arizona – 6 hours
Zion is a centrally located park. It is within driving distance of Salt Lake City, Las Vegas, and Phoenix. All three cities have an international airport and the concentration of national parks in the surrounding area makes it easy to visit multiple parks in one road trip.
Estimated Drive time to Zion National Park from nearby National Parks
- Bryce Canyon National Park – 1.25 hours
- Grand Canyon National Park
- North Rim – 2.25 hours
- South Rim – 5 hours
- Capitol Reef National Park – 3 hours
- Great Basin National Park – 3.5 hours
- Death Valley National Park – 4.25 hours
- Arches National Park – 4.75 hours
- Canyonlands National Park – 5 hours
- Petrified Forest National Park – 5.25 hours
- Joshua Tree National Park – 5.5 hours
- Mesa Verde National Park – 6 hours
- Black Canyon of the Gunnison National Park – 6.75 hours
- Saguaro National Park – 7.5 hours
Zion National Park Shuttle
Zion Canyon is a very narrow canyon with a very limited amount of parking. The shuttle typically operates from April to October, during holiday periods, and select weekends. When the shuttle is operating, personal vehicle access beyond Canyon Junction is limited to guests of Zion Lodge. The shuttle has nine stops beginning at the Visitor Center and ending at the Temple of Sinawava. Free to all park visitors, it was created to alleviate park congestion and reduce harmful pollution to the natural vegetation.
2021 COVID-19 Pandemic Update – Shuttle Tickets
Due to the COVID-19 Pandemic, visitors wishing to use the Zion Shuttle are required to have a timed shuttle ticket. These tickets are available at Recreation.gov. These tickets are released in two batches and have a $1.00 per ticket service fee.
Advanced Tickets
Advanced Tickets are released several weeks in advance. We are still awaiting an announcement on when they will be releasing the advanced tickets for the daily shuttle service starting on March 13, 2021.
Tickets for February 13, 14, 20, 21, 27, 28, and March 6, and 7, 2021 will be released on January 31 at 9:00 am MST (11:00 AM EST).
One Day in Advance Tickets
The one day in Advance Zion Shuttle Tickets are released at 9 am MST (11:00 AM EST) the day before said date.
Afternoon Walk-Up
Between 1 pm and 3 pm, there are a limited number of walk-up tickets available. These tickets does not guarantee shuttle boarding but if there is space on a shuttle these tickets allow you to fill that space.
Zion Shuttle Stops
Stop # 1: Visitor Center
Located just North of the park entrance at the Visitor Center, it is the starting point for visitors entering the park from Springdale. Trailheads for the Watchman and Pa’rus trails begin here.
Stop # 2: Zion Human History Museum
The previous Visitor Center has been converted into the Human History Museum. Visitors will be treated to views of the Altar of Sacrifice and additional parking options.
Stop # 3: Canyon Junction
This is the point at which Route 9 and Zion Canyon Scenic Drive intersect. There is access available to the Virgin River.
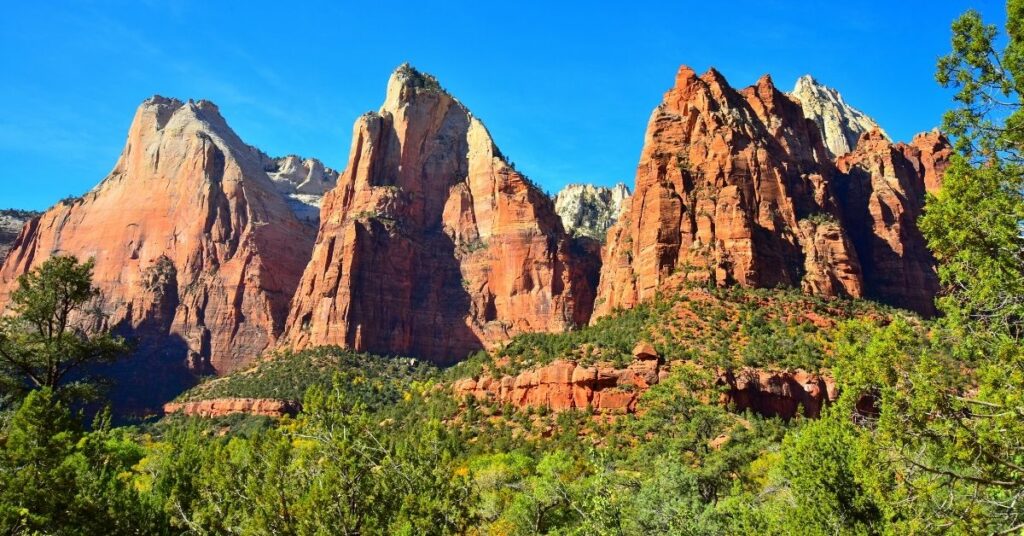
Stop # 4: Court of the Patriarchs
Views of the Court of Patriarchs are provided here.
Stop # 5: Zion Lodge
The hub of Zion National Park is where many visitors choose to hike the Emerald Pools Trail, dine in the park, and use restrooms before continuing further into the park.
Stop # 6: The Grotto
The Angels Landing and West Rim Trail hikes orignate from here.
Stop # 7: Weeping Rock
The trails to Weeping Rock, Observation Point, Hidden Canyon, Cable Mountain, and the East Rim Trail originate from here.
Stop # 8: Big Bend
Views of Angels Landing and Great White Throne are provided at this stop along with access to the river.
Stop # 9: Temple of Sinawava
The final stop on the shuttle system provides access to The Narrows and Riverside Walk. During the peak seasons, the return lines can experience lengthy waits.
Zion Shuttle Parking
The primary parking lot for Zion is located at the Visitor Center. Arriving early in the morning before 9:00 AM is highly suggested as parking spaces are generally gone before late-morning. An additional parking lot is located within the park at the Human History Museum, however space is limited. There is additional parking outside of the park in the community of Springdale for an additional fee that does not count towards your park entrance.
Best time of year to visit Zion National Park
The best time of the year to visit Zion National Park is during the Spring and Fall months. The temperate is still relatively comfortable between the low 60s to high 70s. The Summer season brings the highest number of visitors and weather that reaches over 100 degrees on most days. Cool clothing and a substantial amount of water is recommended for visitors. Winter season brings heavy snowfall and temperatures between the low 20s and low 50s.
How many days should you spend in Zion National Park?
The amount of time that you spend in Zion National Park is dependent on your itinerary. There is no right answer to it
If you’re short on time and only have one day in the Zion, it is recommended that you begin your day early in the morning utilizing the free park shuttle to enjoy the gorgeous canyon views from the Emerald Pools, Weeping Rock, and The Narrows. Multiple days are recommended for visitors who will be hiking the strenuous, but challenging trails of the park such as Angels Landing, Observation Point and The Narrows.
Where to stay in Zion National Park?
While there are several gateway towns near Zion, if you only have one day to spend in Zion it is best to plan to stay in Zion National Park or in Springdale.
Camping in Zion National Park
While Zion National Park has three campgrounds, if you are planning a one day trip to Zion; your best options for camping is South Campground or Watchman Campground. Both campgrounds take reservations and Watchman is open year-round. Click here to learn more about Camping in Zion National Park.
There are several camping options in and around Springdale. Check out Zion Canyon Campground and RV Resort and Zion River Resort RV Park and Campground.
Lodging in Zion National Park
- Zion Lodge – Zion Lodge is a historic lodge in the heart of Zion Canyon. Get a jump on the crowds by staying in the park. Rooms from $169/night: Book on Hotels.com
Lodging in Springdale, UT
Springdale is the closest town to Zion National Park. There are plenty of hotel options and there is a shuttle from Springdale to the viistor center so you can avoid hunting parking
- Flanigan’s Inn – A cute little inn about a half-mile from the park with a spa, restaurant, and bar. Rooms from $99/night: Book on Hotels.com or Booking.com
- Bumbleberry Inn – Bumbleberry Inn offers fresh bumbleberry pie and shuttle into Zion. Rooms from $80/night: Book on Hotels.com or Booking.com
- SpringHill Suites by Marriott – SpringHill Suites is a modern hotel with a view and a pool. Rooms from $129/night: Book on Hotels.com or Booking.com
Coolest Airbnbs near Zion National Park
Here are a few suggested Airbnbs near Zion National Park :
- Springdale Townhome – Springdale Townhome is a 2 bedroom rental with all the amenties of home that sleeps 6. Rooms from $112/night: Check availability on VRBO
- Historic Rose Cottage – Rose Cottage is charming historic cottage located on the main street. This rental sleeps 4. Rooms from $225/night: Check availability on VRBO
- Observation Point – Observation Point is a luxury rental that sleeps 8. Rooms from $112/night: Check availability on VRBO
If none of these strike your fancy check out these other amazing Zion Airbnbs.
What to Pack for One Day in Zion National Park?
- America the Beautiful National Parks Pass: Grand Canyon National Park costs $30 for a 7-day pass. If you intend to visit more than 3 National Park Services sites in a year, the America the Beautiful Pass will more than pay for itself. >> Get Your Pass HERE
- National Park Passport – The National Park Passport Book is the cheapest and best souvenir of your national park adventures. This book makes it easy to collect the National Park Cancellation stamp have the date of your visit and make it easy to track when you visited each national park service unit. >>> Buy your parks passport HERE
- Learn more about the National Park Passport Program
- Refillable Water Bottles – Do your part to reduce litter in our parks by bringing a refillable water bottle with you. A reusable and refillable water bottle can save you a lot of money and really help the environment. Here are my favorite water bottles
- Hydration Bladder – If you are hiking longer distances, a hydration bladder is the best way to hike with significant quantities of water. It is a rare hike when I don’t bring a full bladder with me.
- Snacks – There are limited services in the park. So pick up all your snacks before you go. Pack a couple of different options so you are prepared for any craving.
- Fruit: Pick hard fruits such as apples or pears. These hold-up in the heat and in packs without getting squished to mush. Another option is freeze-dried fruit. Freeze-dried strawberries are the BOMB. They are crunchy, sweet and the best part is they are lightweight and yummy. These are my new favorite trail snack.
- Vegetables: Cucumbers and carrots hold up well during hiking and in a hot car.
- Granola Bars: Take your favorite non-coated in chocolate granola bars. Anything coated in chocolate will melt and be a sticky mess. My favorite is a selection of Cliff Bars. They are great even when squished.
- Sunscreen – You don’t want to get burned on your visit.
- Lip balm – Your lips need just as much sun protection as your skin does.
- Sunglasses – Similar to sunscreen, you need a good pair of polarized sunglasses to protect your eyes from the glare of the sun.
- Hat – Hats are another sun protection device. A hat can keep the sun off your face and neck and help minimize the need for sunscreen while on the trail.
- First aid kit – As with any outdoor adventure, accidents happen. It is better to be prepared and have a compact first-aid kit ready to help with any accidents.
- Headlamp – Always keep a headlamp handy. You never know when you might want it. It can be used for midnight bathroom runs to sunrise/sunset hikes. A good headlamp makes it easy to operate in the dark.
- Shoes – Shoes are probably the most important piece of gear to any hiker. Hiking shoes should be seen as an investment. On the trail, your feet are your transportation and a solid pair of hiking shoes help support your feet and can prevent injury.
- Hiking Day Pack – A good day pack is the best way to transport all your gear when hiking. I highly recommend getting a backpack that is designed for outdoor use. These packs come with handy pockets and straps. My 40 L day pack has a pocket for my water bladder and a clip to hold the water line in place.
- National Park Obsessed Shirt – Share your love of the National Parks and support National Park Obsessed with a National Park Obsessed T-Shirt.
If you are new to visiting a the National Parks, check out our National Park Essentials Guide to get your started.
Zion National Park Art Print Poster
$26.00

Zion National Park Line Logo Mug
$21.00
Utah Mighty Five Shirt
$29.00
What to do When You Have One Day in Zion National Park?
This itinerary assumes that the shuttles are running and is designed to work with a morning shuttle into Zion Canyon. We suggest bringing a sack lunch with you into the park or planning on eating at the Zion Canyon Lodge. You will lose a lot of time if you try to head back to Springdale for lunch.
This one day in Zion itinerary includes hiking Angels Landing and part of The Narrows. If you are scared of heights and cliff edges but still want to get a canyon rim view, you can either hike Angels to Scouts Lookout and Observation Point**
Unfortunately, hiking both Angles Landing and the Narrows in one day means that you will be hiking one of these two trails at the busiest part of the day. At least as far as I have found, it’s a pick your poison. My recommendation is to start with Angels. The last 0.5 miles is along a very narrow cliff edge and requires using chains to climb out. After about 10 am, the chains are extremely crowded bordering unsafe.
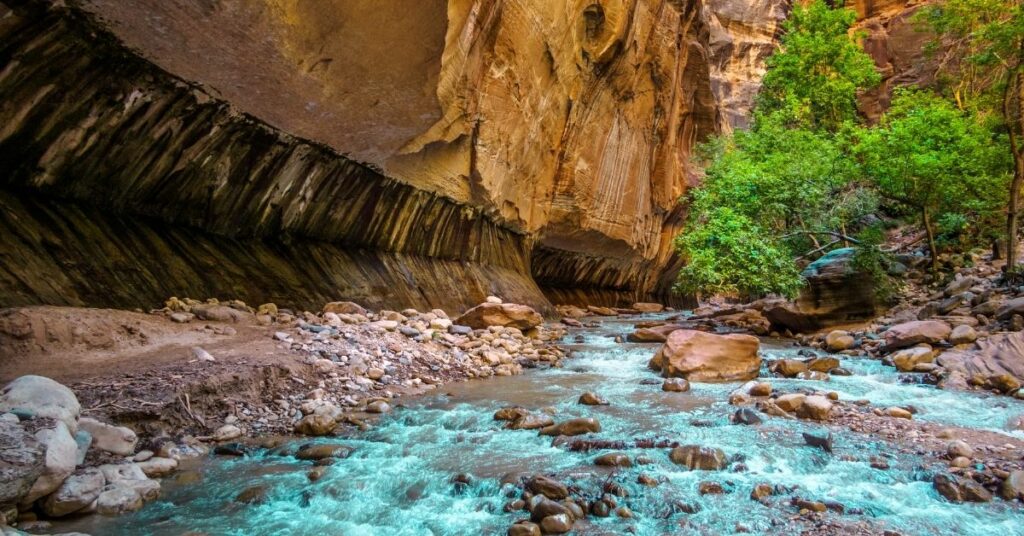
The Narrows hike is a river hike. You are hiking in the river. You WILL GET WET. Depending on the season and the flow rate the water level can range from ankle to chest deep on 5′ 5″ individuals. Water temperatures can range from 40 F to 65 F.
For this hike, you need to be prepared. I am 100% team trekking poles. I use them on just about every hike and this one is no exception. I used a pair of older poles that I didn’t mind getting waterlogged. Pick your footwear carefully. You want to protect your feet but at the same time, it needs not become waterlogged. I used a pair of Keen sandals but if you don’t want to buy a special pair of shoes, there are several places outside of Zion that rent shoes and gear. Depending on the time of year, you may want dry pants or waterproof bags. These are also available for rent outside the park. I suggest picking them up the day before so you can get an early start.
**Observation Point is currently inaccessible via the Weeping Rock trailhead in Zion Canyon. It can be reached via an overnight backpacking trip on the East Rim trail.
1 Day in Zion Itinerary
- Zion Visitor Center
- Angels Landing Hike
- The Narrows/Riverwalk Trail
- Big Bend
- Weeping Rock
- Emerald Pools
- Court of the Partiarch
How to Make the Most of One Day in Zion National Park?
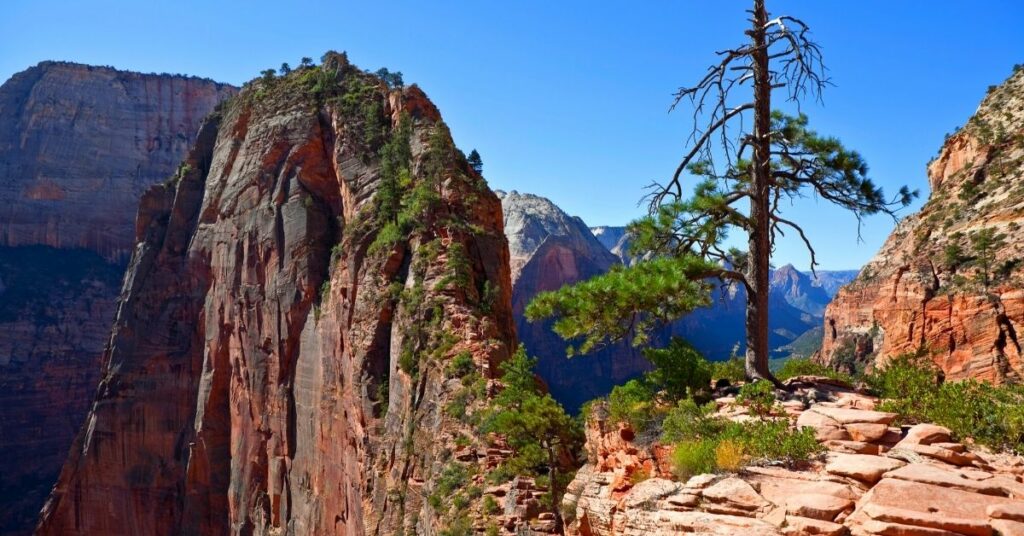
Hop on the shuttle and make your way to Stop #6 The Grotto and the Angels Landing Trailhead. Stop at the bathrooms before heading up the trail, but don’t dawdle you are trying to summit the landing and be off the chain section before the main crowds arrive. These bathrooms are way nicer than the ones at Scouts Landing. With that out of the way get ready for Walther’s Wiggles.
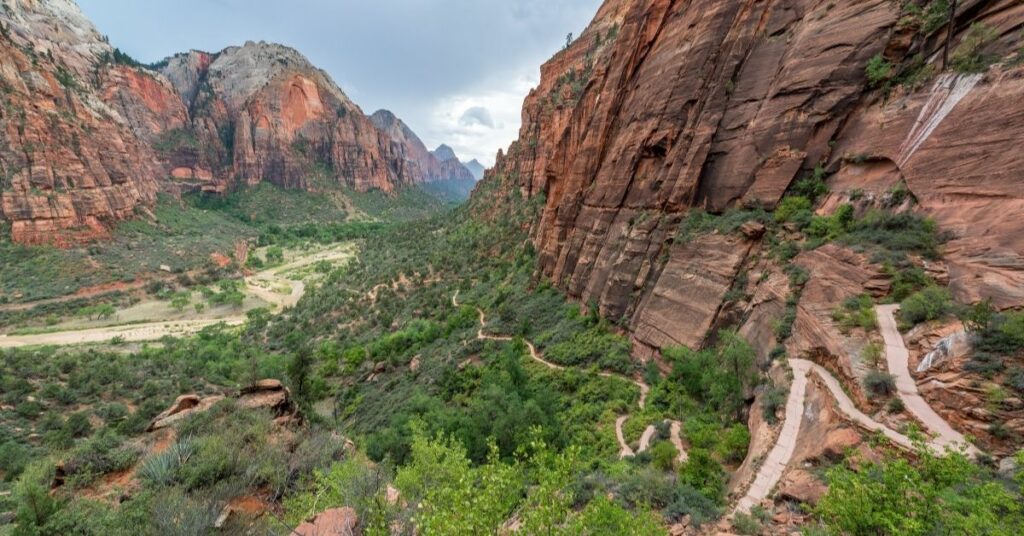
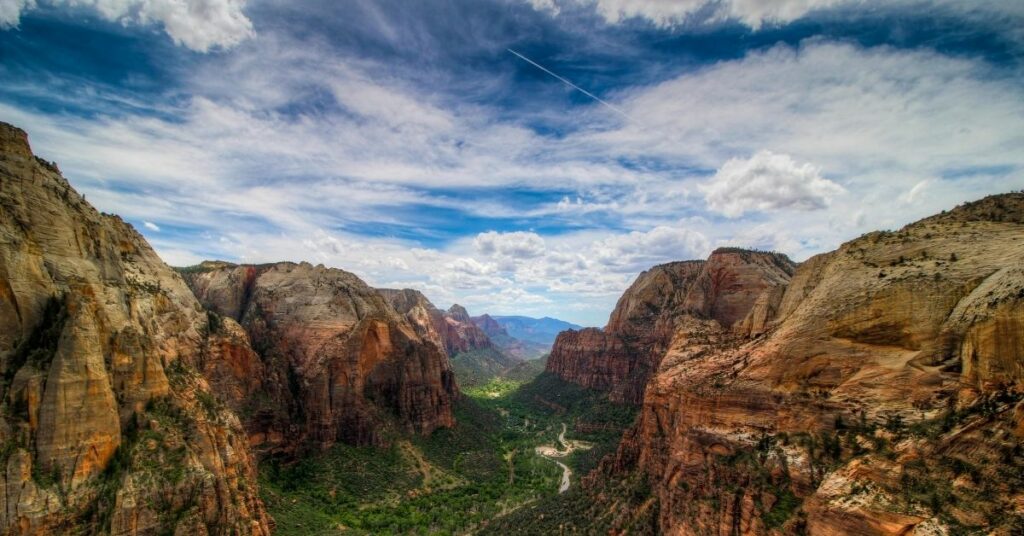
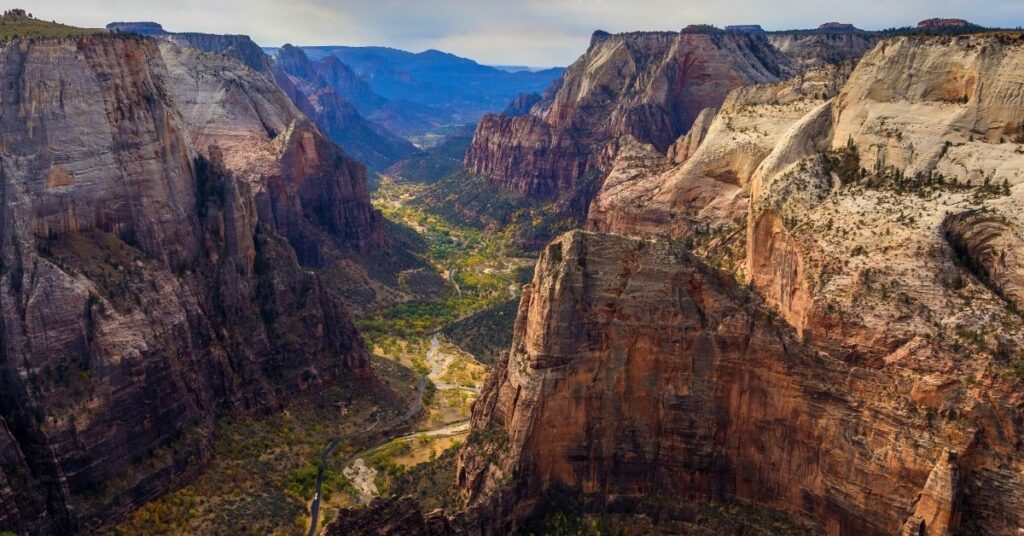
Angel’s Landing is a 5.4-mile hike with about 1,500 feet of elevation gain. This trail is one of the iconic national park hikes. National Park Obsessed’s founder Jennifer describes it as the scariest hike she has ever done but it’s totally worth it. Most of the hike is an easy uphill hike to a spot officially known as Scouts Lookout. Unofficially it’s called Chicken’s Coop because it’s the stopping point for those not wishing to tackle the chains. The chains section is a narrow cliff with 600 foot drops on either side. If heights aren’t your thing, then they aren’t your thing. If you don’t feel comfortable doing the chains section, please don’t risk it.
When you get back the Grotto, there is a nice picnic area. This is a great spot to have an early lunch or grab a shuttle back to Stop #5 and have lunch at the Zion Lodge.
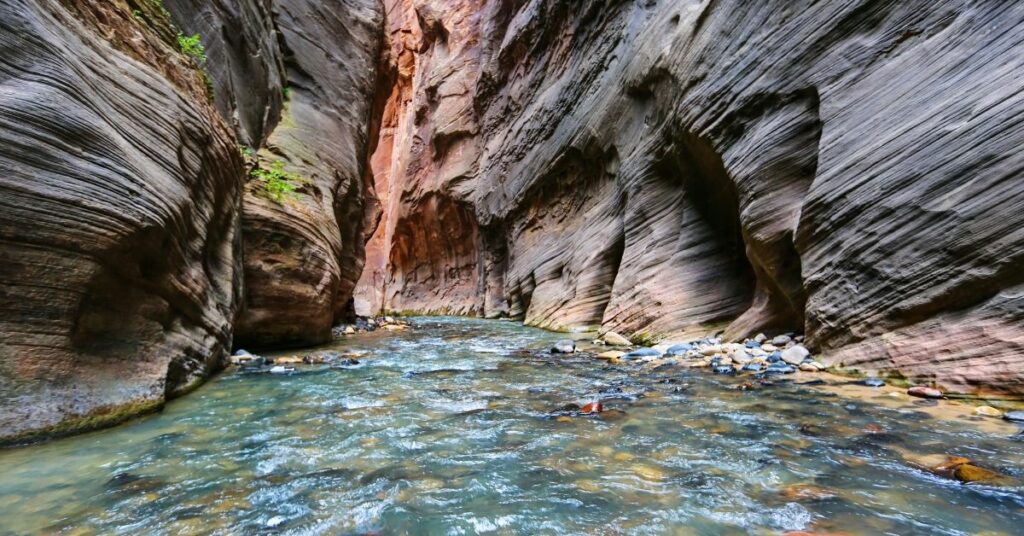
After lunch, take the shuttle up to Stop #9 Temple of Sinawava. This is the last shuttle stop in the canyon and the trailhead for the Riverside Walk/Narrows. There is a nice 1-mile paved path that follows the Virgin River up to a narrow point in Zion Canyon. After about a mile, the paved path ends at the river edge. Here it’s time to get wet.
With a Bottom-Up Narrows hike, you can hike any length of the canyon you want up to 10 miles round trip (5-8 hours). If you want a short hike, then make the 1 river mile round trip to Mystery Falls. If you want a little bit of a longer trip, its 4 river miles round trip (3-5 hours) to Orderville Canyon and Wall Street but it will likely be late afternoon/early evening by the time you are done and you may not have time to stop at other sights in the canyon.
If you aren’t headed to Orderville Canyon and Wall Street when you get done with the Narrows hop back on the shuttle and start the ride out of the canyon. I suggest getting off the bus at Stop #8 Big Bend and spending 15 mins enjoying the view while you wait for the next shuttle bus.
Stop #7 Weeping Rock is currently closed due to a rock slide but when that re-opens, stop here an enjoy a nice stroll to Weeping Rock.
If you are still up for some hiking, get off at Stop #5 Zion Lodge and make the 1.5 mile hike up to Lower Emerald Pools. This short trail is a nice walk and ends at a pretty little area with some very pretty pools of water. If you have time the Middle and Upper Emerald Pools are a little bit of a longer hike but they have waterfalls and some other nice views.

The last stop in the canyon is Stop #4 Court of the Patriarchs. This is another viewpoint that you can stop and enjoy. This is a nice sunset and stargazing spot if you are staying in Springdale. Double-check the last shuttle time before staying at this stop to watch the sunset here.
Amazing Zion Trails for Day Hike
Angels Landing
- Distance: 5.4 miles/4-hours
- Elevation Gain: 1,488 feet
- Difficulty: Strenuous
- Trail Guide: Long drop-offs, steep and narrow at the last section
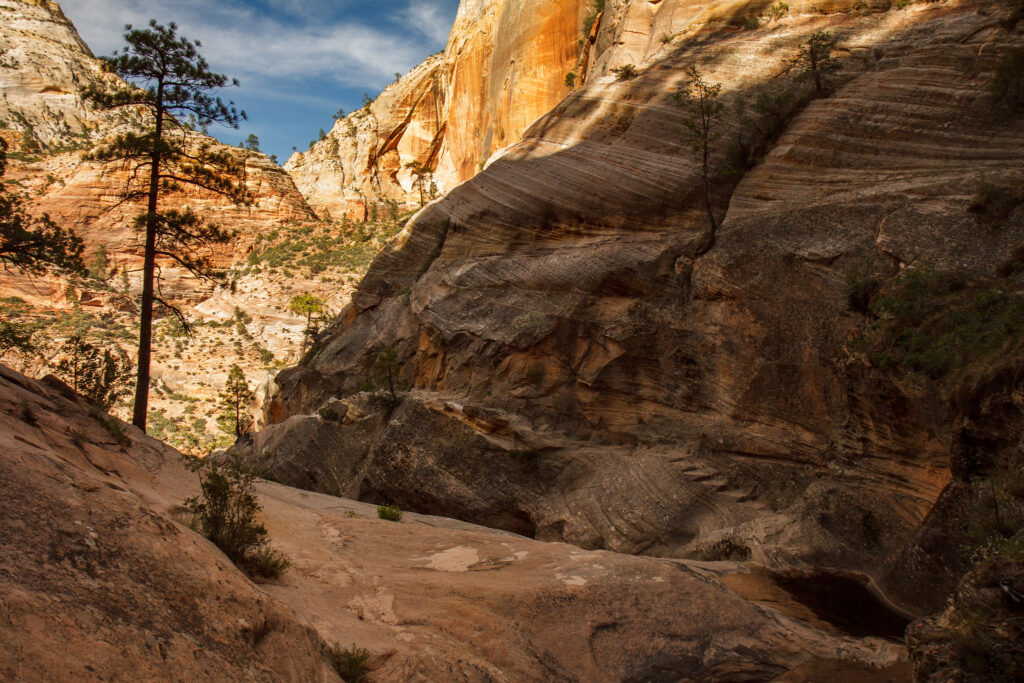
Angels Landing is the premier hike in Zion National Park. Known for the panoramic views of the canyon provided from the top, this internationally renowned hike begins from The Grotto trailhead feet from the Zion Canyon Shuttle Stop. The beginning of the trail follows the West Rim Trail that is relatively flat before ascending up steep switchbacks. The final 1/2 mile of the trail follows a steep ridge that contains steep drop-offs that require chains for secure handholds. Anyone with a fear of falling or heights is advised to use their best discretion when proceeding beyond Scouts Lookout.
The best time for hiking the trail is during the Spring, Summer and Fall seasons early in the morning before the crowds arrive and the temperature increases. It is suggested to avoid hiking the trail during the Winter months due to the heavy amount of snow and ice along the way. There are no water stations available along the route, please pack accordingly.
Observation Point
- Distance: 8-miles/6-hours
- Elevation Gain: 2,148 feet
- Difficulty: Strenuous
- Trail Guide: The trail begins at the Weeping Rock Trailhead (Shuttle Stop #7) ascending over 2,000 feet to the summit. The majority of the hike is uphill through Echo Canyon and it requires a great level of fitness to complete.
Observation Point is considered the pristine viewpoint in Zion. It provides views of nearly every major attraction within the park. The trail to Observation Point begins at the Weeping Rock Trailhead connecting hikers with Weeping Rock, Hidden Canyon, and finally Observation Point. The hike is strenuous, requiring great fitness to reach the top. Once at the top, hikers are treated to panoramic views including the canyon, Angels Landing, and the trail which they took below them.
** IMPORTANT: This Trail is currently closed due to a rock slide.
The Narrows / Riverwalk Trail
- Distance: 9.4 miles/8-hours (The Narrows); 2.2 miles/1.5 hours (Riverwalk Trail)
- Elevation Gain: 334 feet (The Narrows); 57 feet
- Difficulty: Strenuous (The Narrows); Easy (Riverwalk Trail)
- Trail Guide: The trail begins from the Temple of Sinawava at the last park shuttle stop. The Riverwalk Trail is paved following along the Virgin River until it reaches the beginning of The Narrows at the slot canyon entrance. The Narrows leads hikers through the canyon wading through the water in a bottom up hiking path.
The Narrows is the most popular and photographed hiking trail within the park. Hikers should pack a light coat, sufficient water, and wear closed-toe shoes or boots. Any items brought on the hike should be enclosed in a waterproof bag because you will get wet. The hike is an out-and-back trail that is described as harder on the return. It is necessary to check weather conditions in advance of hiking The Narrows especially during the Spring season as runoff can raise the water levels or create flash floods, resulting in a closure.
Hidden Canyon
- Distance: 2.4 miles/2.5-hours
- Elevation Gain: 850 feet
- Difficulty: Strenuous
- Trail Guide: Uphill trail featuring long drop-offs following along a cliff
Hidden Canyon is accessible from the East Rim Trail originating from the Weeping Rock Shuttle Stop. The trail splits at the 3/4 mile portion of the trail to the right. If you proceed left, you will be on your way to Observation Point. The trail is exposed along a canyon wall ledge with drop-offs to the valley. As you climb higher, there are chains positioned along the trail similar to Angels Landing.
** IMPORTANT: This Trail is currently closed due to a rock slide.
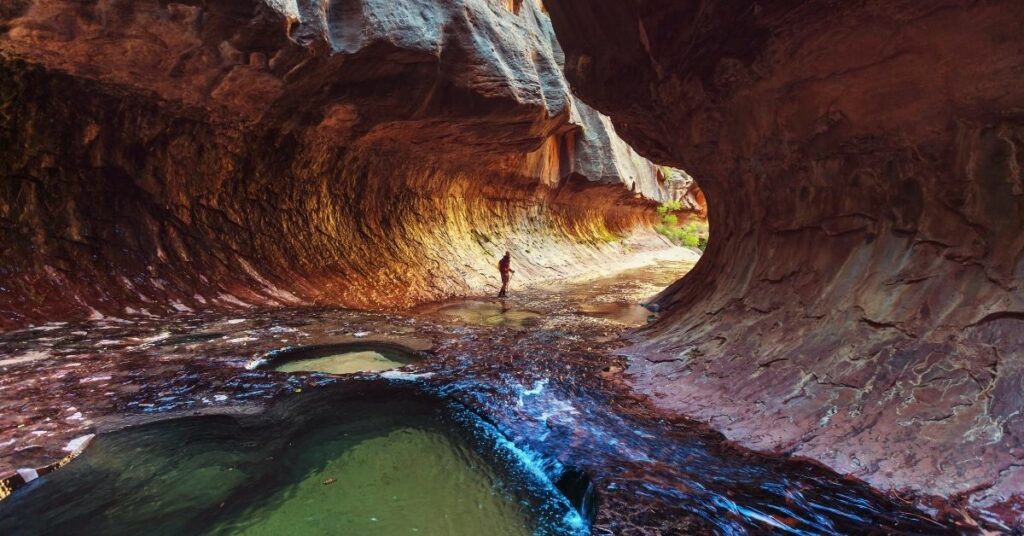
Subway Canyon
- Distance: 9.5 miles/7-hours
- Elevation Gain: 1,000 feet
- Difficulty: Strenuous
- Trail Guide: All-day hike recommended for experienced hikers involving canyoneering, rappelling, and proceeding from top-to-bottom.
A permit is required in order to hike The Subway that can be obtained from the Visitor Center. The Subway gets its name from the canyon above them which forms that of a subway tunnel-effect. As an all-day, technical hike, those up for the challenge are required to swim/wade through water, and climb down several rock formations with the assistance of built-in ropes. Hikers are recommended to begin from the Wildcat Trailhead, ending at the Left Fork Trailhead.
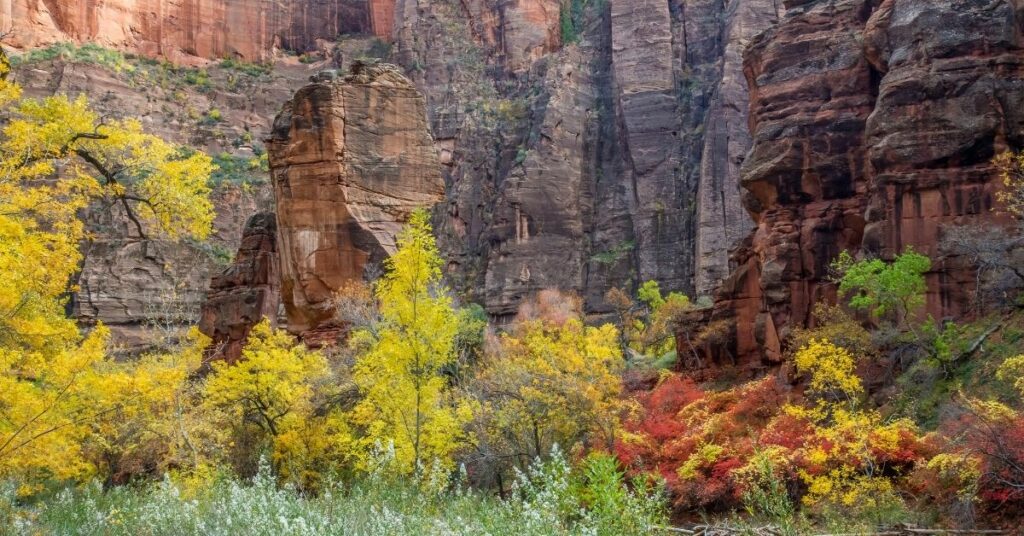
Emerald Pools
- Distance: 1.5 miles/45-minutes roundtrip (Lower Emerald Pool); 2-miles/1-hour roundtrip (Middle Emerald Pool); 3-miles/2-hours roundtrip (Upper Emerald Pool)
- Elevation Gain: 70-feet (Lower); 150-feet (Middle); 350-feet (Upper)
- Difficulty: Easy(Lower); Moderate (Middle); Strenuous (Upper)
- Trail Guide: The trail begins flat upon leaving the Zion Lodge area across the Virgin River bridge. Elevation gradually increases upon reaching the different pools when accessible. Area between the Lower and Middle Pools can be slippery when walking.
The Emerald Pools trailhead is located directly across from the Zion Lodge. The Lower Pool is a great, short hike for families and small children utilizing strollers. The Middle Pool is a great location for visitors to cool along the dual waterfalls above them off during the warmer months while looking into the canyon from several observation points. The Upper Pool is a strenuous trail that might not be accessible at all times depending on the condition of the trail and the power of the waterfalls.
Watchman Trail
- Distance: 2-miles/1-hour roundtrip
- Elevation Gain: 400-feet
- Difficulty: Moderate
- Trail Guide: A short round-trip, relatively flat trail that is located near the Visitor Center that looks into the park entrance at the Virgin River.
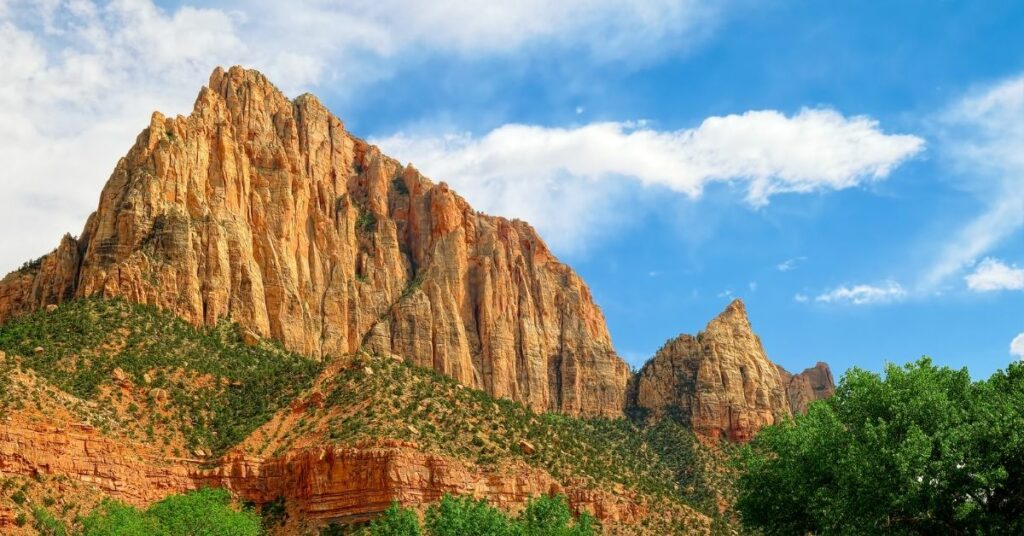
The Watchman Trail is a short hike that is suitable for all visitors as a good introduction to Zion National Park. The trailhead is located near the Visitor Center along Highway 9. While it is not an impressive or popular trail unlike the other trails within the park, it is an easy hike to complete early in the morning or during a cloudy day. The trail is directly in the sunlight and does not have any shade provided. The overlook is commonly associated with publicized images of the park from the Virgin River below and the Watchman in the distance.
Final Thoughts on Spending a one day trip in Zion National Park
I hope this One Day in Zion National Park Itinerary helps you plan your trip to Zion. Zion is an amazing National Park and is so worth a visit. If you need any help finding gear for your trip check out my guides below.
If you are looking for advice on other types of outdoor gear specific guides:
Here are some other National Park gear you might like:
- 29 Phenomenal National Park Gifts for Park Lovers
- 19+ Junior Ranger Gift Ideas
- Epic US National Park Wall Maps to help you keep track of your travels
Pin for Later: How to Make the Most of One Day in Zion National Park?

Hi, I'm Jennifer!
Welcome to the wonderful world of National Parks. I'm here to help you plan your NEXT amazing adventure through the United States National Parks and beyond. I want the national parks to be accessible to all.
I live in Tennessee, and when I'm home, you can find me hiking in the Smokies and the Cumberland Plateau.
58/63 National Parks
250+/423 National Park Units
Want to know more? Start Here.
Snag one of my National Park Ebooks and Downloadable Itineraries
Talk with an Expert
Share your love of the parks with a shirt, ornaments, hoodies, frames, and more.