
This post may contain affiliate links, meaning if you book or buy something through one of these links, I may earn a small commission at no extra cost to you! Read the full disclosure policy here
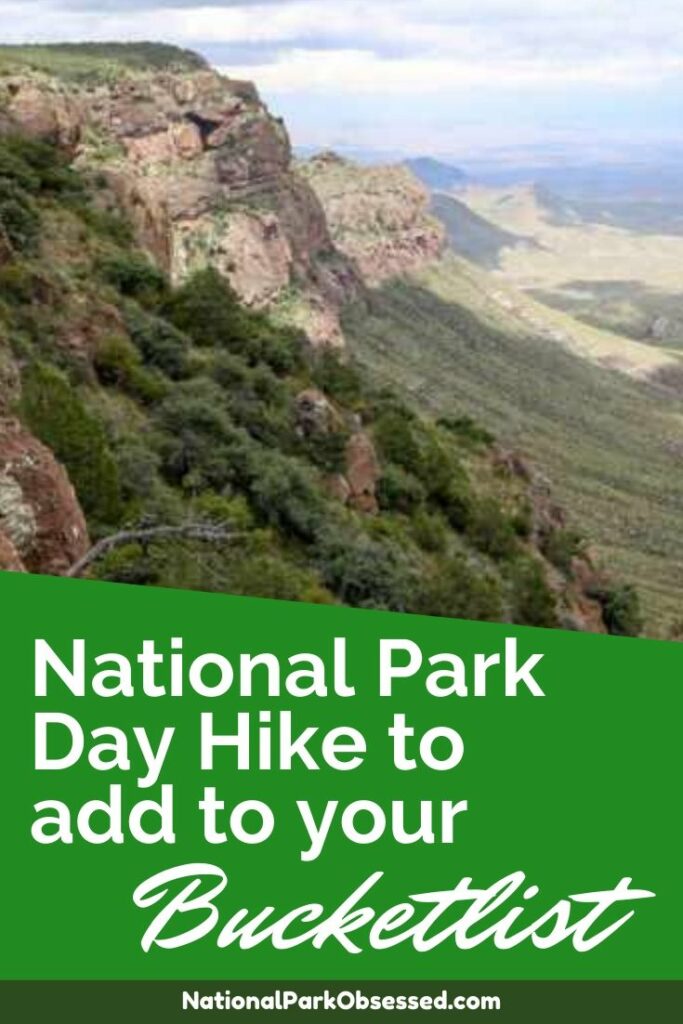
There is no shortage of hiking trails in the National Parks. There are more than 21,000 miles of hiking trail spread across 419 National Park Service Units. Some hikes are short boardwalks and others are long-distance hiking trails There is a park and trail for every hiking skill level. Not every hiker wants to head into the wilderness and spend the night. So I asked a few of my fellow travel bloggers and national park lovers to share their favorite National Park Day Hike to create a giant bucket list of days hikes for you to explore.
Each of these hikes is between 5-18 miles long and takes between 3-12 hours to complete on average. They range from slot canyon hikes to mountain hikes. There is something for everyone.
Before we get into our day hiking bucket list, let’s talk hiking safety.
Help support this site by purchasing one of our National Park Shirts, Poster, and other gear. Every purchase includes a donation to the national parks and helps keep National Park Obsessed’s website free to use and producing more national park guides.
Looking for more help planning your next adventure? Join the National Park Obsessed Facebook Group here to connect other national park lovers, trade advice, or see inspiring photos of the National Parks?
How to stay safe while hiking
- Tell someone where you are going and when you will be back. They need to know your hiking plan along with a number to call should you not return on time.
- Know your limits. There is no shame in realizing turning back for any reason. If you are in over your head, get out. National Park rescues are not easy or fun and can result in death.
- Learn what goes into rescue by reading Death, Daring, and Disaster: Search and Rescue in the National Parks
- Check with the park rangers before heading out on your hike. Trail conditions are always changing. They will have the latest information.
- Check the weather before you head out. Is there a rainstorm north of your position? What kind of temperatures are you expecting? Know this before hiking.
- Stay on the trail and stick to the plan. Should the worst happen, search and rescue will start looking for you on the trail and assume you are following your plan. It can take hours if not days to locate a missing hiker who has gone off-trail and changed their plans with no notice.
- Carry enough water. Very few of these hikes have places to refill water bottles. Those that do will require the water to be treated. Plan on at least 1 liter of water for every two hours of hiking. This may need to be adjusted depending on the time of year and the difficulty of the hike.
- Hiking burns a lot of calories and you need to be prepared for spending the day on the trail. Bring a mixture of sweet and salty snacks to keep you fulled throughout the day.
- Wear proper shoes and socks. All of these hikes require solid footwear with good cushioning and grip. If you have ankle issues consider high top boots. Your socks should be moisture-wicking and ease friction.
- Consider using trekking poles. If you have knee pain or balance issues, trekking poles can help prevent and deal with these issues.
- Bring sun protection. Sunburns happen anywhere including on cloudy days hiking on snow.
- Wear layers when hiking. Be prepared for changing conditions. Always have a light jacket and raincoat just in case you need them.
- Always carry a light source. If you hike runs long and you are out after dark this can light the way and if something happens you can use the light to help attract attention.
- Carry a map and know how to read it. It doesn’t matter how well marked the trail is supposed to be, carry a map in case you get off trail or have questions about the route.
What To Pack For A Day Hike
- Refillable Water Bottles – Refillable water bottles are an easy way to help reduce little while allowing you to carry water with you.
- Hydration Bladder – If you are hiking longer distances, a hydration bladder is the best way to hike with significant quantities of water. It is a rare hike when I don’t bring a full bladder with me.
- Sunscreen – Sunscreen helps prevent sunburn You don’t want to get burned on your visit. If you are visiting a national park and planning on going swimming please use a reef-friendly sunscreen (even in the alpine lakes). These sunscreens have a lower environmental impact on marine environments.
- Lip balm – Your lips need just as much sun protection as your skin does.
- Sunglasses – Similar to sunscreen, you need a good pair of polarized sunglasses to protect your eyes from the glare of the sun.
- First aid kit – As with any outdoor adventure, accidents happen. It is better to be prepared and have a compact first-aid kit ready to help with any accidents.
- Headlamp – Always keep a headlamp handy. You never know when you might want it. A good headlamp makes it easy to operate in the dark.
- Bug Protection – No one likes to be attacked by bugs during their entire hike.
- Hat – Hats are another sun protection device. A hat can keep the sun off your face and neck and help minimize the need for sunscreen while on the trail.
- Hiking Day Pack – A good day pack is the best way to transport all your gear when hiking. I highly recommend getting a backpack that is designed for outdoor use. These packs come with handy pockets and straps. My 40 L day pack has a pocket for my water bladder and a clip to hold the water line in place.
- Shoes – Shoes are probably the most important piece of gear to any hiker. Hiking shoes should be seen as an investment. On the trail, your feet are your transportation and a solid pair of hiking shoes help support your feet and can prevent injury. You should look for a brand that fits your feet and this can per a very personal thing. You will hear people who swear by Asolo, Merrell, KEEN, or 100 other brands. If it is sold by REI then it is a good quality pair of hiking shoes. Find your shoe brand and a good pair of hiking socks that work together to make the perfect fit and you will not get blisters. I spent 12 years hiking in Asolo boots because they had an amazing fit for MY feet (they recently changed their fit and no longer work for my feet so I am about 500 miles into my first pair of Salomon boots).
- Trail Navigation – Always carry a map and compass. They never run out of batteries and you can always figure out where you are. In many national parks, your cellphone is NOT adequate for navigation in the parks. Cell service is spotty and UNRELIABLE in many national parks and they can run out of batteries. A map and compass never have that problem.
- Trowel – On day hikes, it may become necessary to go to the bathroom while on the trail. It is good practice (and kindness to others) to bury your waste and pack out your toilet paper. All waste should be buried in a small hole about 8 inches deep. A trowel makes digging this whole really easily.
- Bear Spray – If you hiking in bear county, bear spray is an important safety device. On the unlikely event that you are attacked by a bear, this concentrated pepper spray can deter a charging bear and save your life. PLEASE NOTE – Bear spray is to be used on the bear NOT yourself.
- Personal Locator Beacon – A personal locator beacon can help you and your family feel safe on your adventures. This satellite communicator offers the ability to seen text messages or emergency alerts. These beacons can transmit your location to emergency services. Do keep in mind that knowing your location is half of the battle. It can take hours if not days for search and rescue to locate you. These devices have two costs. The first cost is the cost of the device and the second is the subscription service for sending and receiving messages. But the peace of mind can be worth the cost.
Bucket List of National Parks Day Hikes
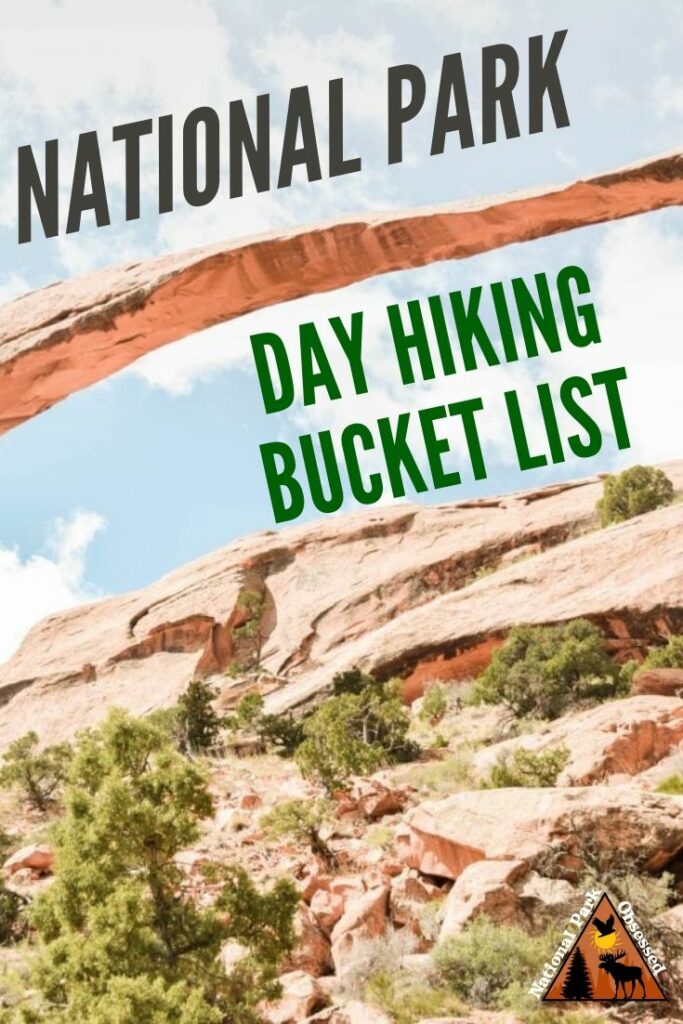
- Devil’s Garden Loop, Arches National Park
- The South Rim Trail, Big Bend National Park
- Fairyland Loop Trail, Bryce Canyon National Park
- Sulphur Creek Trail, Capitol Reef National Park
- Savage Alpine Trail, Denali National Park
- Trail of the Cedars to Avalanche Lake Trail, Glacier National Park
- Iceberg Lake Trail, Glacier National Park
- Cascade Canyon Trail, Grand Tetons National Park
- Bristlecones/Alpine Lake Loop, Great Basin National Park
- Charlies Bunion Trail, Great Smoky Mountains National Park
- Skyline Trail Loop, Mount Rainier National Park
- Hidden Lake Trail, North Cascades National Park
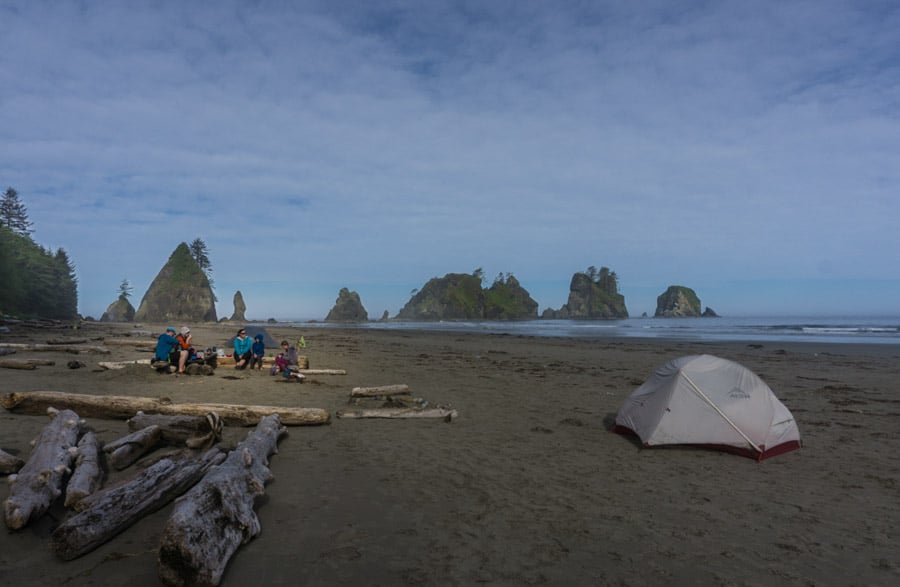
- Shi Shi Beach Trail, Olympic National Park
- Sky Pond Trail, Rocky Mountain National Park
- Half Dome, Yosemite National Park
- Cathedral Lake Hike, Yosemite National Park
- Clouds Rest Hike, Yosemite National Park
- Angels Landing Trail, Zion National Park
- Observation Point Trail, Zion National Park
- The Narrows, Zion National Park
Best National Park Day Hikes
Arches National Park Hikes
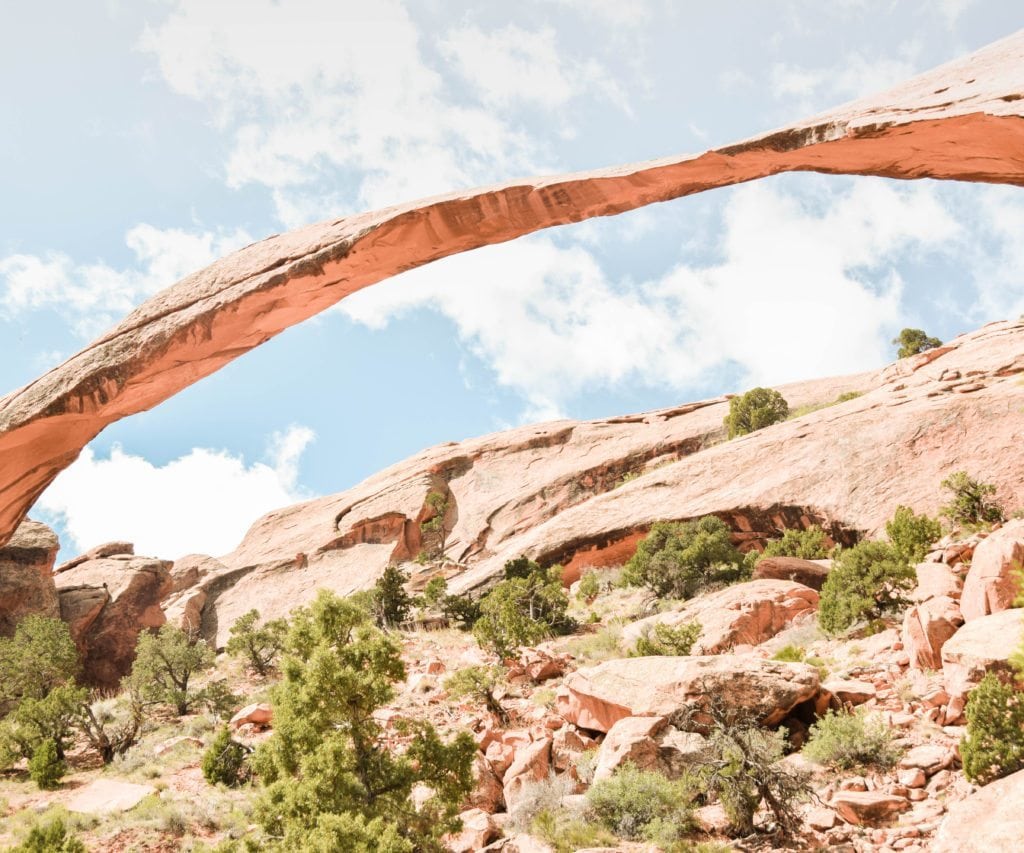
Devil’s Garden Loop Trail
Difficulty: Strenuous
Distance: 7.5 miles
Expected Hiking Time: 3-5 hours
The Devil’s Garden Loop trail is one of the best trails in Arches National Park. While most visitors to Arches National Park only hike to Delicate Arch, this loop trail offers views of 7 different arches plus interesting rock formations such as Dark Angel.
The arches you’ll see on this trail include Landscape Arch, Partition Arch, Navajo Arch, Double O Arch, Private Arch, Pine Tree Arch, and Tunnel Arch.
The trail begins as a paved trail and the first part is pretty busy because of this. The paved trail takes you up to Landscape Arch as well as Pine Tree Arch and Tunnel Arch.
From then on it’s more of a primitive trail with some drop-offs and small scrambles up and over rocks. From this point on the trail is much quieter which makes it a great option if you’re looking for quieter trails in Arches National Park. There is an alternate route which is marked as “primitive trail” where there’s some more scrambling and, at certain times of the year, you’ll need to wade through a small pool of water.
For most of the trail, you’re walking on the rock which can get slippy if it’s been raining so take extra care. The primitive alternate is not recommended in ice and rain.
Since it gets hot in Arches National Park during the day I’d advise starting the Devil’s Garden Loop trail early to avoid the hottest part of the day. Plus, this way you’ll also make sure you get a parking space, the parking lot at the trailhead gets very busy by mid-morning. The trailhead is also 45 minute’s drive from the park entrance so factor that into your planning.
~~ Hannah Kacary of That Adventurer Blog
Get help planning your trip to Arches National Park.
- National Parks of Utah
- 1 Week Road Trip Through Utah’s Mighty Five
- 11 Things You Can’t Miss on Your First Visit to Arches National Park
Big Bend National Park Hikes
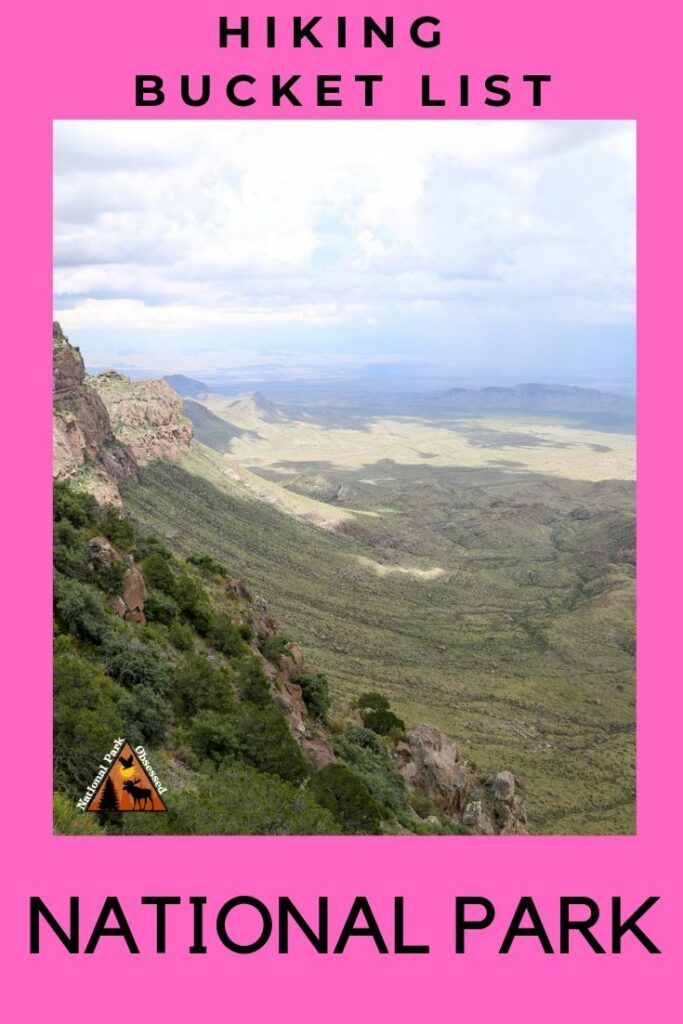
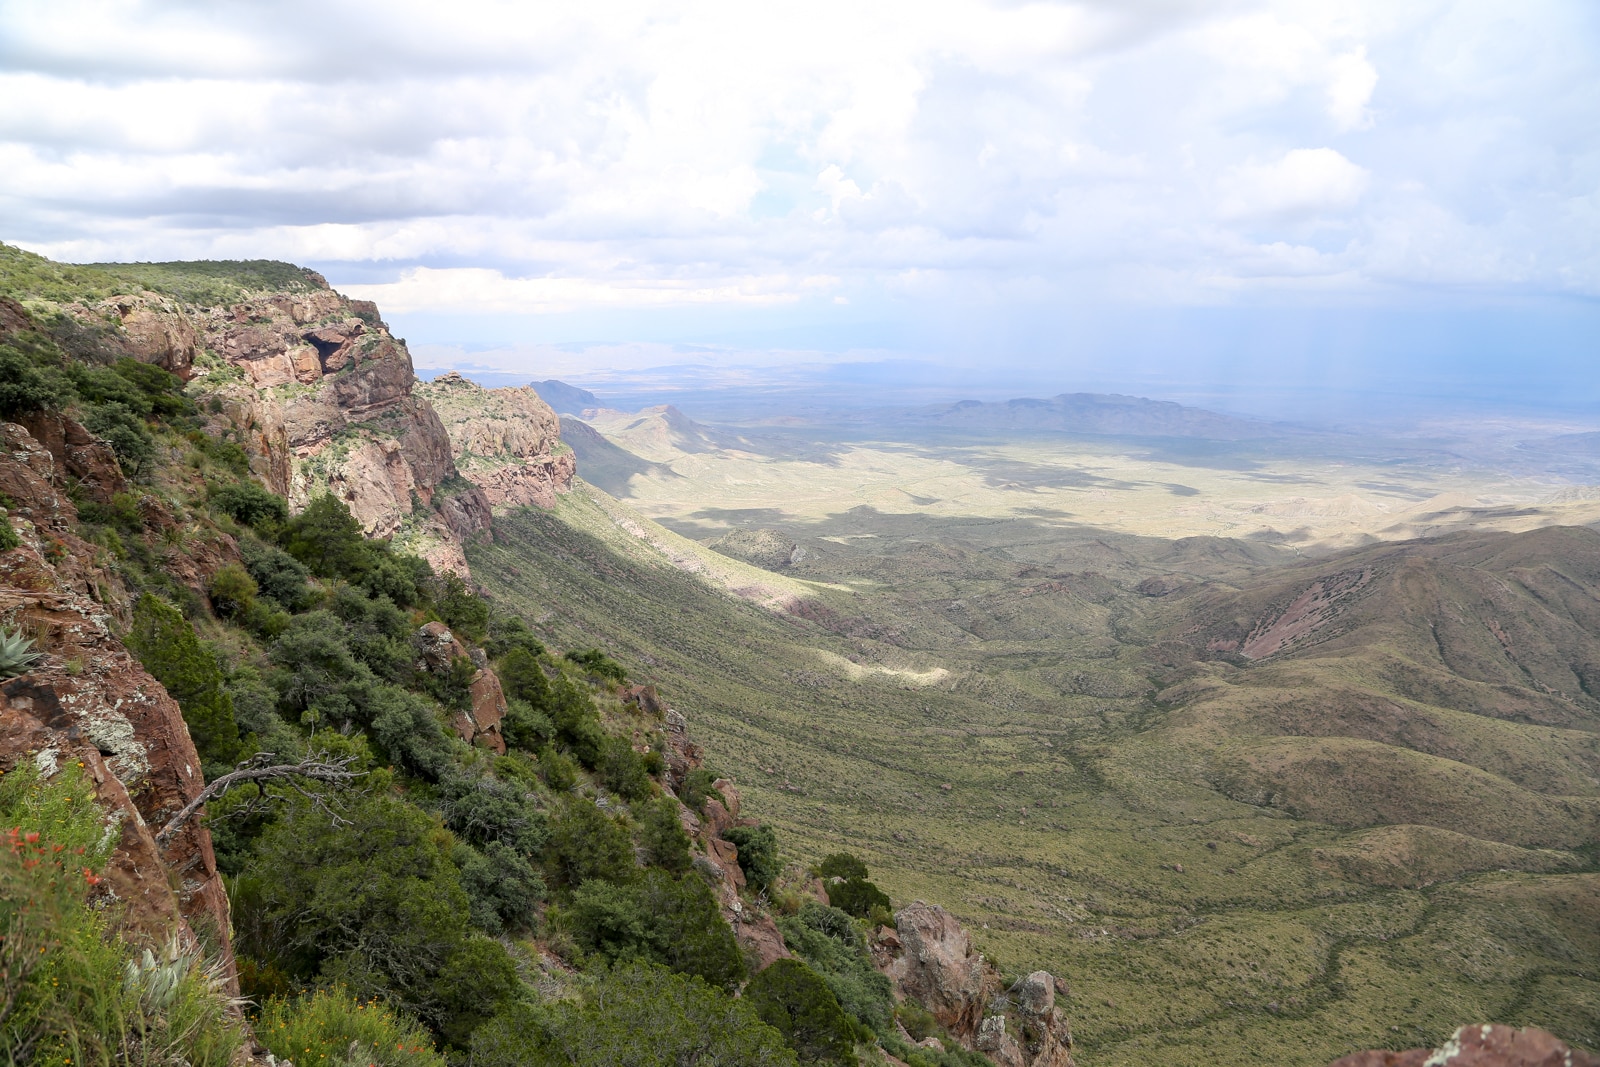
The South Rim
Difficulty: Strenuous
Distance: 12 miles
Expected Hiking Time: 7-8 hours
There are 150 miles of hiking trails in West Texas’ Big Bend National Park and out of all these miles of trails, the South Rim is the most ambitious. Many choose to camp at the rustic campsites set up along the trail, but we conquered this trail as a day hike. It is a loop trail that starts and ends in the Chisos Basin in the mountains. The highlight of this hike its namesake, the southern rim of the Chisos, found at the halfway point. The trail borders the cliff with Mexico spread out on the plains below.
The trail is strenuous due to its length. It took us over 8 hours to complete, but we indulged ourselves in lengthy breaks to enjoy the views. Budget for a minimum of 7 hours. There’s an option to add on a there and back trek to the top of Emory Peak which will add on another hour to your hike. If you have the energy and start your morning early enough, it’s worth the extra effort to see the view from Big Bend’s highest peak.
When visiting Big Bend National Park, be sure to allow for multiple days to hike the many trails. Whether you tackle the South Rim or one its countless shorter trails, you’ll never regret a day spent exploring this tiny, desert park.
~~ Erin Mushaway of Sol Salute
Get help planning your trip to Big Bend National Park
- National Parks of Texas
- All about Big Bend National Park
- The Ultimate Guide to Camping in Big Bend National Park
Bryce National Park Hikes
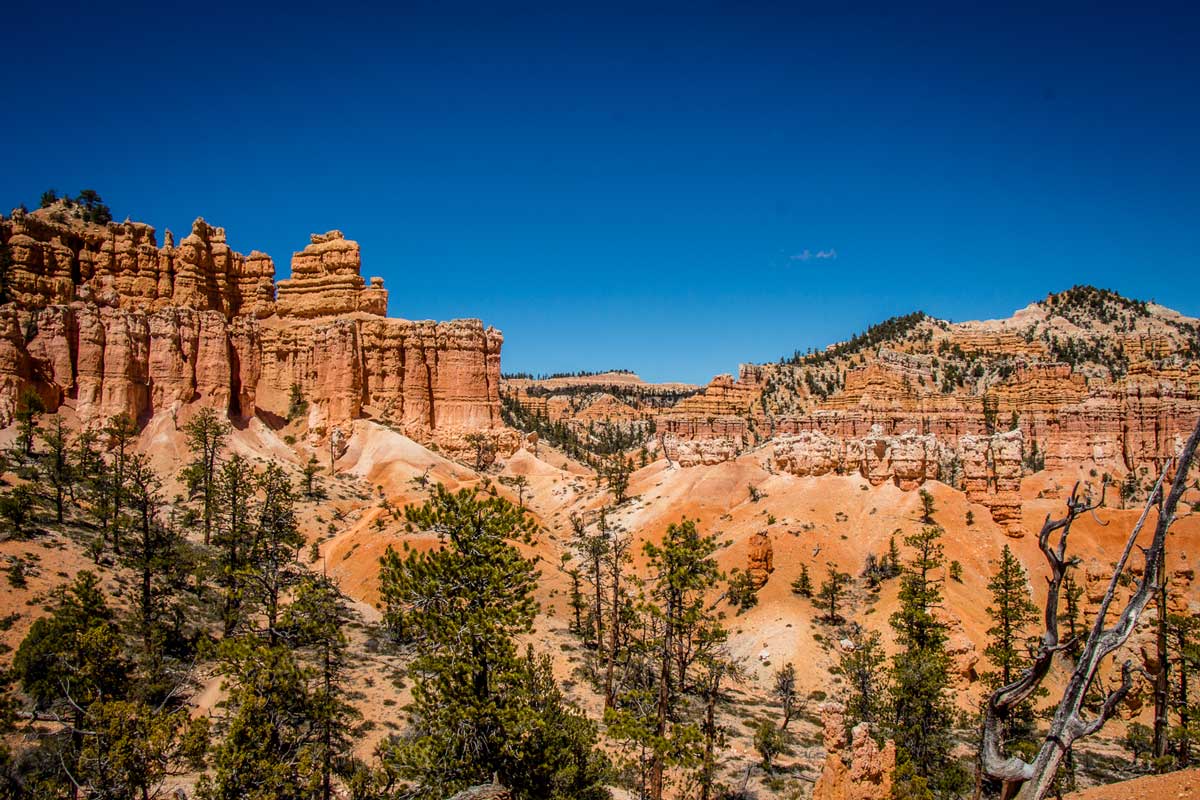
Fairyland Loop Trail
Difficulty: Strenuous
Distance: 8 miles
Expected Hiking Time: 4-5 hours
The Fairyland Loop Trail in Bryce Canyon National Park is a hike you don’t want to miss. Given that it’s a longer and more difficult day hike, you’ll find some solitude amongst the spectacular scenery. When we visited Bryce in early spring, several of the other trails were still closed so we probably saw more people on the Fairyland Loop than we might have otherwise. But it was nothing compared to the crowds we followed on the Queens Garden trail the day prior. There were still small patches of snow and mud in some sections, which made it a little slippery in spots but still manageable in proper hiking boots.
This 8-mile hike takes you through some of the most amazing scenery Bryce Canyon has to offer, from sweeping vistas to hiking through the hoodoos. Most of the hike follows along the ridge, where the views get better at each turn. There are some spur trails, like the one to Tower Bridge, that will add only slightly more time but are well worth the effort.
The National Park Service website classifies this hike as strenuous and recommends allotting 4 to 5 hours to complete the loop. It does have several elevation changes throughout the hike, but they are easily done by an experienced hiker. In fact, we hiked Fairlyland Loop with kids, who were 5 & 3 years old at the time, and they were able to do 6 miles of the 8-mile hike. Plenty of water, hats, and sunscreen are highly recommended for this hike since you won’t find much shade along the way.
~~ Celine Brewer of Family Can Travel
- National Parks of Utah
- All about Bryce Canyon National Park
- The Ultimate Guide to Camping in Bryce Canyon National Park
- Hiking Peek-a-Boo Loop Trail
- 1 Week Road Trip Through Utah’s Mighty Five
Capitol Reef National Park Hikes
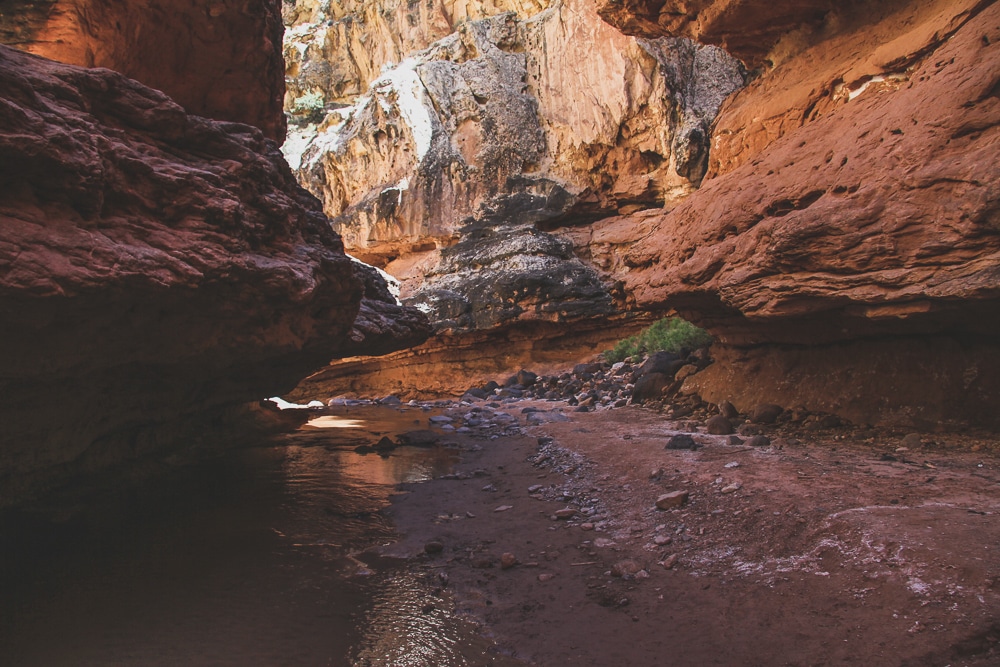
Sulphur Creek Trail
Difficulty: Moderate
Distance: 5.5 – 9 miles
Expected Hiking Time: 3-5 hours
Sulphur Creek is the perfect hike for a hot summer day in Capitol Reef National Park. The trailhead for Sulphur Creek is across the street from the Chimney Rock parking area. The actual hike is a route, not a marked trail, so it can change based on weather. It is 5.5 miles, plus about three more if you only have one vehicle. The trail ends at the visitor center, so if oyu have a second car or a bike, leave there so you have a way to get back to the trailhead. If not, you’ll have to walk along the road to get back or hitchhike back to your car.
First, you’ll be hiking in a wash through the Goosenecks. Eventually, you’ll come to the confluence with Sulphur Creek, where you’ll go to the left (there is a little sign here telling you which way to go) and finally be in the water. The water is usually pretty shallow but is still very refreshing in the blazing sun.
Going in this direction, top-down, you’ll have to climb down three small waterfalls, but they aren’t terribly difficult. You can hike on through without stopping or you can stop and relax in some of the deeper water. Definitely, don’t do any cliff jumping, though. The water isn’t deep enough for that. Swimming should not be necessary to get through any of it. At the top of the third waterfall, the most difficult to get down is a small pool you can hang out in before continuing. You can climb around and down the left side of it, or slide down it.
The entire hike is at the bottom of canyons and through narrows with cliff walls towering above you. It’s unlike anything else in the park and a must-do if you have more than one day in the park. If rain is in the forecast though, skip this one due to the possibility of flash floods.
~~ Megan of Red Around the World
Get help planning your trip to Captiol Reef National Park.
- National Parks of Utah
- One Day in Captiol Reef National Park
- 1 Week Road Trip Through Utah’s Mighty Five
Denali National Park Hikes
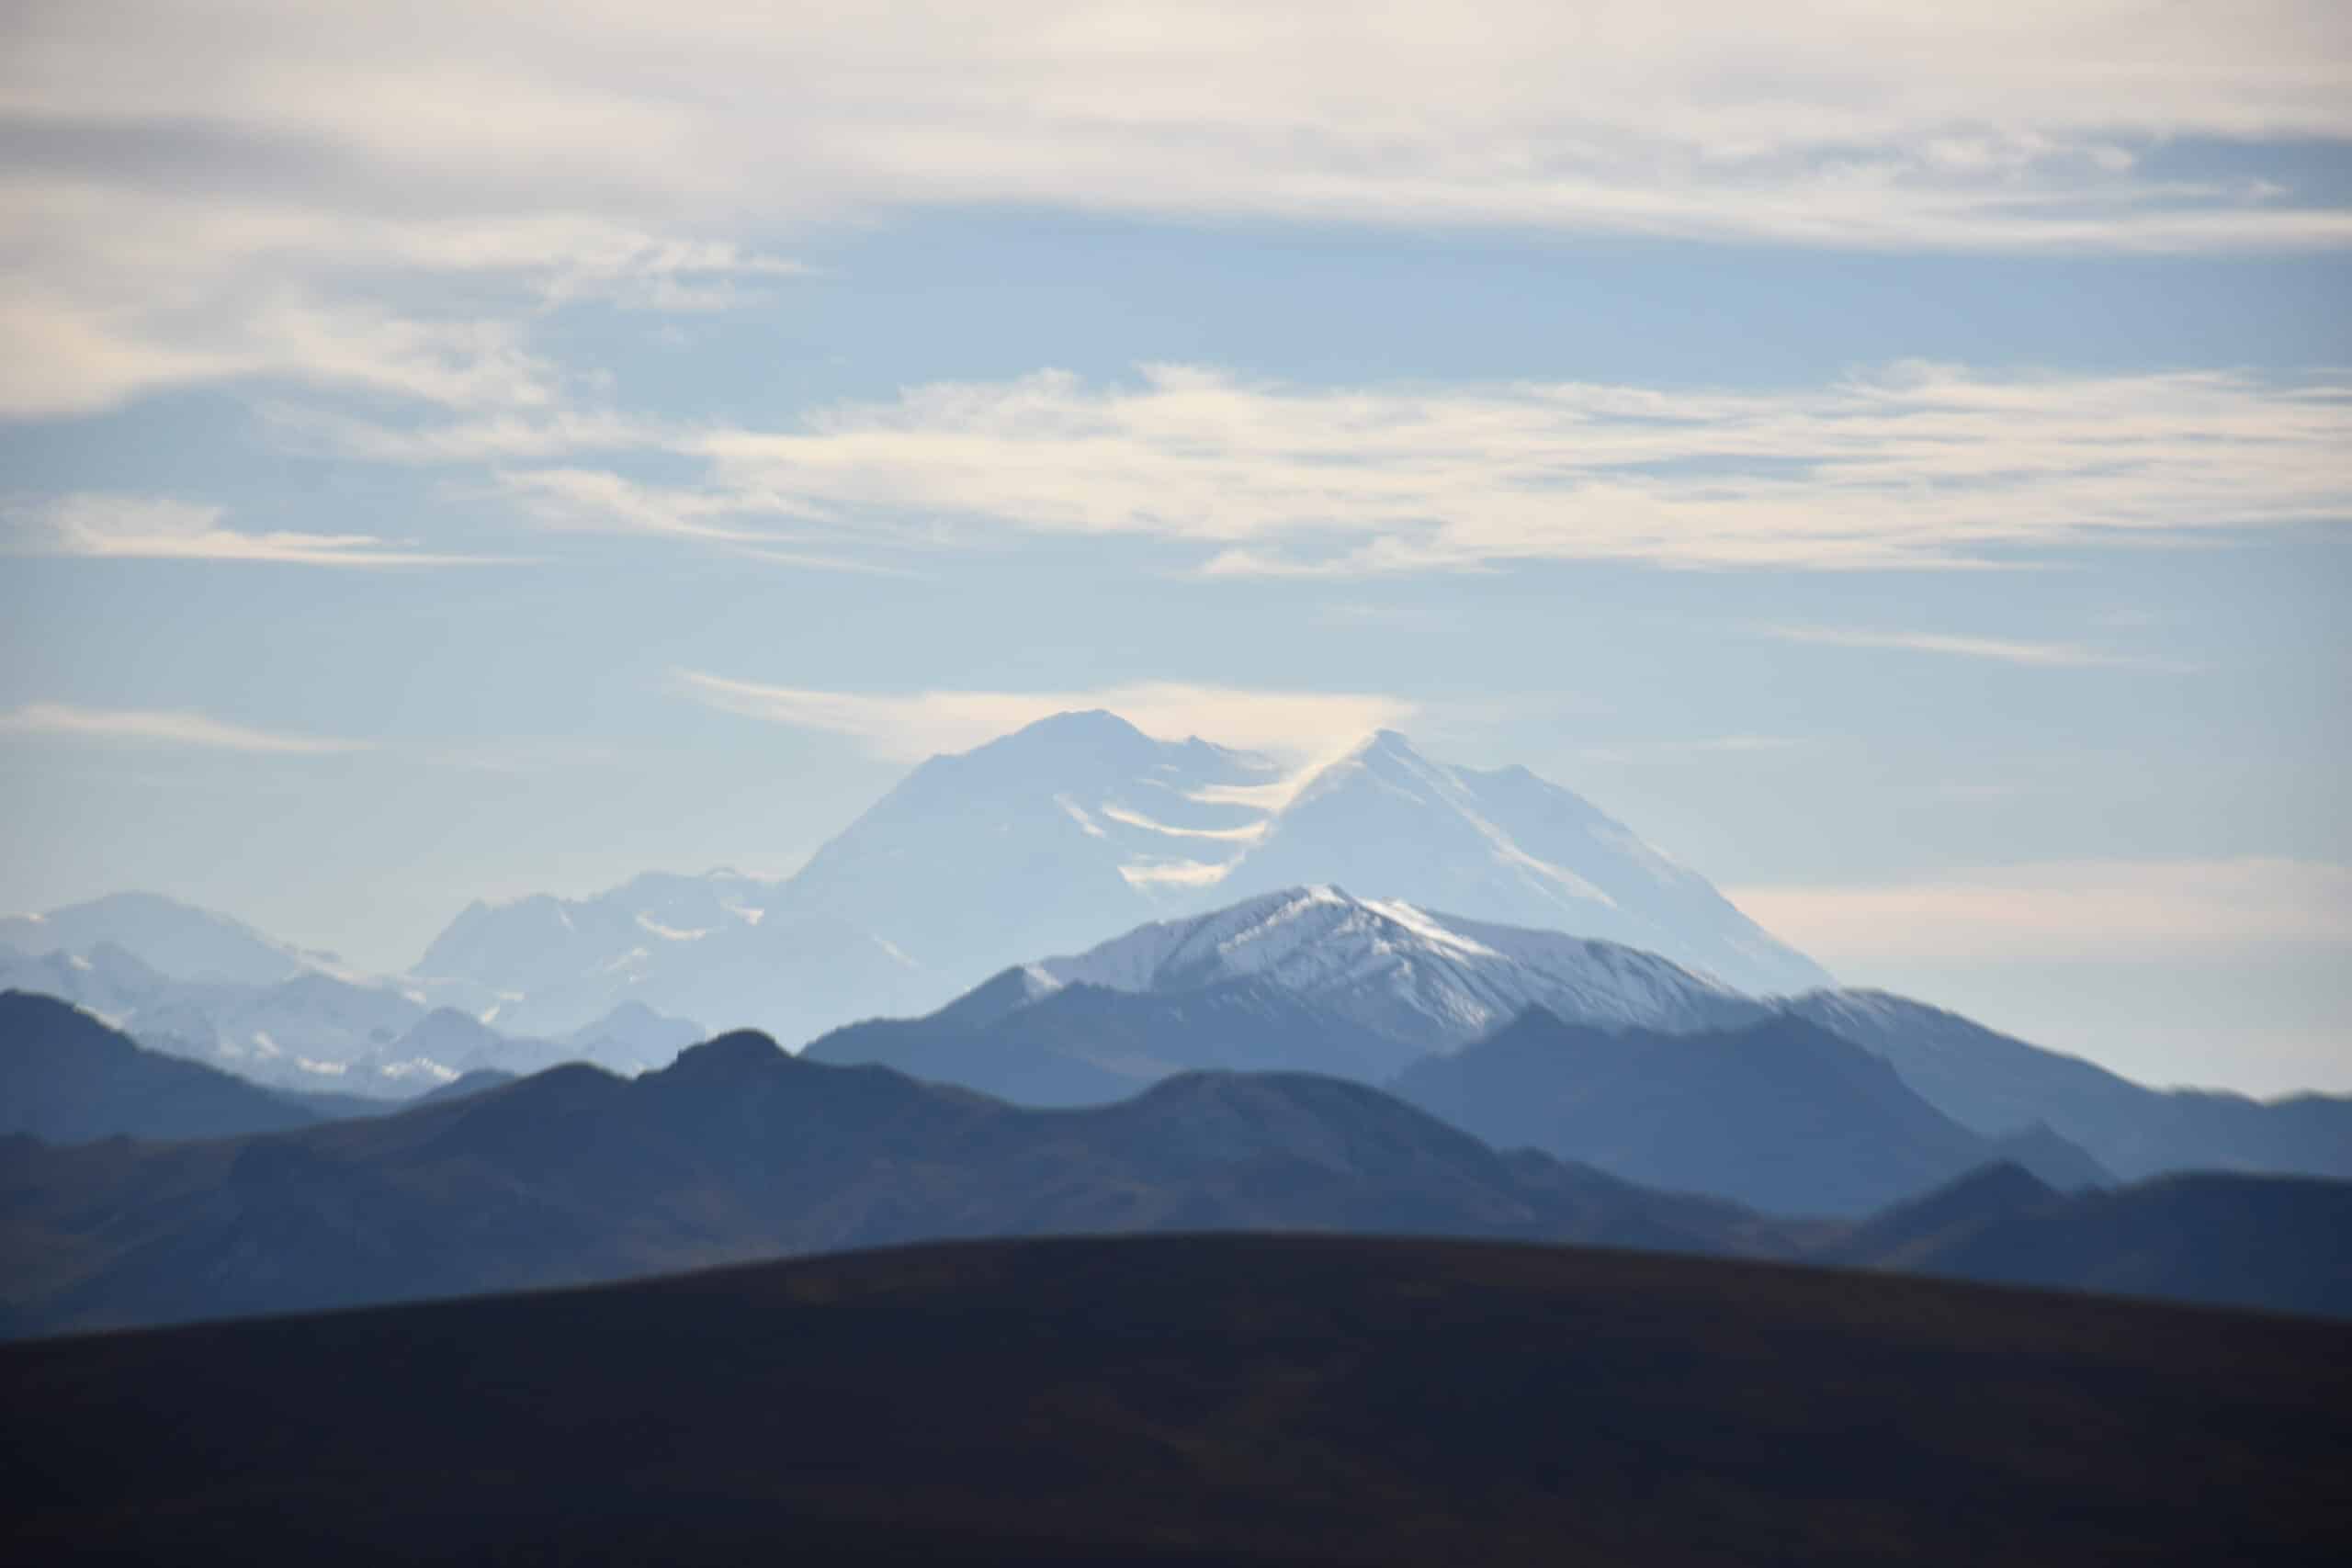
Savage River Alpine Trail with Savage River Loop
Difficulty: Moderate/Strenuous
Distance: 6.1 miles
Expected Hiking Time: 2-3 hours
Savage River Alpine Trail is one of the few marked and maintained trails in Denali National Park. The trail is a point to point hike from the Savage River Campground to Savage River. During the summer season, there are regular shuttle buses from the campground to Savage River. This allows hikers to park a vehicle at one end of the trail and catch a ride back to their car. The best way to do this hike is to park your car at one parking lots at either end and then catch a shuttle bus back to the other end to start your hike.
With this trail, you can start at either end. If you start at the campground, the trail steadily gains elevation until you are at the top of the ridge. and then you have a steep climb down off the ridge to end at Savage River. You get to hike towards Denali will allow you to enjoy the views. If you start at Savage River, you do the exact opposite. You have a STEEP climb up and then much slower descent and you have to turn around to enjoy a view of Denali.
At Savage River Campground, head across the street to find the trailhead. For the first mile, the trail follows a small creek and gains steady elevation. As you move away from the valley, the trail will get steeper. Keep an eye out in this area for mountain blueberries and bears. But mostly the blueberries. Feel free to eat them. They are delicious. The trail keeps climbing until you hit the ridge top. Here you will have a clear view of Denali. Assuming she graces you with her presence, odds are good, you will just get a view of the valley. Follow the trail along the ridgeline. As you get further along the trail, you will start seeing an increase in rock outcropping. These mean you are almost to Salvage River and you decent.
The decent to Savage River is quick with a narrow series of switchback and steep incline trail. Take your time and keep your footing. Once at the river, follow the riverside trail along the Savage River to the bridge and then hike back along the other side.
~~ Jennifer of National Park Obsessed
Get help planning your trip to Denali National Park
- National Parks of Alaska
- All About Denali National Park and Preserve
- How to Get to Denali National Park
- 10 Things to Know Before Visiting Denali National Park
- 8 Books to Read Before Visiting Denali National Park and Preserve
- The Ultimate Guide to Camping in Denali National Park
- Denali Road Lottery – Everything You Need to Know
Glacier National Park Hikes
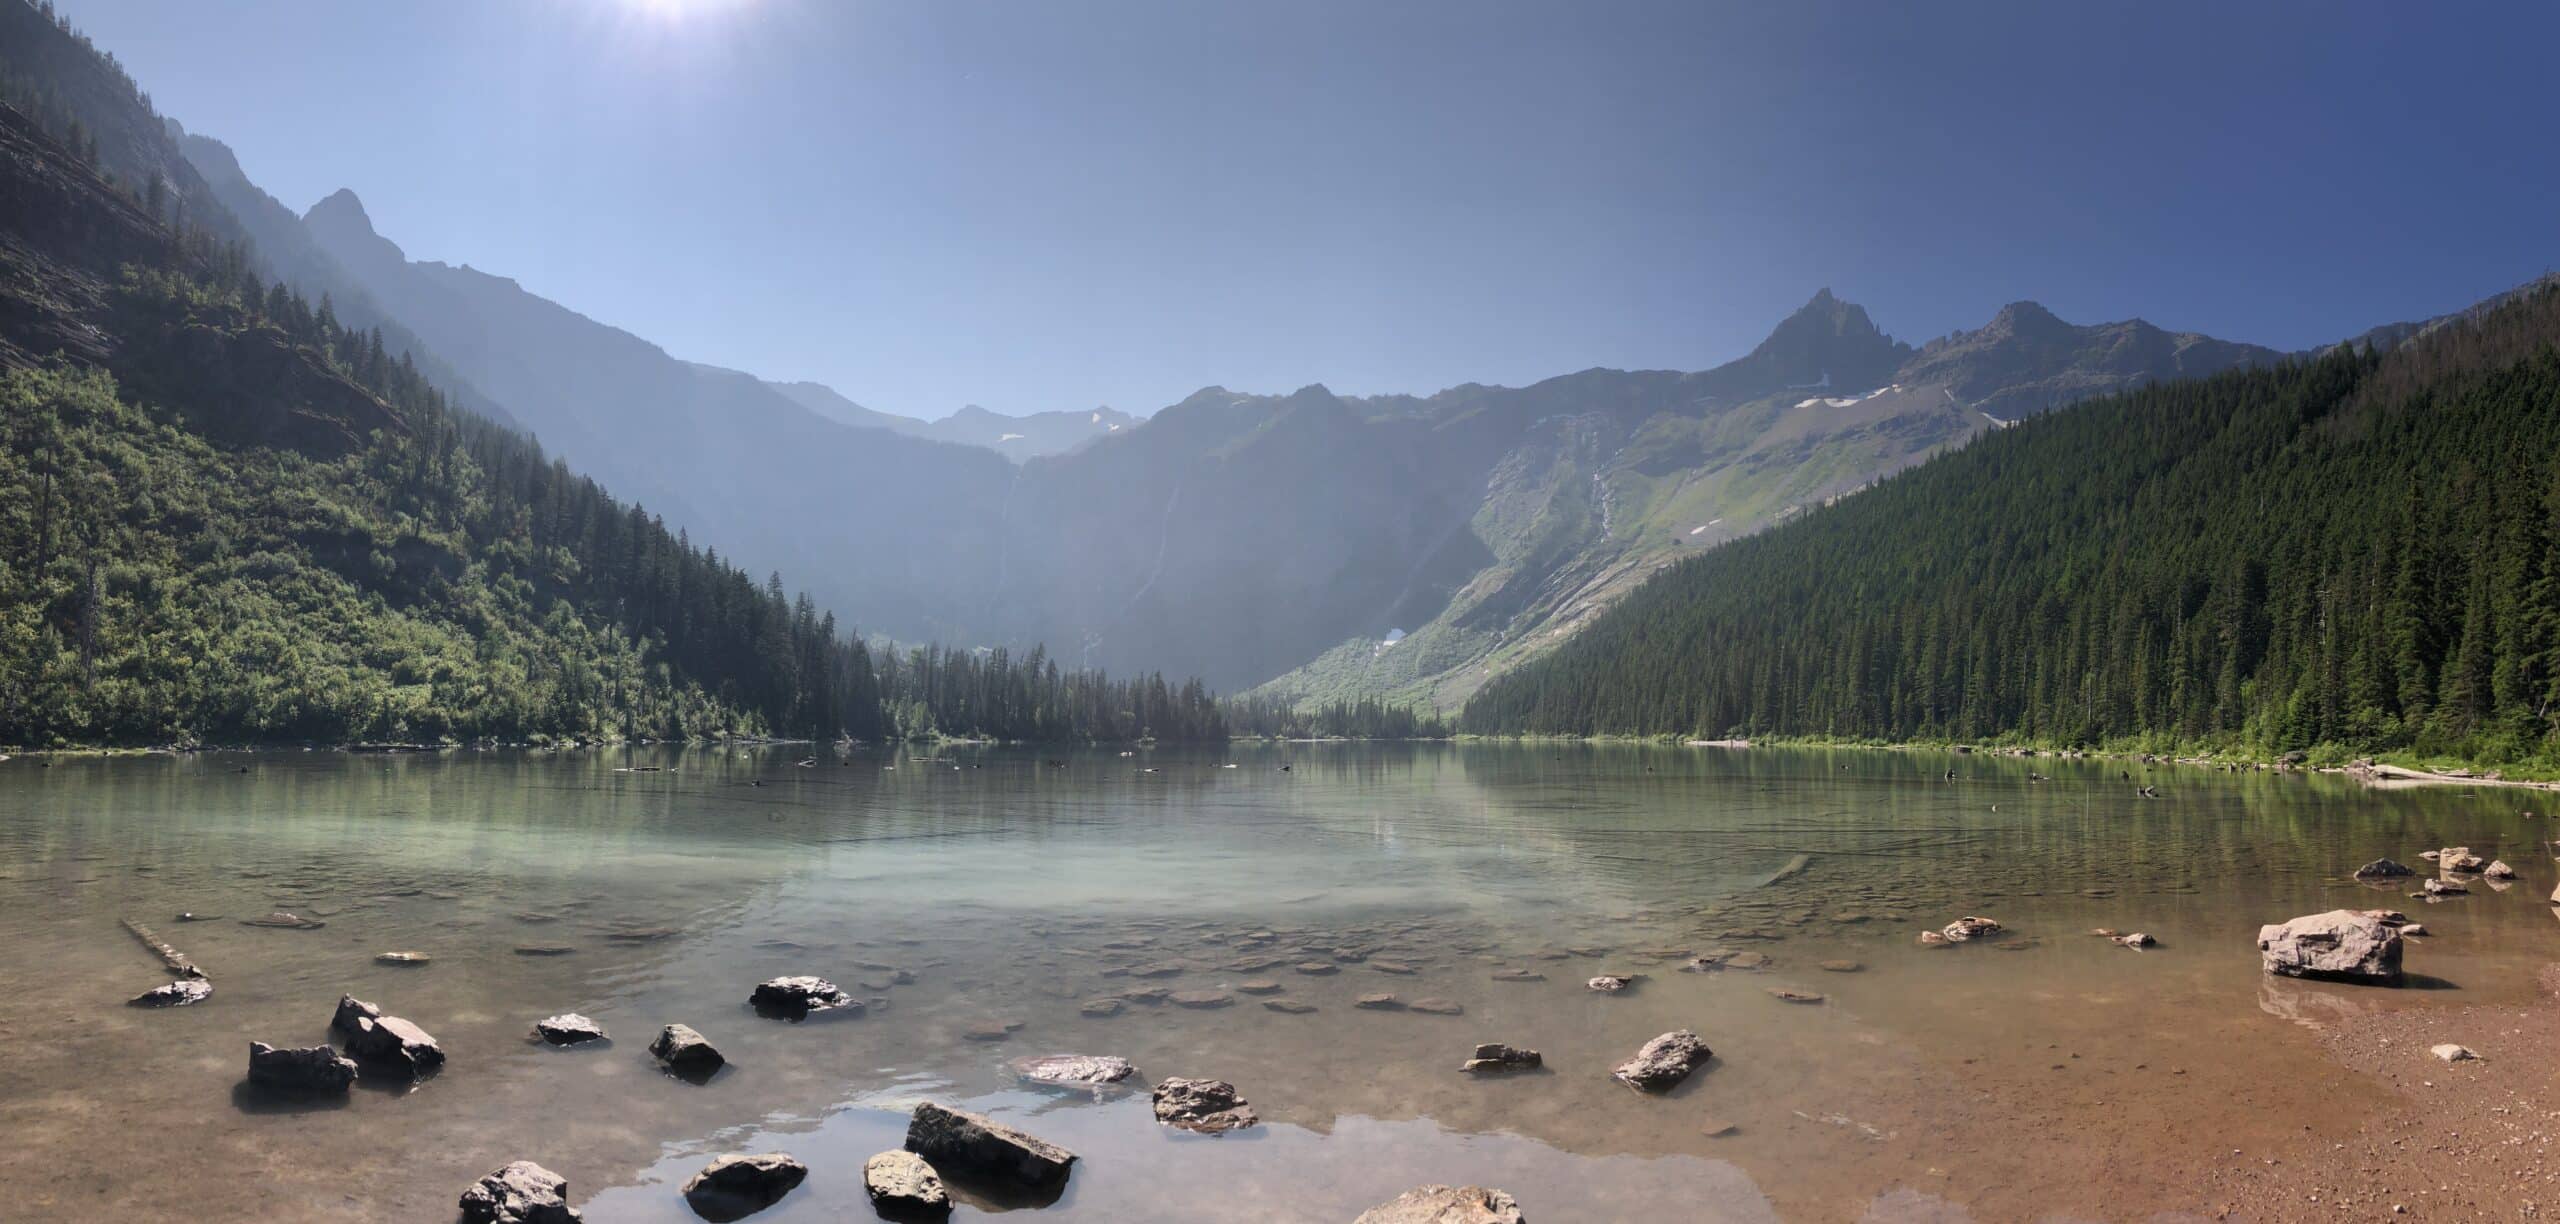
Trail of the Cedars to Avalanche Lake Trail
Difficulty: Easy / Moderate
Distance: 4.5 miles
Expected Hiking Time: 3-4 hours
If you are visiting Glacier National Park with kids, then the Trail of the Cedars to AvalancheLake is a definite bucket list hike. Located in the West Glacier area, the Trail of the Cedars is the starting point to reach Avalanche Lake. It is considered an out and back trail, so once you reach the lake, you turn around and retrace your steps back towards the start.
It begins as a raised boardwalk hike through a gorgeous tall cedar tree forest, then connects to the Avalanche Lake trail. After about a mile, you will reach Avalanche Gorge, a stunning viewpoint, you begin the hike towards Avalanche Lake. Hikers will get to view this narrow gorge up close. The trail is marked very well and takes you through some beautiful forested scenery. There are a couple of sections of incline, but it isn’t too steep and there are plenty of natural wonders to keep hikers entertained on your way towards Avalanche Lake.
A good portion of the trail runs loosely along Avalanche Creek. Hikers will see it during the beginning of this hike, but will usually hear the rushing water during the majority of the hike. Sadly, you will also see many downed trees as a result of recent wildfires and avalanches. Once you reach Avalanche Lake, stop and take in your surroundings because the green glacier-fed waters are one of the most picturesque spots in Glacier National Park. In the summer, visitors may enjoy wading in the chilly water for a bit or relax by the shore and having some snacks or a picnic lunch. If you visit in the spring or summer you will also see a few waterfalls in the distance plunging into the lake. Overall, I highly recommend hiking Trail of the Cedars and Avalanche Lake when visiting Glacier National Park. It is surely one of the bucket list hikes in the U.S.
~~ Margie DQ of DQ Family Travel
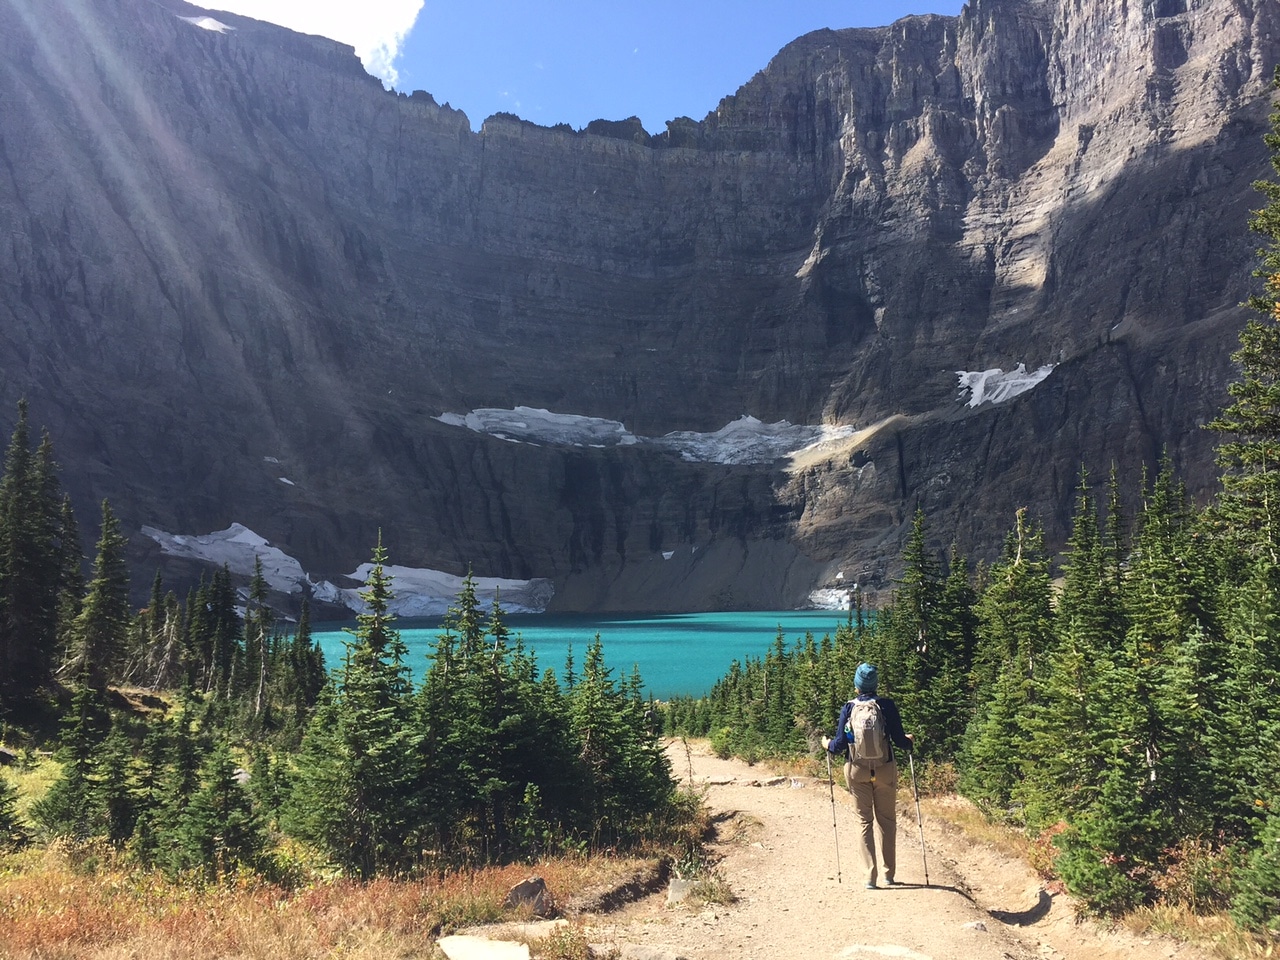
Iceberg Lake Trail
Difficulty: Strenuous
Distance: 9.7 miles
Expected Hiking Time: 3-4 hours
The hike to Iceberg Lake is one of the most stunning hikes in the lower 48 United States. For this reason, hiking to Iceberg Lake is a “can’t miss” on any visit to Glacier National Park.
The trail starts behind the Swiftcurrent Motor Inn cabins. The largest elevation climb will occur during the first half-mile of the trail where you will climb almost 300 feet in elevation and then it levels out into rolling hills. Around the 2.5 miles, you will get a great view of Ptarmigan Falls. This is a great spot for a breather or snack.
On the trail again and approximately 3 miles out, you’ll have your first glimpse of Iceberg Lake and you’ll understand the reason why this hike is so incredibly popular. Be on the lookout for mountain goats high up on the ridge to your right! While the Ptarmigan trail does veer off, be sure to stay on the trail to Iceberg Lake.
Once you reach Iceberg Lake at approximately 4.8 miles, take time to soak in the beauty of the sun reflecting off the glacial flour in the lake.
~~ Nancy Williams of Checking It Off The List
Get help planning your trip to Glacier National Park
Grand Tetons National Park Hikes
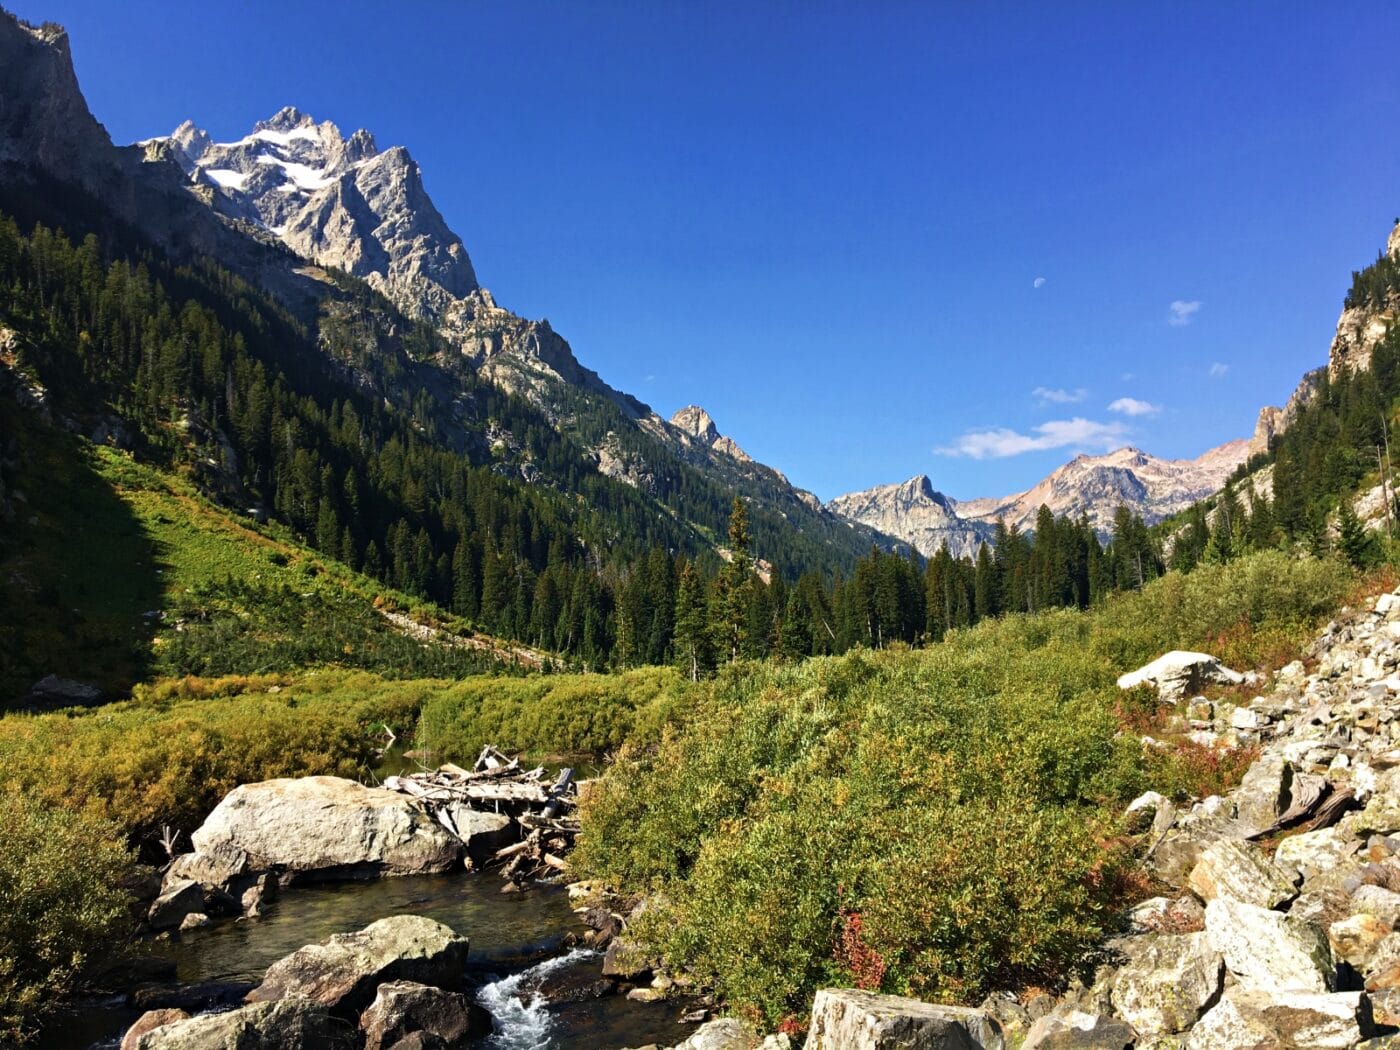
Cascade Canyon Trail
Difficulty: Moderate
Distance: 9 miles out and back (plus 2 miles each way on the Jenny Lake Loop Trail if you don’t get the shuttle boat). You can turn back at any time, though if you want a shorter hike. There’s an elevation change of 1,100 feet, almost all in first/ last 1.5 miles
Expected Hiking Time: 5 – 8 hours
The Grand Teton mountain range is a line of enormous craggy peaks that rise straight up out of the Wyoming plains. There are a couple of lakes at their base. The peaks are divided by a few canyons. Cascade Canyon is arguably the most beautiful. To get to the trailhead, you can either hike 2 miles along the flat Jenny Lake Loop Trail around Jenny Lake or take a shuttle boat across the lake from the Jenny Lake parking and camping area.
From the trailhead, it is a fairly steep 1.5-mile hike up into the canyon. As you enter the canyon, the trail flattens out and heads along the canyon floor, beside a river. Walls of the canyon tower on both sides, creating dramatically beautiful vistas. After about 3.5 miles, the waterfall that gives the canyon its name cascades from a glacier far above down the side of the canyon and into the river below the path. This part of the trail is mostly woods, but there are places you can glimpse the falls. You can turn around here or continue on to a fork in the path. This is 4.5 miles from the trailhead. The right trail continues around and enters the next canyon over, the Paintbrush Canyon. It’s too far to do both canyons in a day hike, so turn around here and enjoy seeing the canyon from a whole new angle on the way back.
This is one of my favorite hikes ever. Most of it is flat, the scenery is sensational, and the canyon is also prime habitat for moose, bears and river otters and sightings are common.
~~ James Ian of Travel Collecting
Get help planning your trip to Grand Teton National Park
- National Parks of Wyoming
- All about Grand Teton National Park
- The Ultimate Guide to Camping in Grand Teton National Park
Great Basin National Park Hikes
Bristlecones/Alpine Lake Loop
Difficulty: Moderate / Strenuous
Distance: 4-6 miles
Expected Hiking Time: 3-5 hours
Great Basin National Park is a hidden gem in the literal middle of nowhere Nevada. It’s home to the only glacier in Nevada, some of the oldest living things on Earth, alpine lakes, and the second highest peak in Nevada. The Alpine Lake Loop (2.7 miles) and Bristlecone/Glacier Trail (4.6 miles) are technically two separate trails, but they are often and easily combined into one long hike.
Start at the Bristlecone Trailhead at the base of Wheeler Peak then head out counterclockwise on the trail. When it forks, stay to the right to go to the alpine lakes first. The first lake you come to is Stella Lake, a small but beautifully turquoise lake with Wheeler Peak towering behind it. Continue along the trail to Teresa Lake, a bigger, emerald green beauty surrounded by pines.
From there, continue on to another fork where you’ll stay to the right to head up to the Bristlecone trees and glacier. This part is much more difficult taking you along a dirt and rock trail up to one of the few Bristlecone groves in the park. You’ll have views for days of lakes and the desert below.
Once you’re in the grove, there is a small loop with informational signs so you can learn about these ancient twisted trees. If you’re feeling really determined, keep going on the glacier trail. Even in June, there can be snow on the higher parts of this trail, so be prepared for that, just in case. After the glacier, just head back down the way you came. This is one of the best trails in Great Basin, for good reason.
~~ Megan of Red Around the World
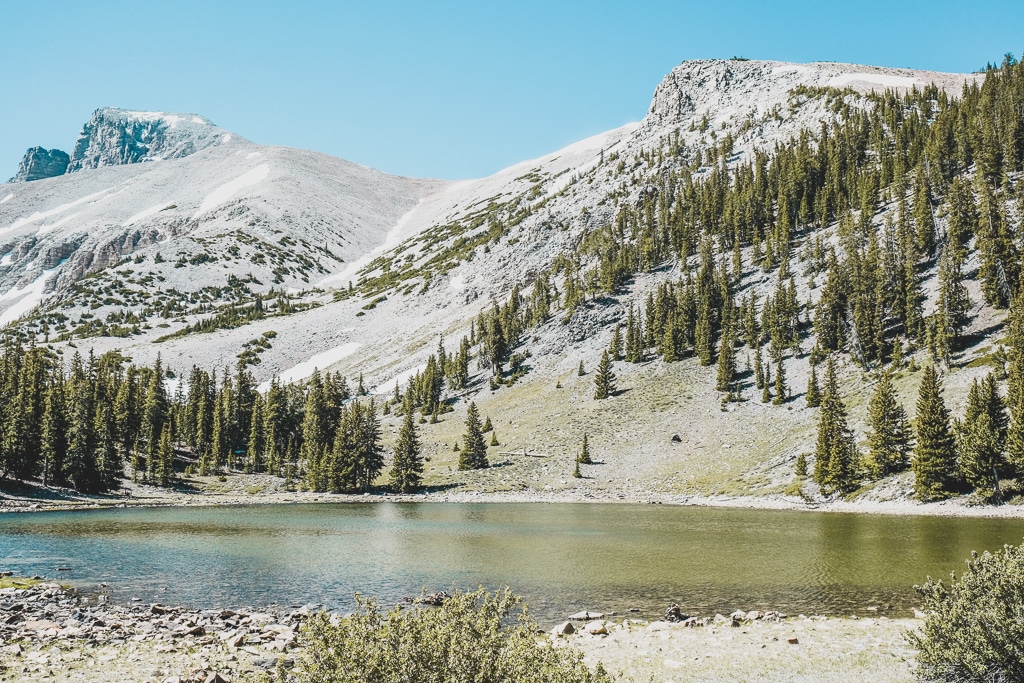
Get help planning your trip to Great Basin National Park
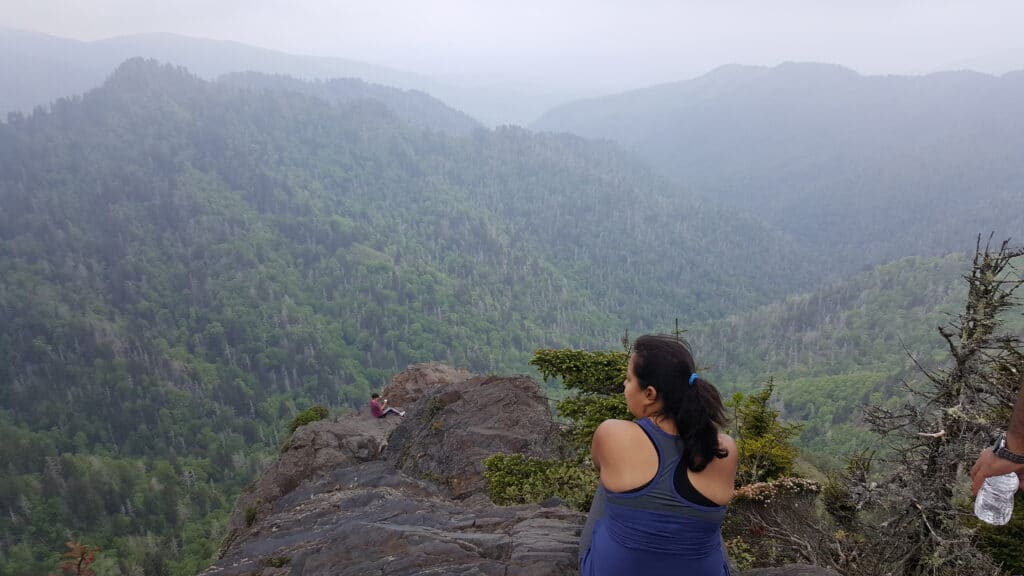
Great Smoky Mountains National Park Hikes
Charlies Bunion Trail
Difficulty: Strenuous
Distance: 8.1 miles
Expected Hiking Time: 4-7 hours
The hiking for Charlies Bunion begins from Newfound Gap parking lot. From there, the path to Charlies Bunion heads east on the Appalachian Trail. Be aware that the Newfound Gap parking lot is a decent size but fills mid-morning on weekends. The trailhead sits on the border of North Carolina and Tennessee.
There is a steady upward climb over the two first miles of the hike. During this time, you will get some magnificent views of the North Carolina side of the Smokies. The trail continues on along the ridgelines. Around 1.7-mile mark, there is a trail junction with views of Mount LeConte and Myrtle Point. At the next Boulevard Trail junction, hikers headed to Mt. LeConte splits off. Keep heading straight along the Appalachian Trail. The trail will pass by the Icewater Spring Shelter. There is a pipe with spring water flowing thru it. This water is NOT safe to drink without treatment.
About 4-miles from the trail a small spur trail will split from the Appalachian Trail. This spur leads to Charlies Bunion, a rock outcropping with a great view of the Smokies. It offers a spectacular view of the Mountain Kephart and Mount Guyot. There is an extremely steep drop off so please watch your steps while enjoying the view.
~~ Urvi Shah of Urvi’s Travel Journal
Get help planning your trip to Great Smoky Mountains National Park
- National Parks of Tennessee
- National Parks of North Carolina
- 11 Things to Know Before Visiting Great Smoky Mountains National Park
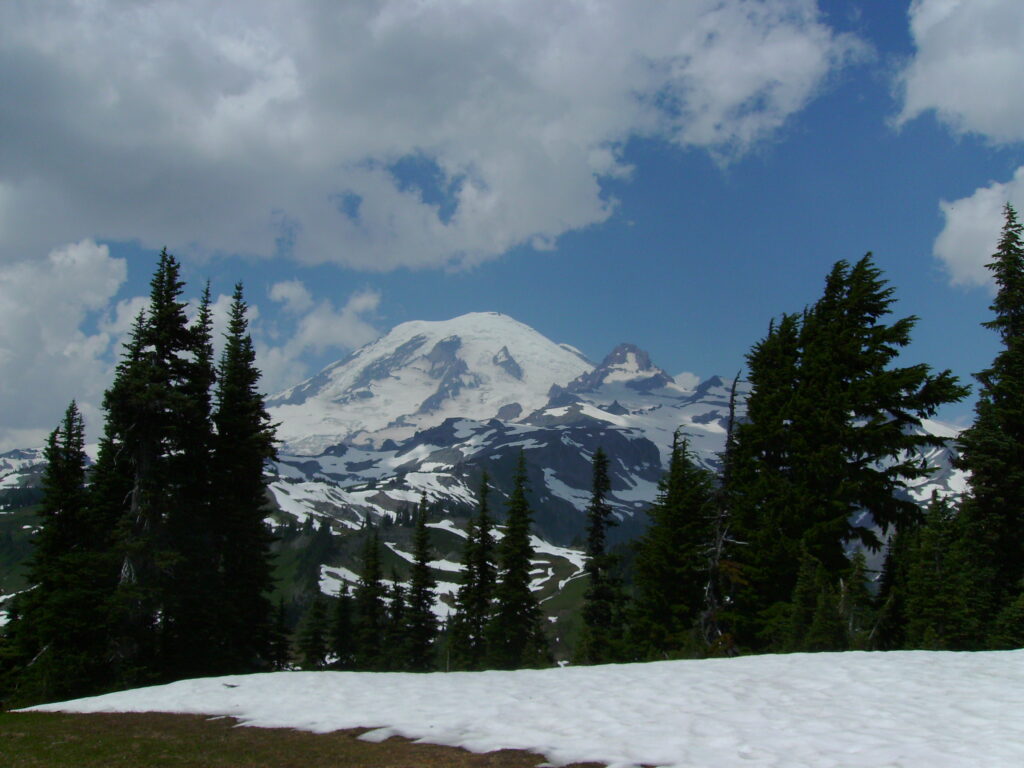
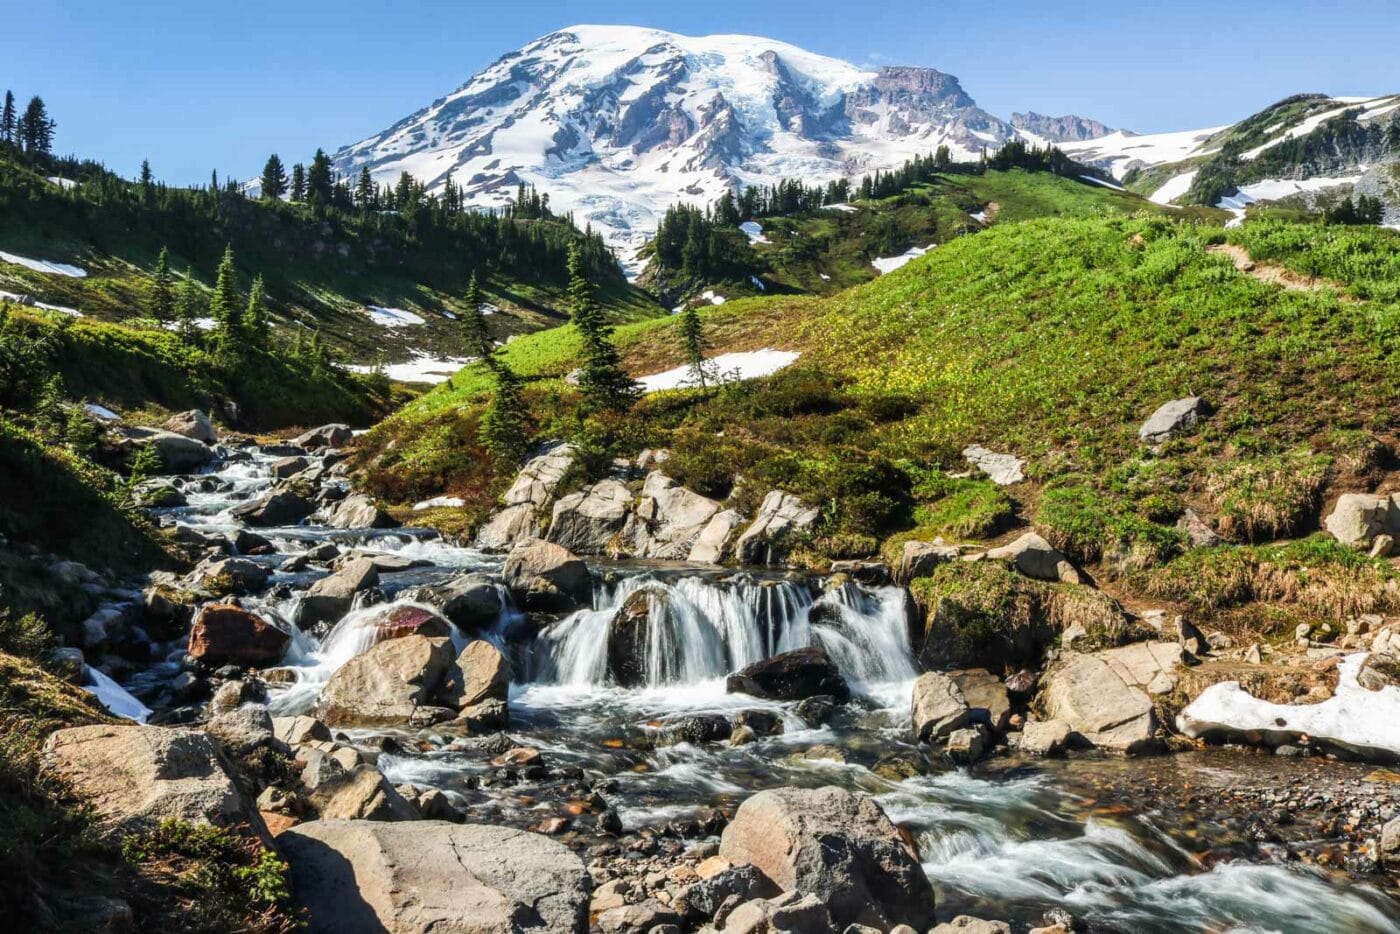
Mount Rainier National Park Hikes
Skyline Trail Loop
Difficulty: Moderate
Distance: 5.5 miles
Expected Hiking Time: 4 hours
A summer’s visit to Mount Rainier National Park is not complete without a wander through the natural flower gardens at Paradise. This area on the south side of the volcano got its name for a reason. It’s the best place to experience the overwhelming beauty of the highest mountain in the Pacific Northwest.
The Skyline Trail Loop trailhead lies just behind the Jackson Visitor Center. Make sure to stop by that visitor center, though, to pick up a map since the network of hiking trails in the area is dense and tricky to navigate without one.
In my opinion, this is by far the best day hike in Mount Rainier National Park, simply because it offers a wide range of mountain scenery. From alpine meadows covered with purple lupines, white avalanche lilies and red Indian paintbrush, to glacier crossings and up-close views of mighty Rainier, this hike packs it all in only 5.5 miles.
It’s a loop, too, so you’ll enjoy new scenery and sights the entire way. Major highlights include the epic vista from Panorama Point, taking in much of the Cascade Range and other regional volcanoes, as well as the iconic view at Myrtle Creek with Mount Rainier towering in the background. If you hike this trail in a clockwise direction, you’ll save a major attraction for last—thundering Myrtle Falls, the ultimate reward.
~~ Bram Reusen of Travel Experience Live
Get help planning your trip to Mount Rainier National Park
- National Parks of Washington
- All about Mount Rainier National Park
- 11 Not to Miss on Your First Visit to Mount Rainier National Park
- The Ultimate Guide to Camping in Mount Rainier National Park
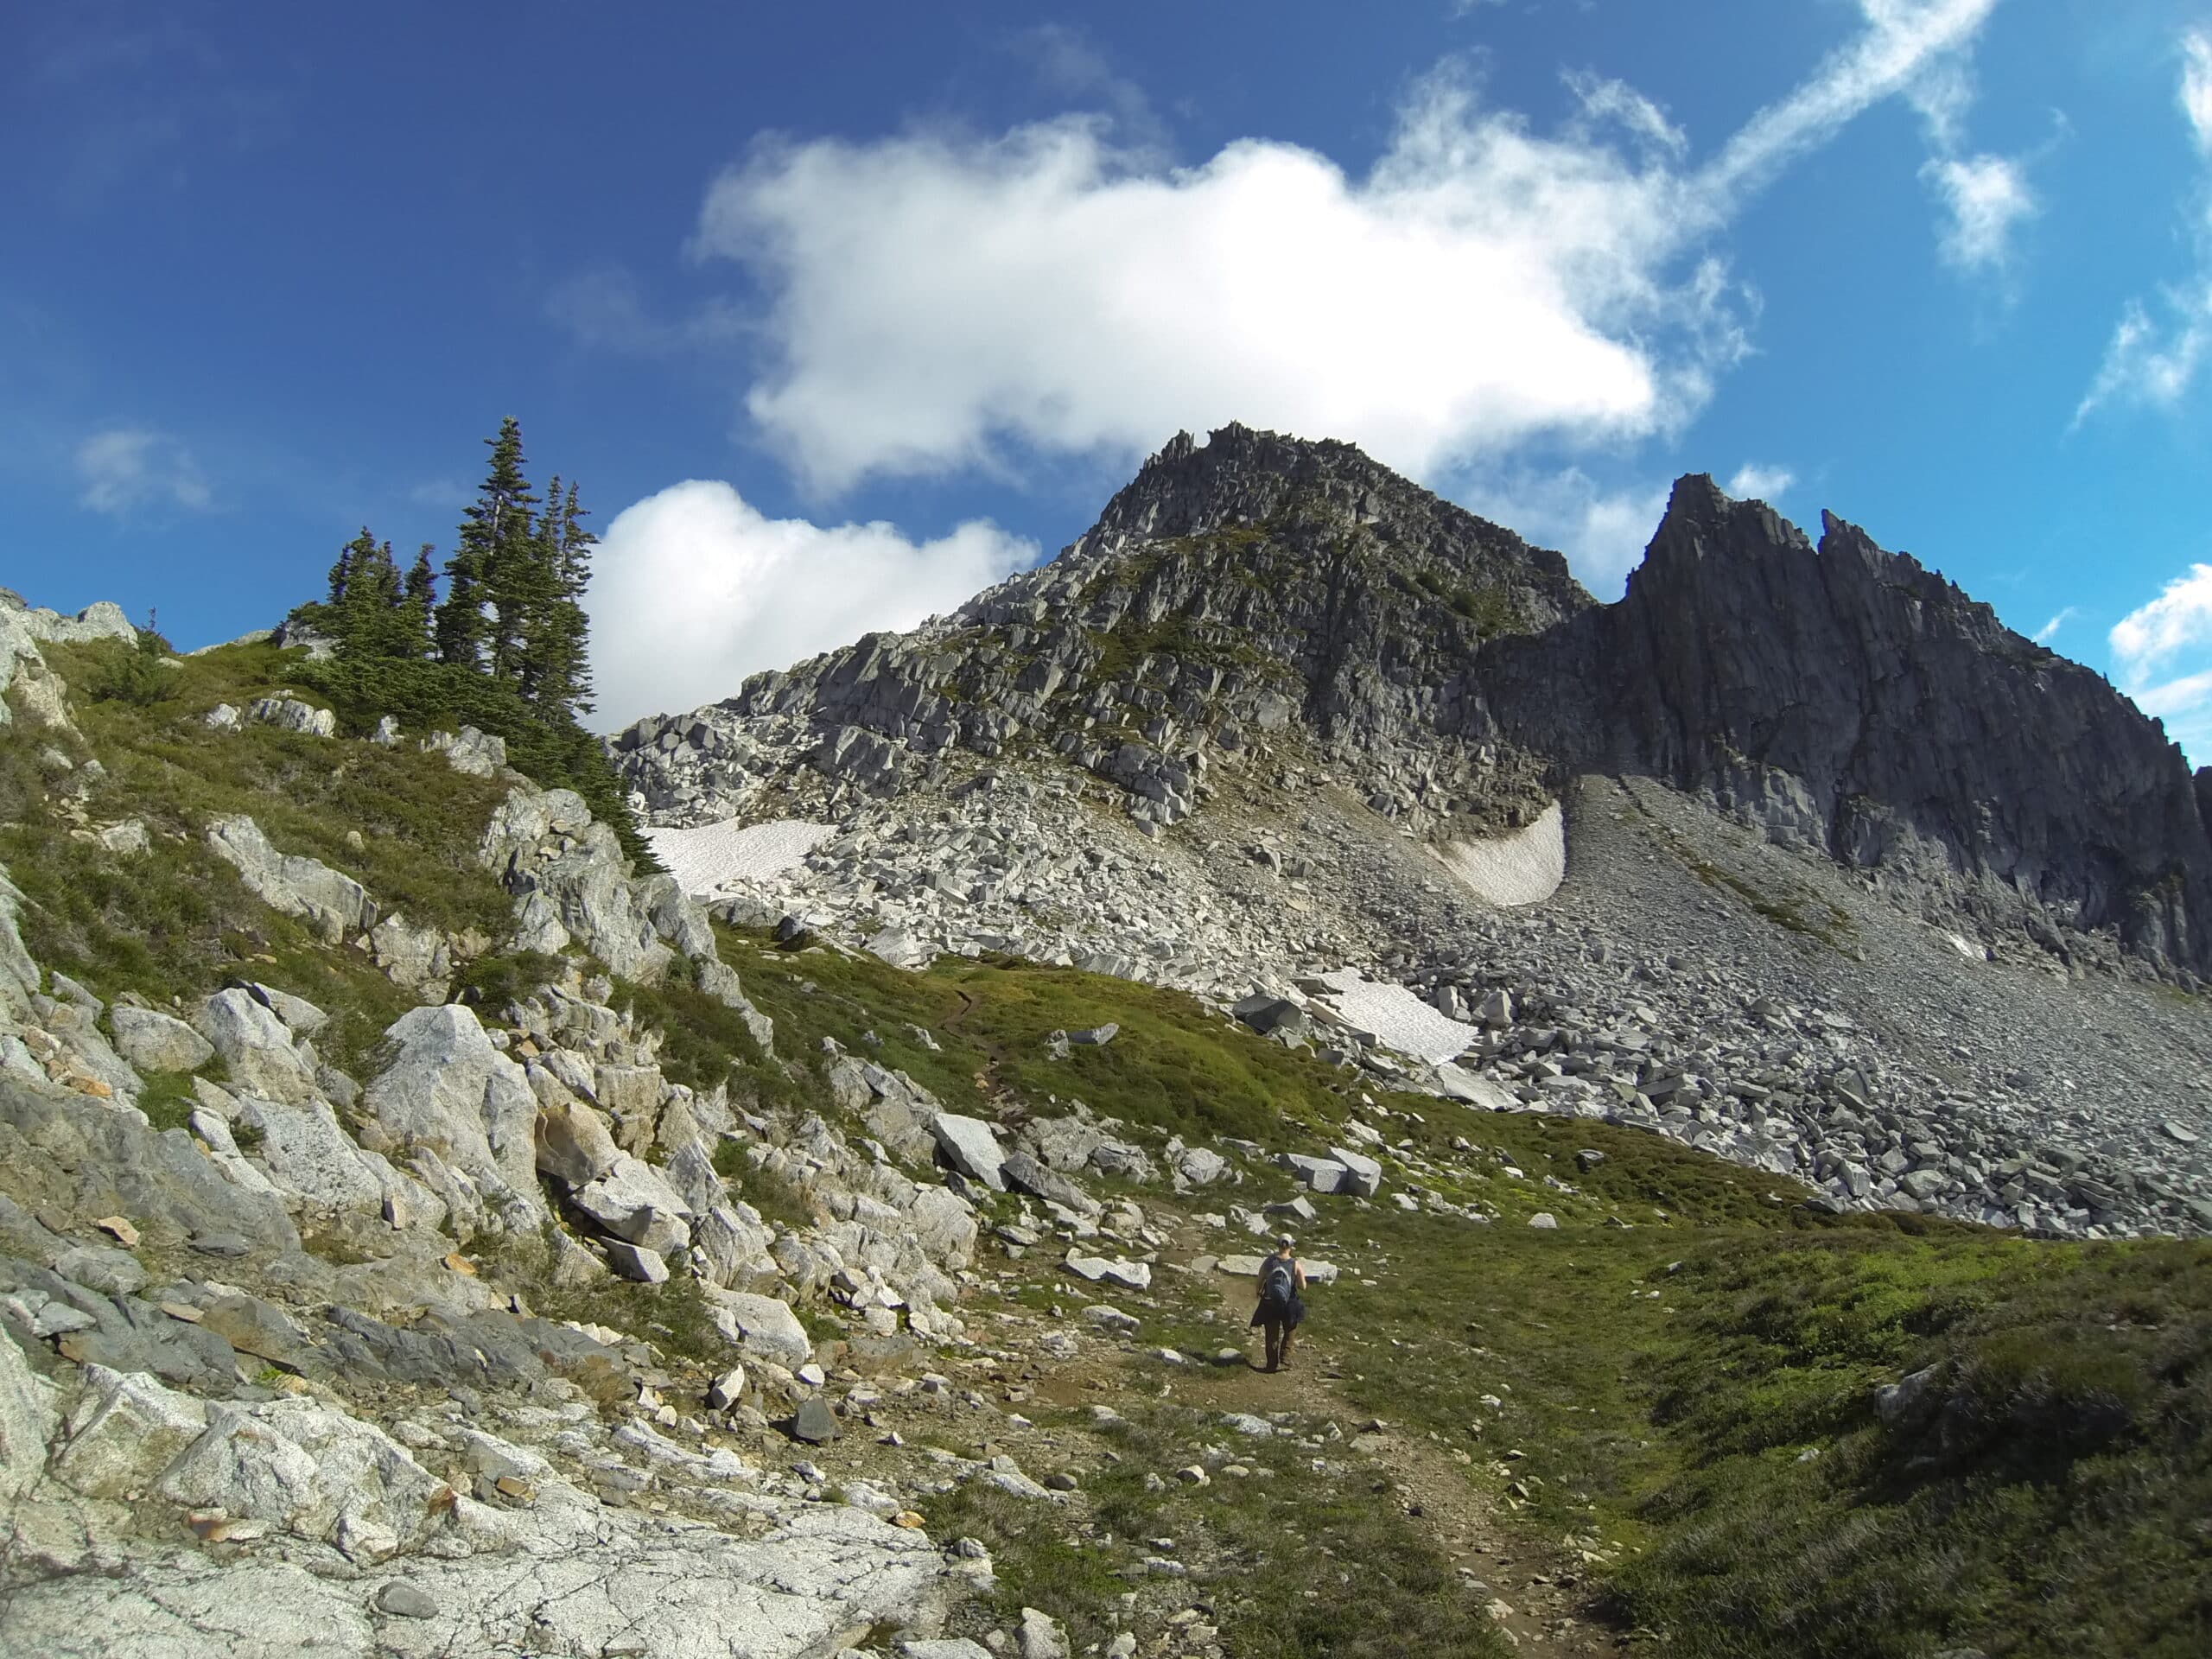
North Cascades National Park Hikes
Hidden Lake Trail
Difficulty: Strenuous
Distance: 8 miles
Expected Hiking Time: 4-6 hours
The Hidden Lake Trail, also called the Hidden Lake Lookout Trail, is one of our best hiking experiences. The trail takes you first through dense forest peppered by mushrooms in season, before opening up to meadows covered in wildflowers. The scenery then changes into granite rocks and steep cliffs, a landscape that seems to be without end. The lookout at that point is just a tiny pixel in the horizon, barely noticeable.
What feels too far to reach will require you to push up every step of the way. The trail is well marked most of the time and not too busy, at least it wasn’t mid-September. Arriving at the lookout is the deserved reward of the challenging path, and well worth every puff and huff scrambling over boulders on the last stretch. The 360-degree views are simply stunning and reach far into the North Cascades mountain range.
The lookout itself is pretty neat and makes for a cool camp. Even if you don’t stay for the night, make sure to check the little cabin. Sit there for lunch as you take in the beauty of the North Cascade National Park. Watch the front side of the lookout is rather steep. A misplaced step might see you tumbling down or twist an ankle.
The trailhead is in not in the National Park proper, so no parking pass is required. Which means a backcountry permit will be needed if you decide to spend the night in the lookout or around the area. You can get the permit at the ranger station located before the start of the trail.
~~ Patricia Pagenel of Ze Wandering Frogs
Get help planning your trip to North Cascades National Park
Olympic National Park Hikes
Shi Shi Beach Trail
Difficulty: Moderate
Distance: 8 miles
Expected Hiking Time: 4-5 hours
If you want to feel as if you are on the edge of the world, hike to Shi Shi Beach in Olympic National Park. You’ll start your hike on a muddy trail in the rainforest, then emerge on the beach to the roar of the Pacific Ocean.
The trail continues along the beach to Point of the Arches, a cluster of spectacular rock islands called sea stacks. Be sure to walk all the way around the point to see the sea stacks from many different angles. Many of them have arches that you can only see from some angles.
If possible, time your visit to coincide with low tide. (Check the tide forecast for nearby Tskawahyah Island online before you go.) That way you can explore the tide pools, which teem with life. Look for sea anemones, starfish, crabs and tons of little fish. If you’re careful, at very low tides you can also walk out across the slippery rocks to some of the sea stacks.
The Point of the Arches area is so beautiful that you might want to consider staying overnight. There are three basic backcountry sites along the trail. Get camping permits in advance at the Olympic National Park Wilderness Info Center in Port Angeles.
The start of the Shi Shi Beach trail is located near the community of Neah Bay near the top of the Olympic Peninsula. The trailhead is actually on the land of the Makah Tribe. You need to get a Makah Recreation Permit to park at the trailhead. Pick one up for $10 at the Tribal Center or various businesses in Neah Bay.
~~ Taryn of Happiest Outdoors
Get help planning your trip to Olympic National Park
Rocky Mountain National Park Hikes
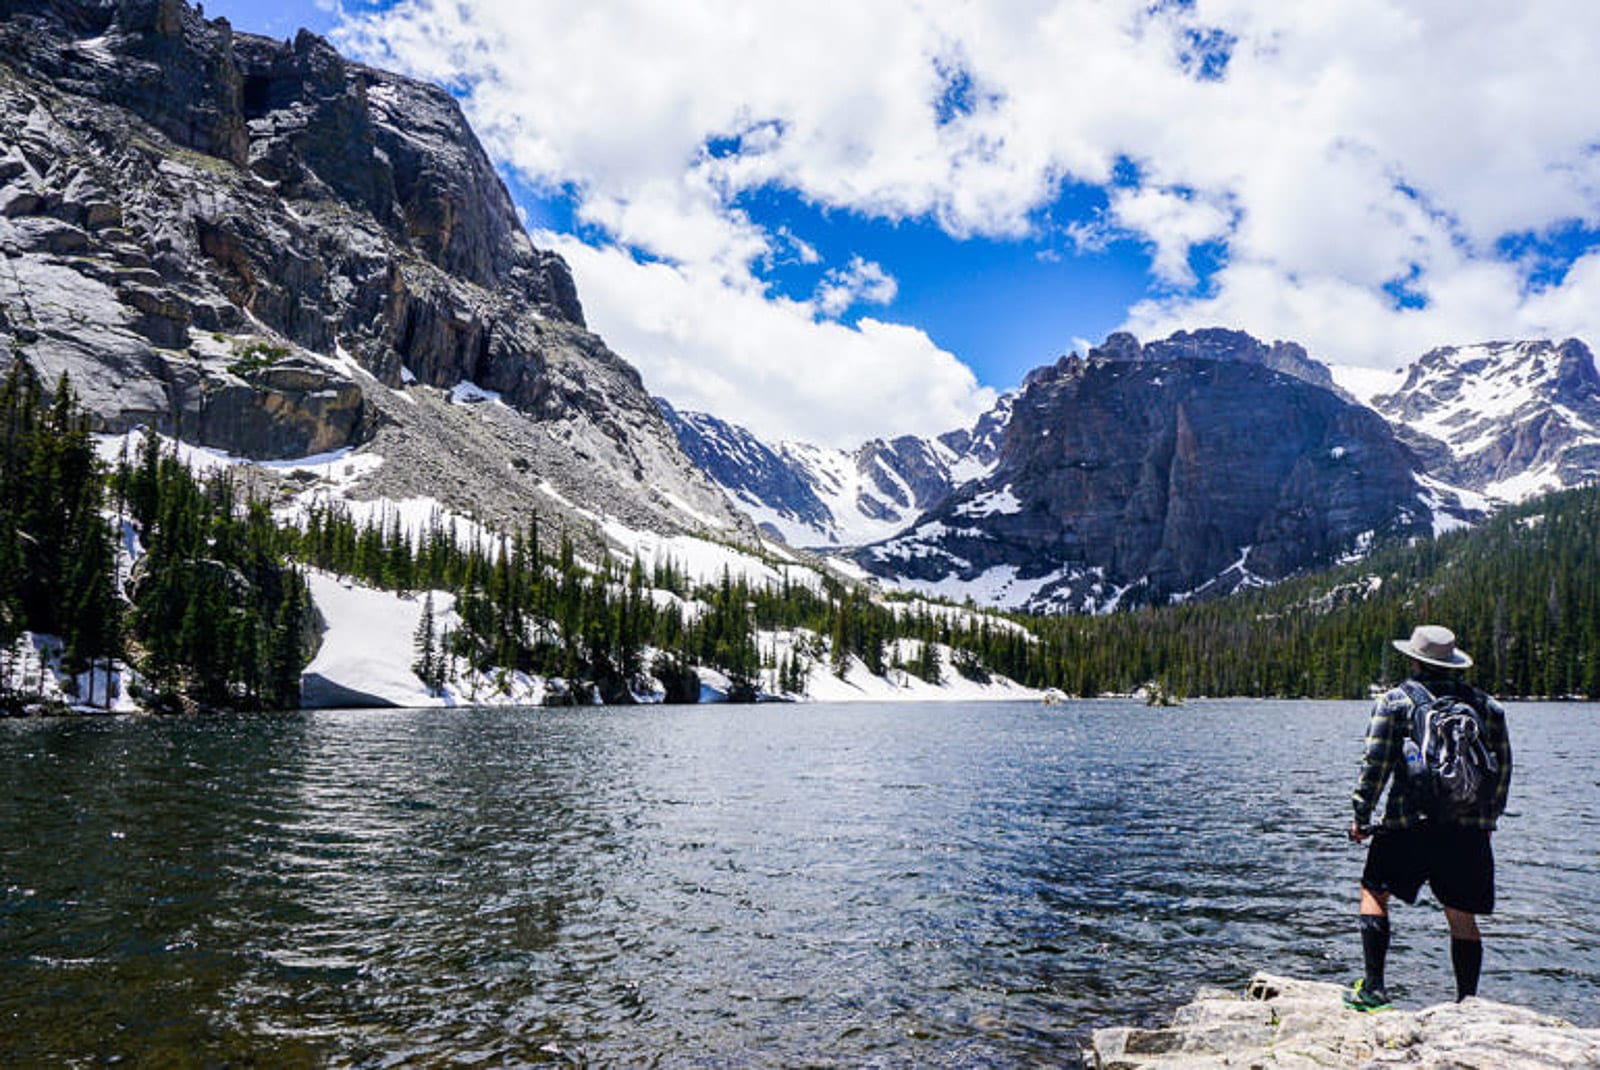
Sky Pond Trail
Difficulty: Moderate/Strenuous
Distance: 9 miles
Expected Hiking Time: 5-7 hours
If you are looking for one of the best bucket list day hikes in a national park, the hike to Sky Pond in Rocky Mountain National Park is one of the best. The trail can be difficult, but what you see along the way definitely makes up for that. The trail starts at the Glacier Gorge trailhead.
The beginning of the trail up until Alberta Falls can be pretty crowded, as the hike to the falls is fairly easy and lots of people will hike up really quick just to see the falls. Right after Alberta Falls, the crowds will clear up and you will have the trail pretty much to yourself. The views start to become pretty outstanding as the trail starts going up. At about 2.8 miles in you will reach The Loch, the first of three alpine lakes you will encounter along this trail. The peaks are so close and tower over the Loch, you will feel like there could not possibly be a trail that leads any further. Of course, this is not true and the trail starts winding next to a beautiful gushing river.
At the 4 mile mark, you will then encounter Timberland Falls a treacherous but gorgeous waterfall where you will have the opportunity to rock scramble up the side of it. After climbing to the top, the views out over Rocky Mountain National Park are incredibly breathtaking. The next alpine lake is also waiting for you at the top of the Timberland Falls and this one is even more beautiful than the last. The trail then continues on to Sky Pond, the last alpine lake you will encounter on your hike. At this point, you totally deserve a break and you have made it to the end of the trail. If you are looking for a challenging, yet amazing hiking trail in a US National Park- Sky Pond is one of the best!
~~ Jess and Ron of Unearth the Voyage
Get help planning your trip to Rocky Mountain National Park
Yosemite National Park Hikes
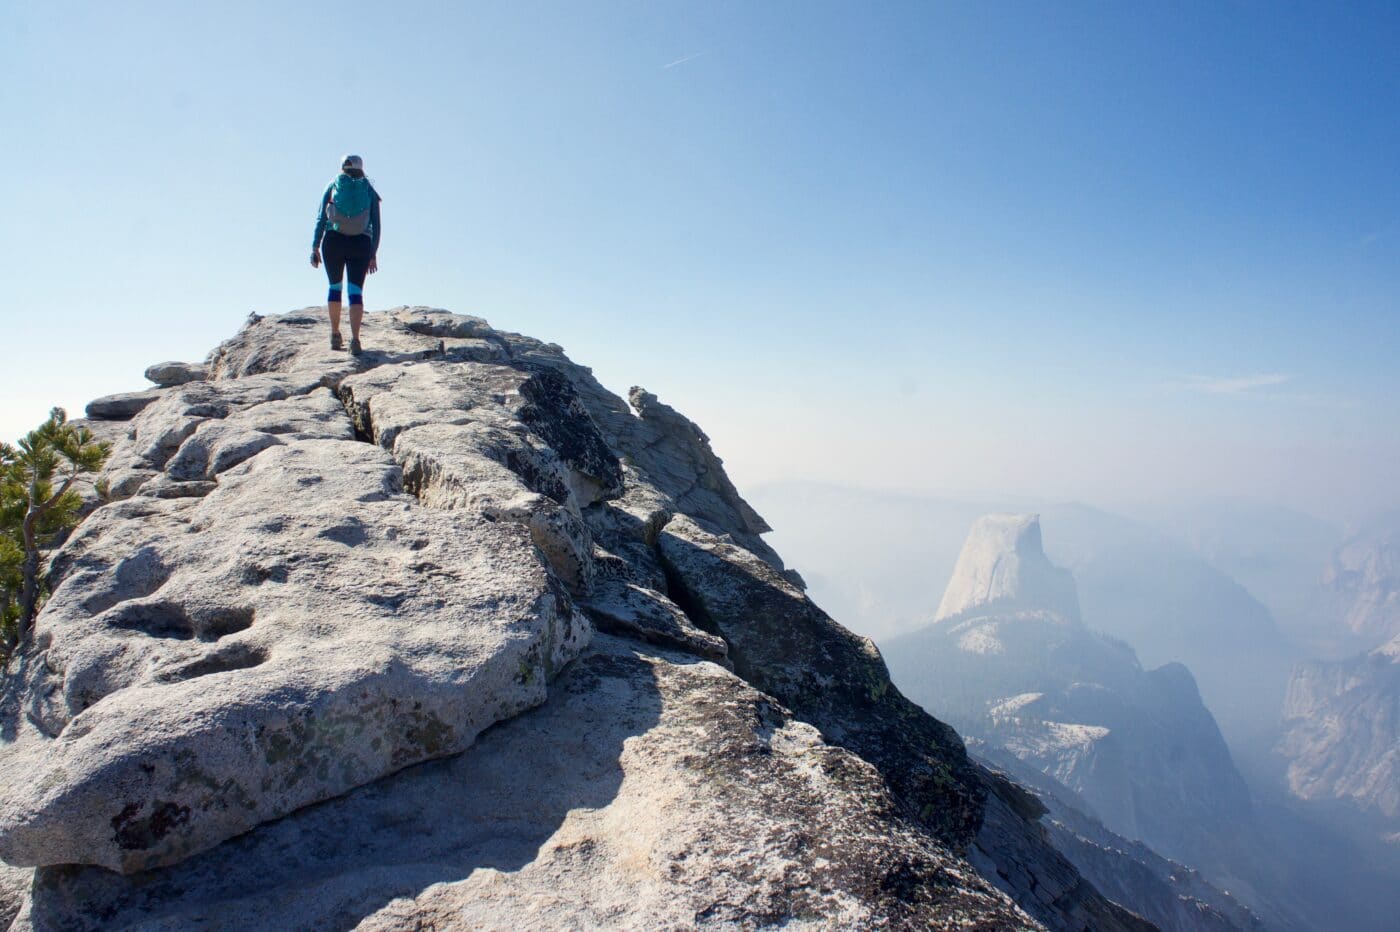
Half Dome
Difficulty: Strenuous
Distance: 14.2 miles via the Mist Trail
Expected Hiking Time: 10-12 hours
The hike up to Half Dome in Yosemite National Park is one of the most challenging yet rewarding hikes you’ll ever do. You begin your trek on the Mist Trail found on the eastern side of Yosemite Valley near Happy Isles. The trail takes you alongside two massive waterfalls, Vernal Falls and Nevada Falls, both of which you’ll encounter on the first half of the hike. This section of the trail also comes with steep inclines and over 600 steps. While strenuous, the views are remarkable, especially as you’re making your way up next to Vernal Falls, so have your camera ready.
Once past Nevada Falls, you’ll be greeted with about 4.4 miles of mostly steep switchbacks leading up to the base of Half Dome. Take these slow if you need to, and drink plenty of water. After the switchbacks, you’ll be faced with the infamous section of cables installed along the curved face of the dome. The cables will assist you in climbing the last 400 feet to the top of Half Dome. It should be noted, the Half Dome cables are not for the faint of heart, and will be a real test for those with a fear of heights. If you can handle it though, you’ll be rewarded with some of the most stunning views you’ll ever see.
In order to attempt the Half Dome hike, all hikers must have a permit to be on the trail past the subdome. A maximum of 300 hikers are allowed on the trail each day. Permits are awarded via a pre-season lottery conducted in March. Those selected will be notified by mid-April. You can register for the Half Dome lottery by visiting the National Park Service website.
~~ Eden Fite of Rock a Little Travel
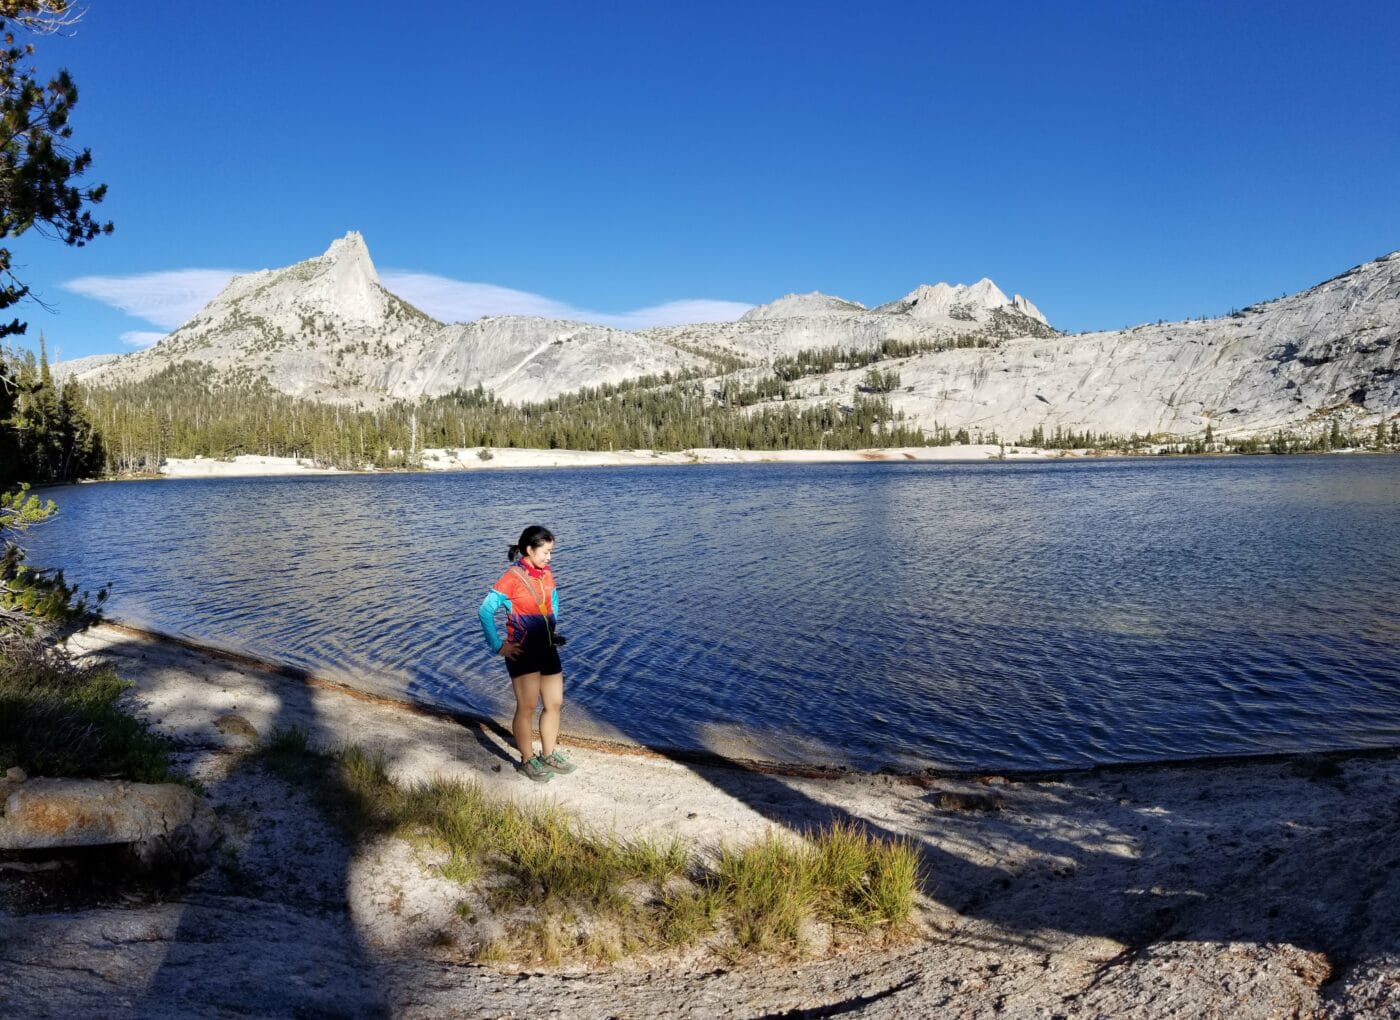
Cathedral Lake Hike
Difficulty: Moderate
Distance: 7 miles round trip to Upper or Lower Cathedral Lakes; 8 miles round trip to see both
Expected Hiking Time: 3-5 hours
Cathedral Lake Hike starts in the Tuolumne Meadows in Yosemite National Park. It’s one of the most popular hikes in the Tioga Road region and a part of the very popular John Muir Trail so the crowd is to be expected. Keep in mind the hike is at elevation so you’ll probably huff and puff a little more than usual. Having said that, the “wow” factor of the scenery, especially considering its moderate distance, makes this hike worth it. The Lower Cathedral Lake is a classic deep blue, alpine lake surrounded by Tuolumne Meadow’s most impressive granite peaks such as Cathedral and Echo Peaks. Where the trail disperses, there’s a flat rock shelf to hang out and sun yourself. If you keep following the eastern shore of the lake, you’ll come across a small sandy beach area perfect for a picnic.
The trailhead for Cathedral Lake is located on Tioga Road before you hit the campground on your way from Yosemite Valley. The line of parked cars is the telltale sign. There will be a row of bear boxes where you can (and should) put all of your food and anything with a smell. Please do this to save your car from damage as well as to save the bears. The trail will be obvious and well signed. Pro tip: Bring bug spray!
~~ Jill of Jack and Jill Travel The World
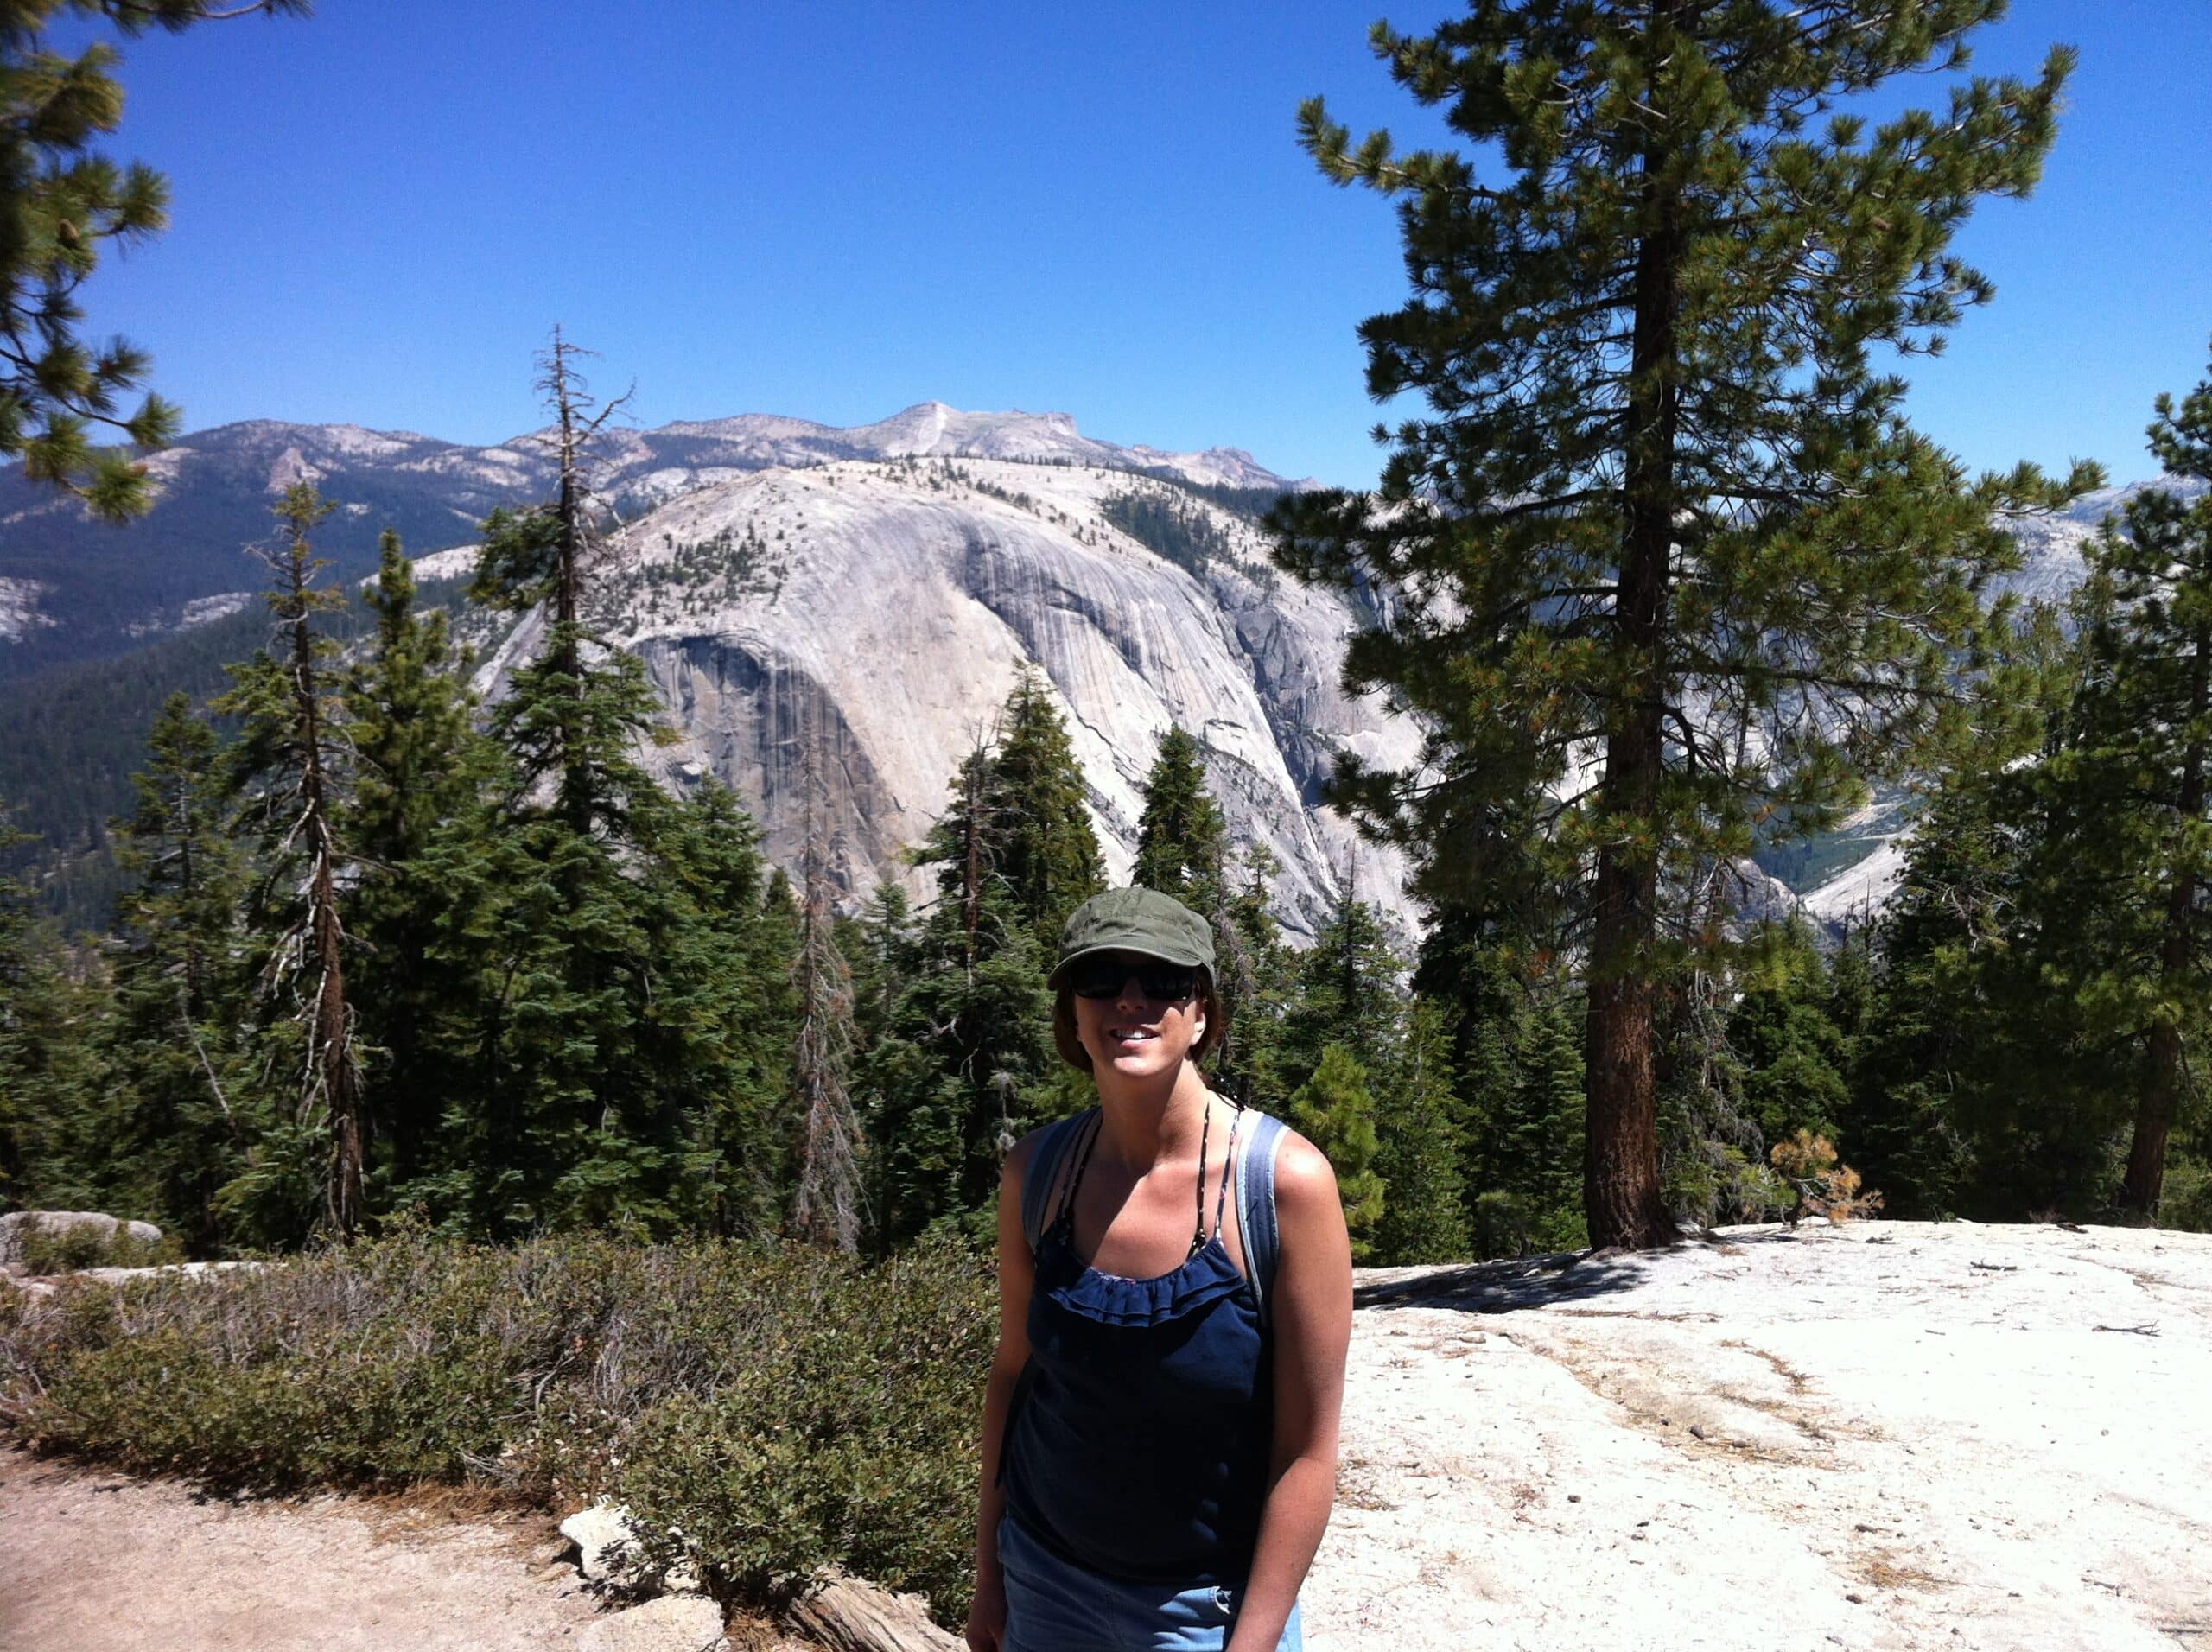
Clouds Rest Hike
Difficulty: Strenuous
Distance: 14 miles
Expected Hiking Time: 7-8 hours
Apart from the classic Half Dome hike, Clouds Rest is probably one of the best hikes in Yosemite National Park and with one of the best views in the entire park as well. The best part though is that you don’t need permits (unlike Half Dome) in order to go hike this gem of a trail.
The Clouds Rest hike is an out-and-back style hiking trail that is roughly 14 miles round trip with about 2,800 feet of total elevation gain. It’s definitely a workout of a hike, but it’s worth the effort. There are multiple trailheads to hike to Clouds Rest, the most popular being the Sunrise Lakes trailhead on Tioga Road. I recommend getting to the trailhead early so you can be sure to easily find a parking spot.
Pack plenty of water for your hike because there aren’t really any good spots to fill up along the trail. At a minimum, I would bring at least 3 liters of water per person, but on a warmer day maybe even up to 4. You may also need to pace yourself throughout the hike because you’ll end at an elevation of 10,000 feet when you get to the top of Clouds Rest, which can sometimes cause people a bit of altitude sickness. However, if you take your time, drink plenty of water, and listen to your body you’re bound to love the Clouds Rest hike. You may even wonder why people fuss so much over getting permits for Half Dome when this hike is here.
~~ Allison of She Dreams of Alpine
Get help planning your trip to Yosemite National Park
- National Parks of California
- 10 Books to Read Before Visiting Yosemite National Park
- One Day in Yosemite Valley
- How to make the most of a weekend in Yosemite
Zion National Park Hikes
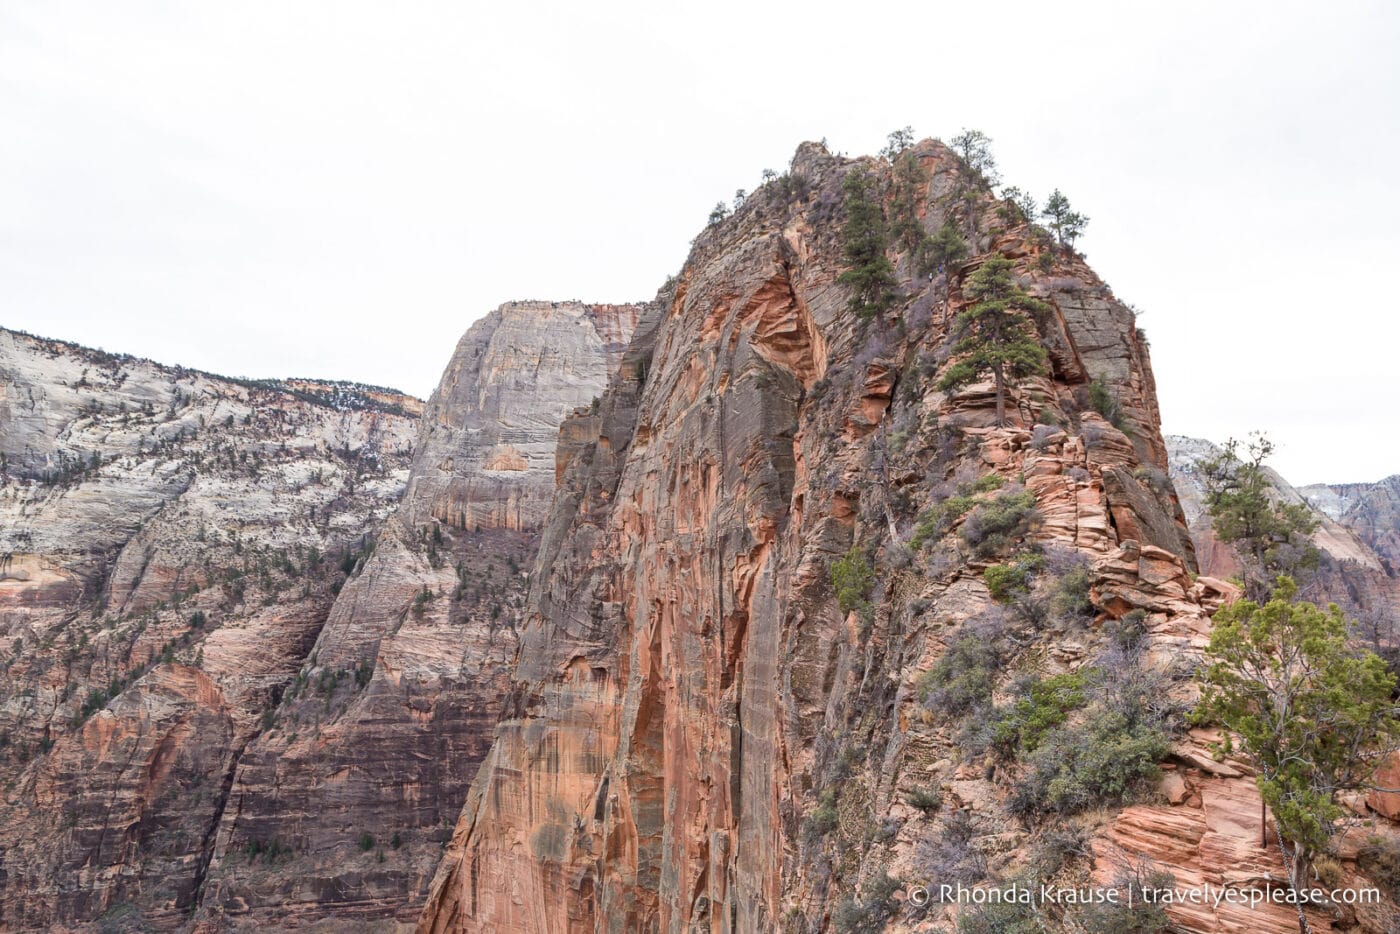
Angels Landing Trail
Difficulty: Strenuous
Distance: 5.4 miles
Expected Hiking Time: 3-5 hours
The trail to Angels Landing is one of the most hair-raising hikes in Zion National Park. With steep drop-offs, a narrow path, and no safety railings, it’s the element of danger that makes this hike so enticing and exciting.
The trail starts off by switchbacking up along the canyon wall and into the shaded Refrigerator Canyon. The trail levels out somewhat as it passes through the canyon, then turns a corner and continues to climb up another set of switchbacks, the famous Walter’s Wiggles.
After Walter’s Wiggles, hikers can catch their breath at Scout Lookout. Some people turn back here, while others summon the courage to continue on to Angels Landing.
The final approach to Angels Landing is the most technical part of the hike. The trail is very narrow in places (just wide enough for one person), with sheer drop-offs on each side. Natural sandstone steps need to be navigated along ridges and up steep ascents, with chains to grab hold of to assist with the scramble. An added challenge is the amount of people on the trail, as hikers need to find a safe spot wide enough to step aside and allow those descending to pass.
The trail ends at Angels Landing, a spectacular viewpoint with a dramatic panorama of Zion Canyon.
~~ Rhonda Krause of Travel Yes Please
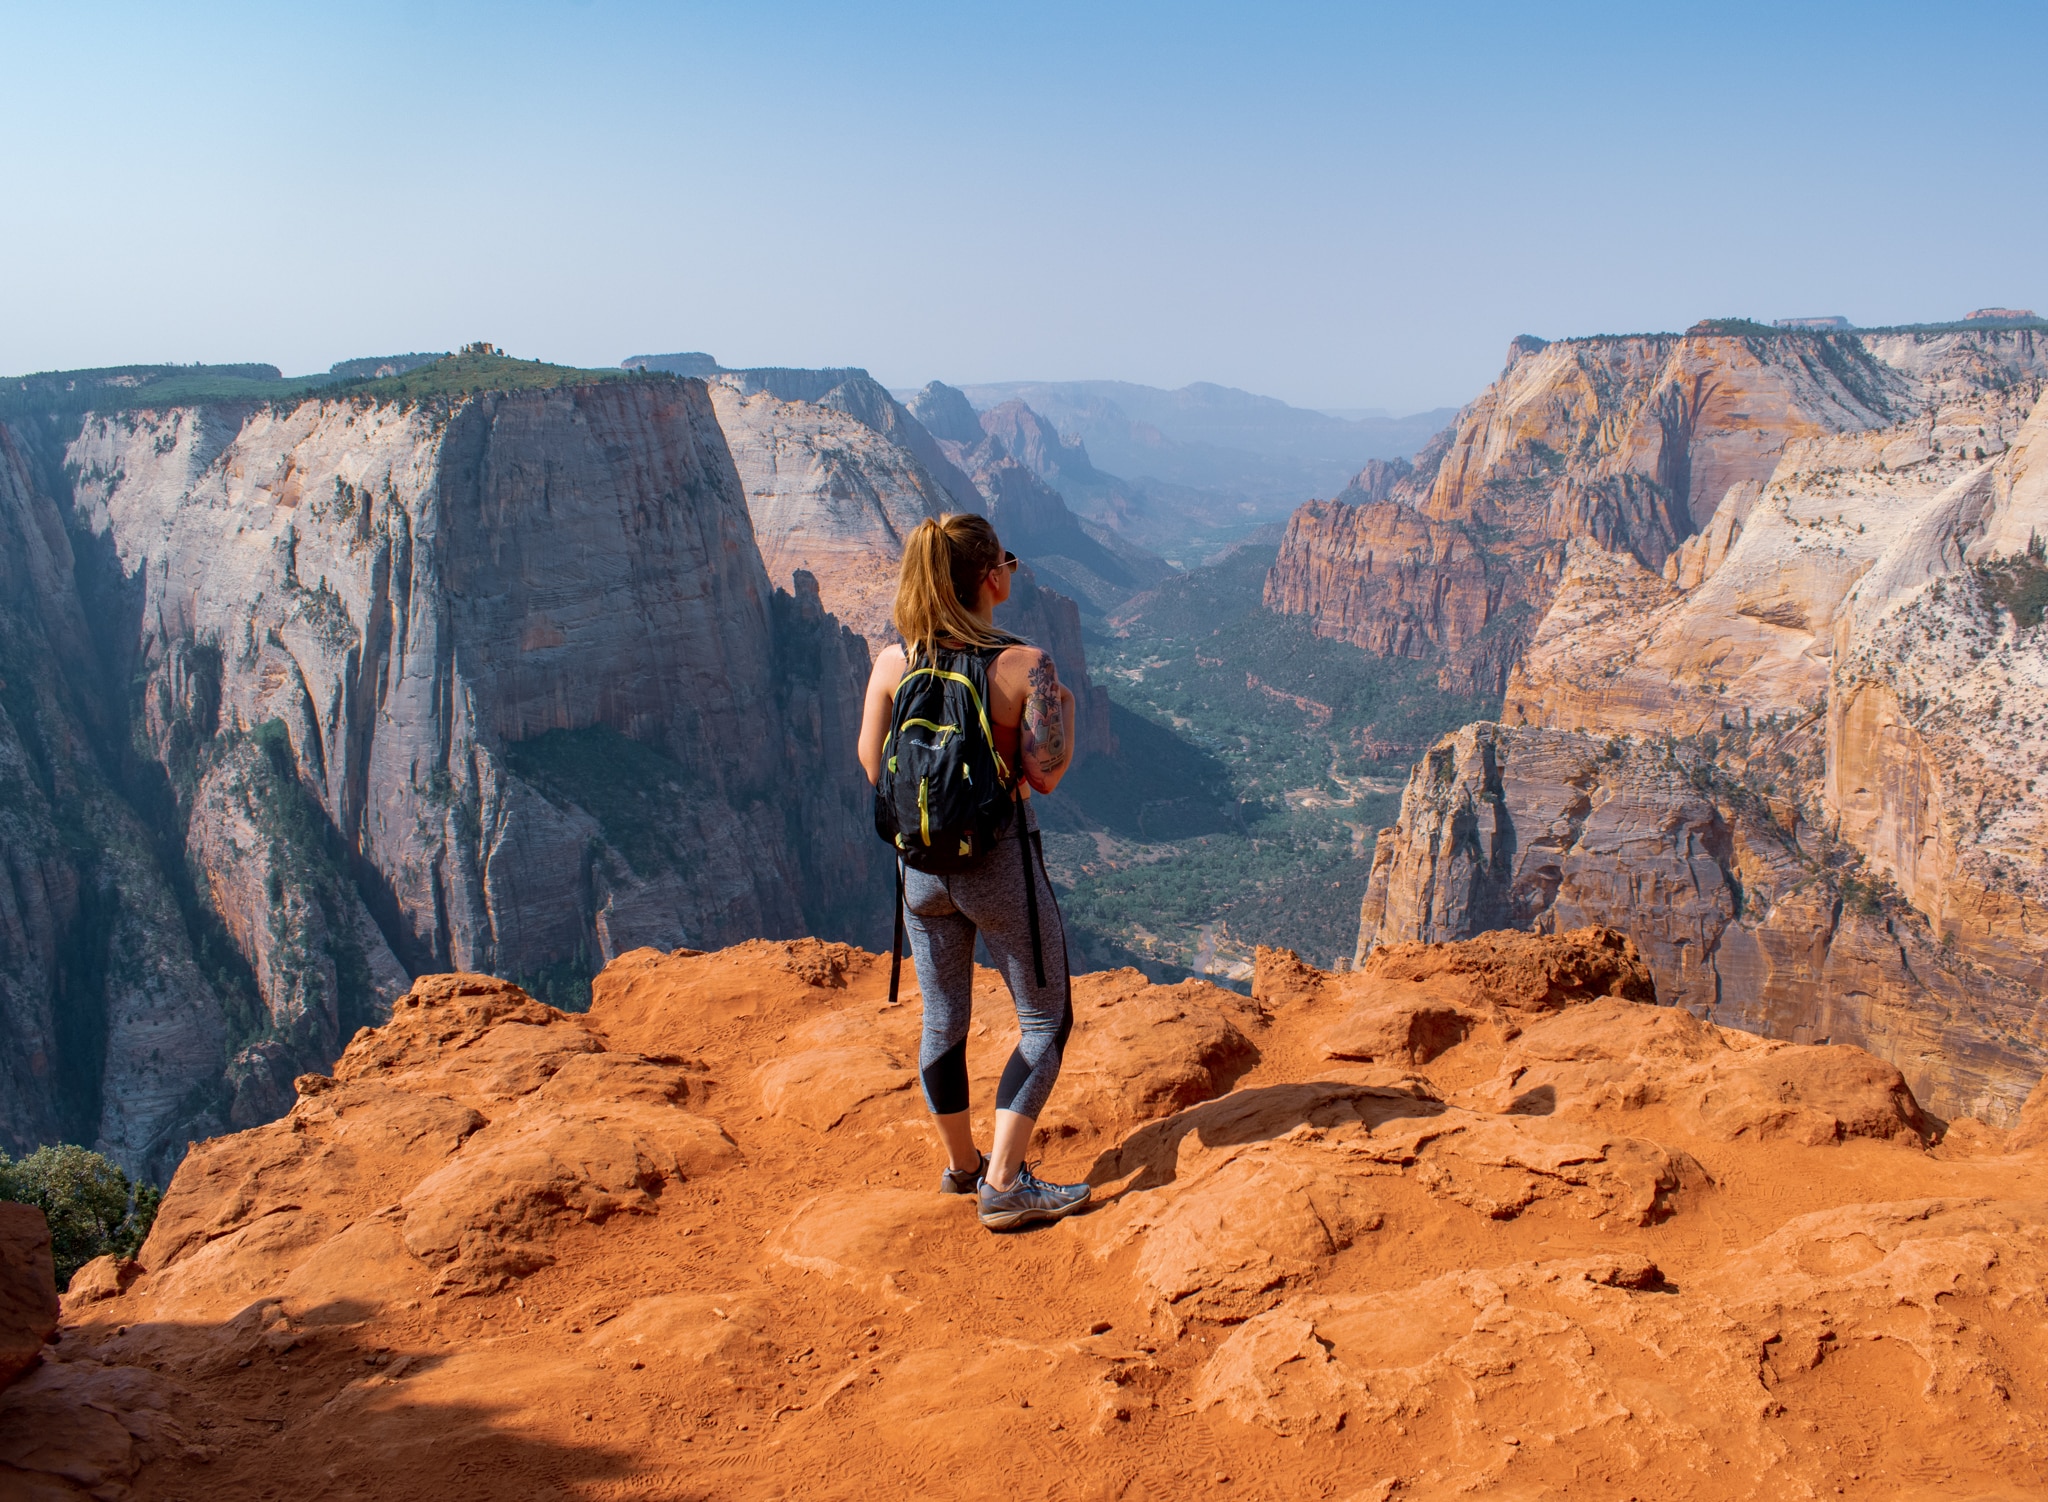
Observation Point Trail
Difficulty: Strenuous
Distance: 8 miles
Expected Hiking Time: 4-6 hours
I am a lady who has been on many hikes and I can confidently say that I’ve never experienced one that has a view that comes even close to comparing to Observation Point, a breathtaking viewpoint towering 6,521 feet above the valley of Zion National Park. The hike usually begins at the Weeping Rock trailhead, with the trail changing almost immediately into steep, unrelenting switchbacks, chiseled out of the red canyon cliffs. As you crawl your way to the summit, you will pass through stunning slot canyons and towering white cliffs. The greenery will become sparser as you climb higher and higher, but what the trail lacks in vegetation, it makes up for in views, offering your first stunning glimpses over the valley. After what feels like you’ve been climbing forever (or, to be more specific, about 2100 feet!), the path will even out and after a mile or so of flat terrain, you’ll finally reach your final viewpoint. At ObservationPoint, the Zion Valley spreads out as far as the eye can see, with the Virgin River snaking off into the distance. It’s the perfect spot to kick back, relax, and think about how much easier the way down is going to be.
As of August 21, 2019, the Observation Point trail is closed due to rockfall. However, so long as the roads are clear, you can take an alternate route via the east plateau and hike the East Mesa Trail to Observation Point.
~~ Jessica Schmit of Uprooted Traveler
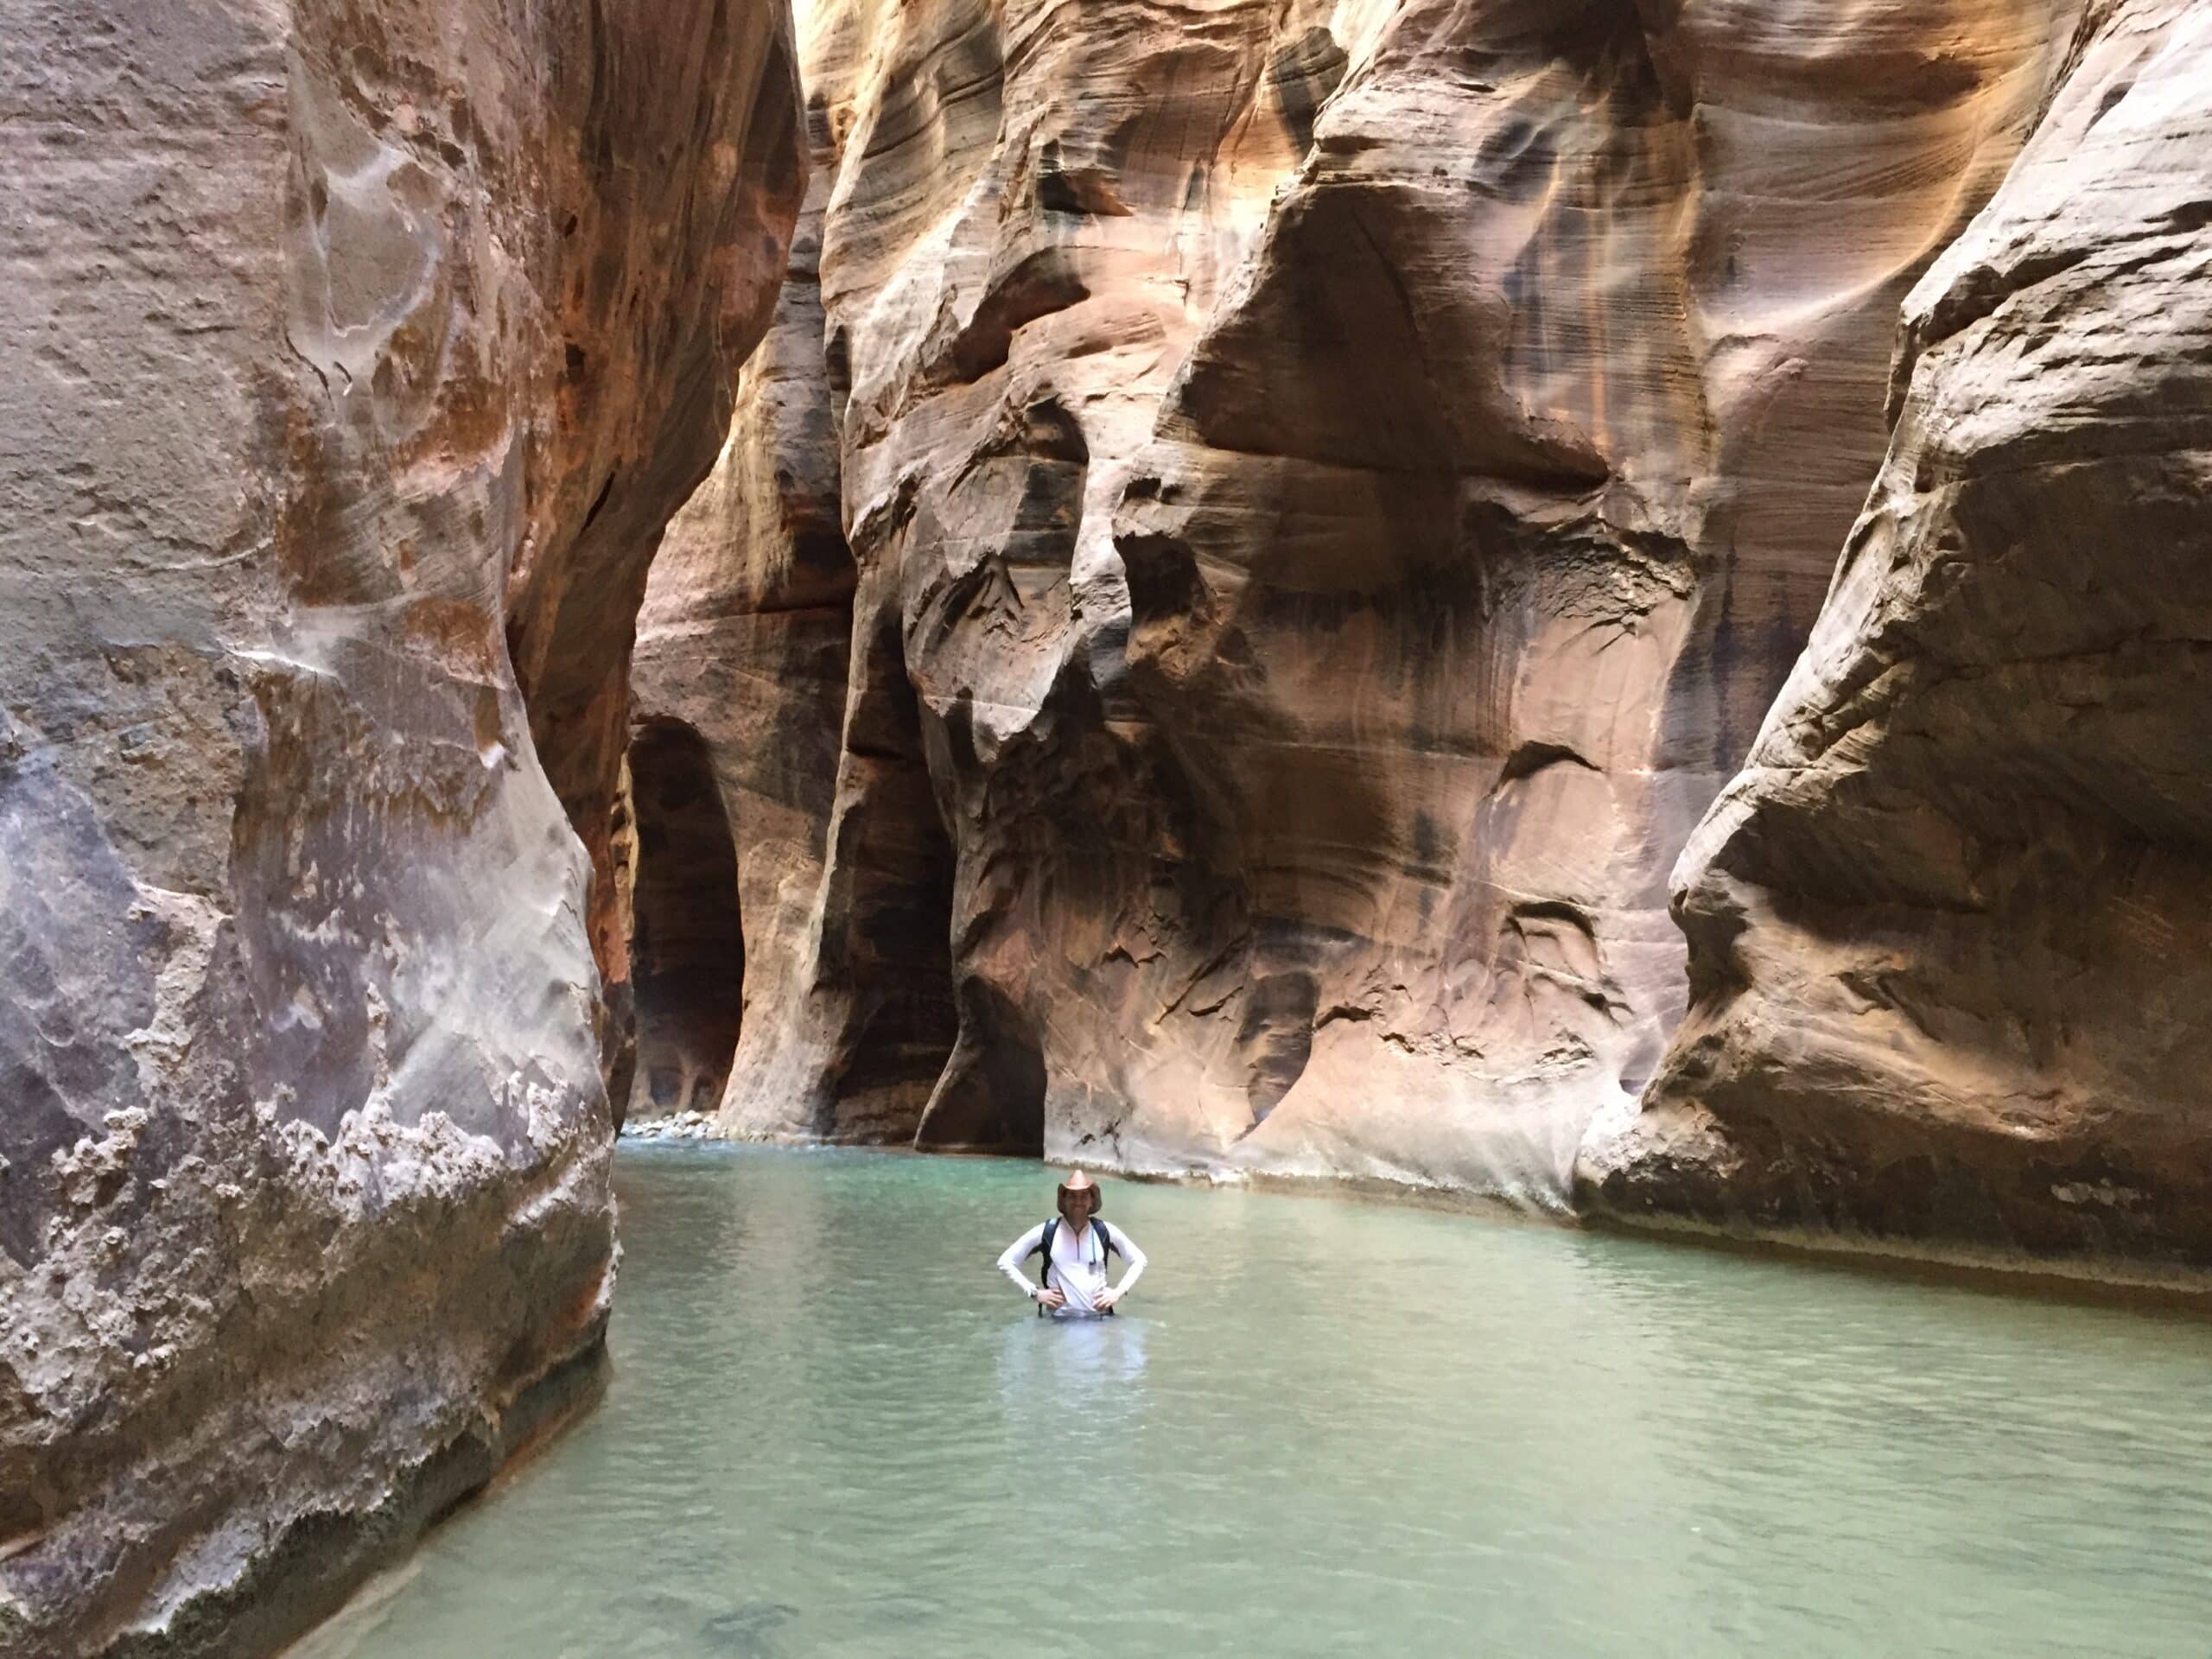
The Narrows
Difficulty: Strenuous
Distance: 16 miles (top-down) or 10 miles (bottom-up)
Expected Hiking Time: 12-14 hours (top-down) or 6-8 hours (bottom-up)
Hiking the Narrows in Zion National Park deserves a spot on every adventure-seeker’s bucket list. The Narrows is a narrow gorge that requires hikers to wade through the Virgin River between canyon walls that are a thousand feet tall. The complete hike is continued strenuous, so it is important to properly prepare.
When hiking the Narrows, hikers have two choices: bottom-up and top-down. Both options will lead you through deep waters (possibly as high as your shoulders). Hiking from the bottom-up is the more popular option. The complete hike is 10 miles roundtrip to Big Springs. Another popular turn around spot is Orderville Canyon which is 5 miles round trip. Many people turn around after the first 1-2 miles. The hike to Big Springs takes an average of 6-8 hours to complete. To access this hike, you’ll take the park’s shuttle to the Temple of Sinawava.
To hike, from the top-down, you will need a wilderness permit (book online through NPS up to 3 months in advance). It is 16 miles long and takes around 12-14 hours. This hike begins at Chamberlain’s Ranch (private property).
Both hikes are gorgeous! Sturdy, closed-toed shoes are necessary (avoid hiking sandals, which will only lead to cut up feet from the river’s rocks!), and hiking poles are recommended to help you navigate the slippery rocks. Bring plenty of water and food, a dry bag for valuable items, and a headlamp (in case you don’t make it out before dark).
This hike can be incredibly dangerous if rain falls, so carefully check for flash flood warnings before you leave. Be prepared to fall in love with Zion’s beautiful redrock, sandstone canyons!
~~ Leah Sprunger of An Adventure is Calling
Get help planning your trip to Zion National Park
- National Parks of Utah
- The Ultimate Guide to Camping in Zion National Park
- Zion Airbnbs: 17 Epic Airbnbs near Zion National Park
- A Complete Guide to Hiking Angels Landing in Zion National Park
- 1 Mighty Week in Utah National Parks ~ A Road Trip Itinerary
What is your favorite National Park Day Hike?


Hi, I'm Jennifer!
Welcome to the wonderful world of National Parks. I'm here to help you plan your NEXT amazing adventure through the United States National Parks and beyond. I want the national parks to be accessible to all.
I live in Tennessee, and when I'm home, you can find me hiking in the Smokies and the Cumberland Plateau.
58/63 National Parks
250+/423 National Park Units
Want to know more? Start Here.
Snag one of my National Park Ebooks and Downloadable Itineraries
Talk with an Expert
Share your love of the parks with a shirt, ornaments, hoodies, frames, and more.